

How to add and modify a divider between header / footer rows
In this guide, you will learn how to add a divider between header (or footer) rows and customize its color and thickness.
We will use the header rows for this tutorial, but you can apply it without problems for footer row customization.
Step 1 - open editor
Section titled “Step 1 - open editor”Click on the “Edit Row” button to open the row settings.

Step 2 - enable divider
Section titled “Step 2 - enable divider”In the “Row Settings”, enable the “Divider Color” checkmark to show the divider. It will appear on the row’s bottom side.

Step 3 - edit thickness
Section titled “Step 3 - edit thickness”Once the “Divider Color” option is checked, you can adjust the thickness and color of the divider.
Step 4
Section titled “Step 4”Click on the “Color” button to select or customize the divider’s color.
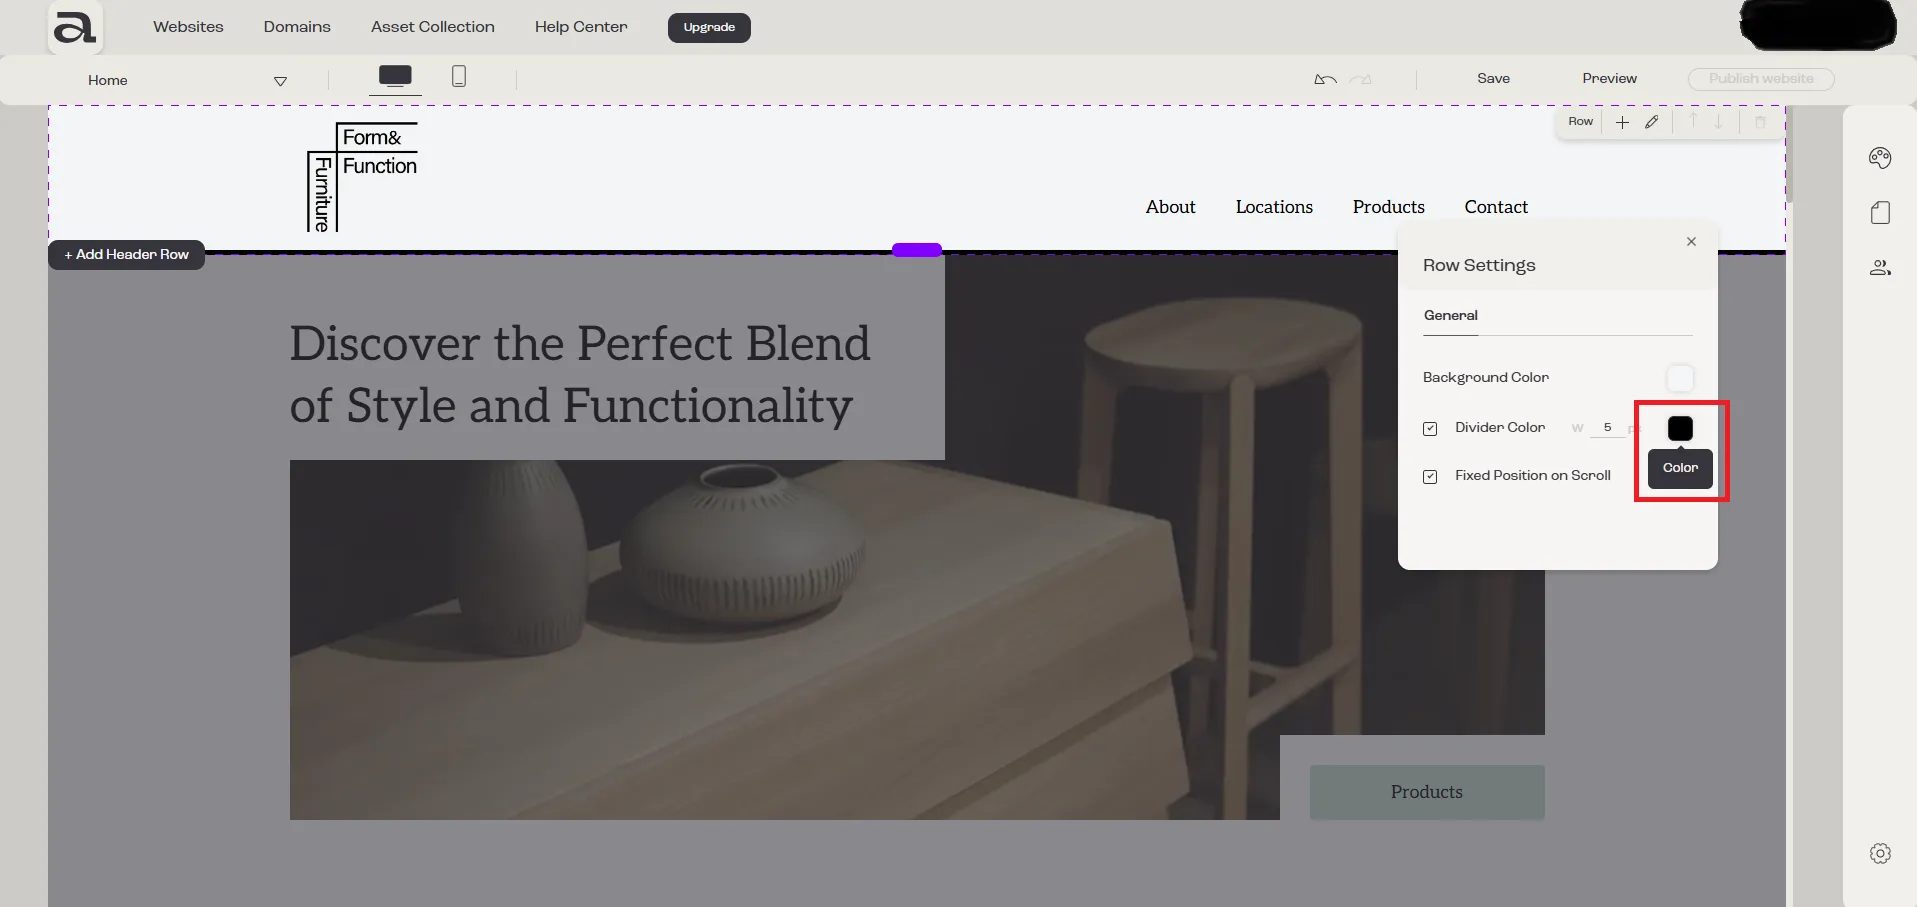
You will see two options for changing the background color:
Custom ColorBrand Color
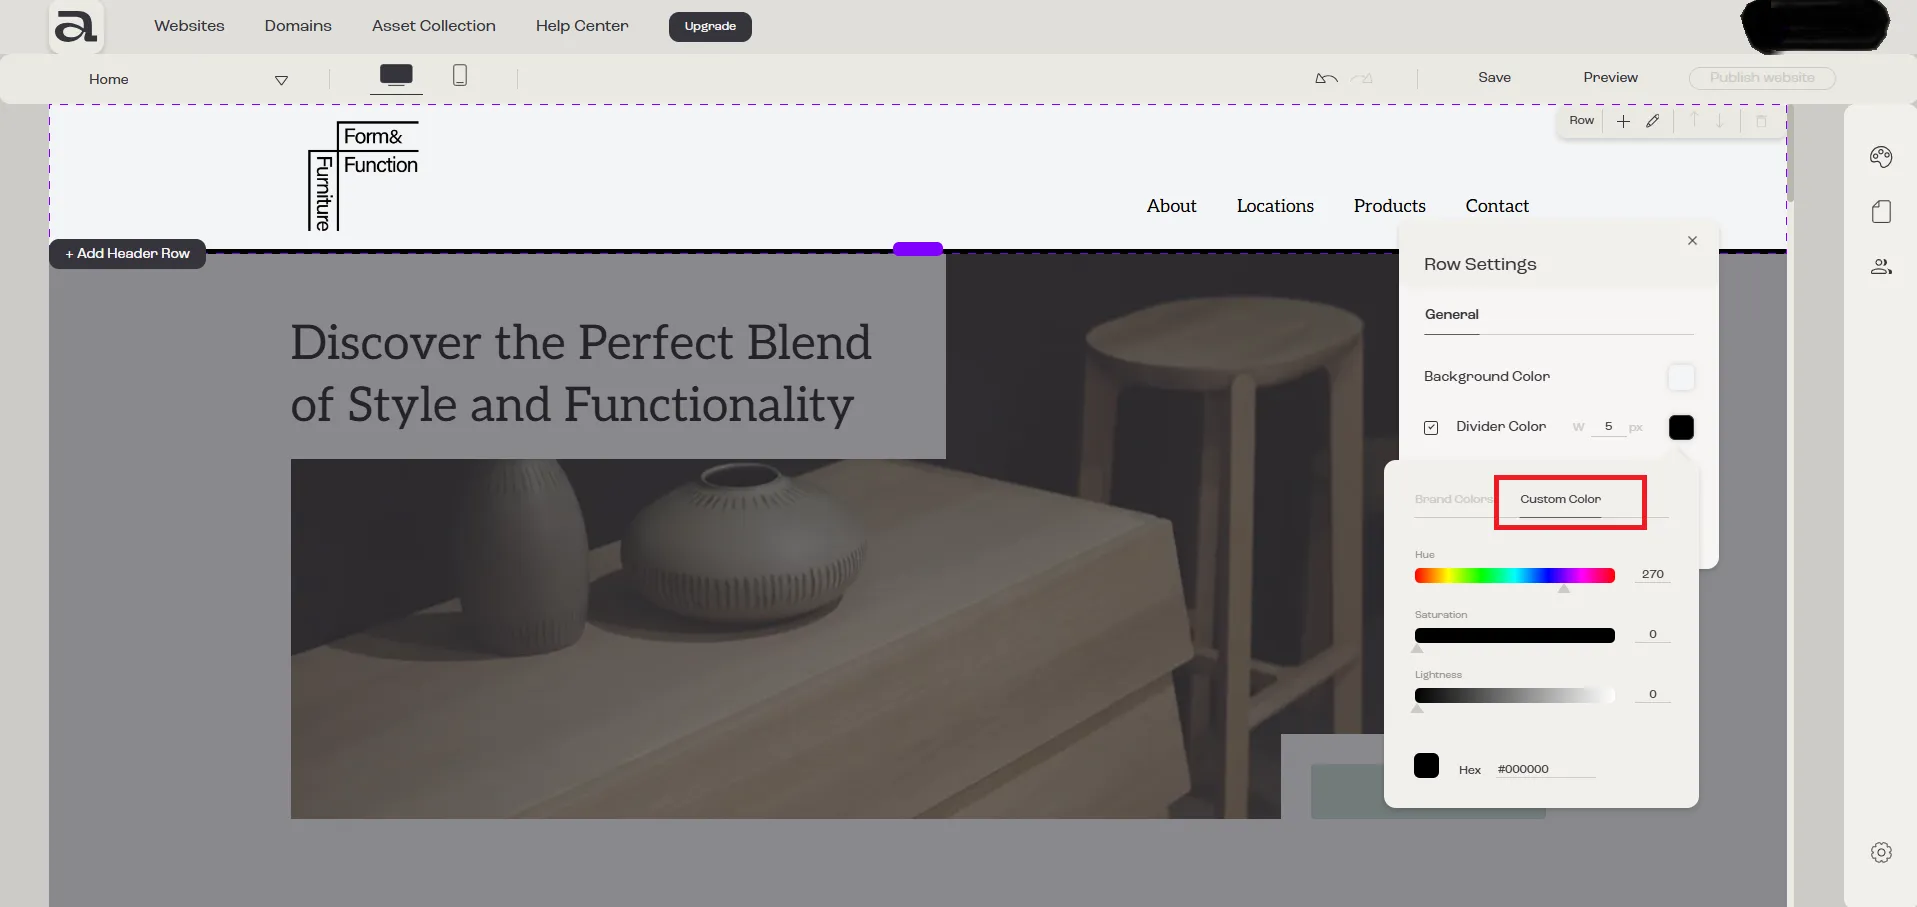
Option one: Custom Color
Section titled “Option one: Custom Color”Select any color from the palette to apply a custom color to your “Divider”.
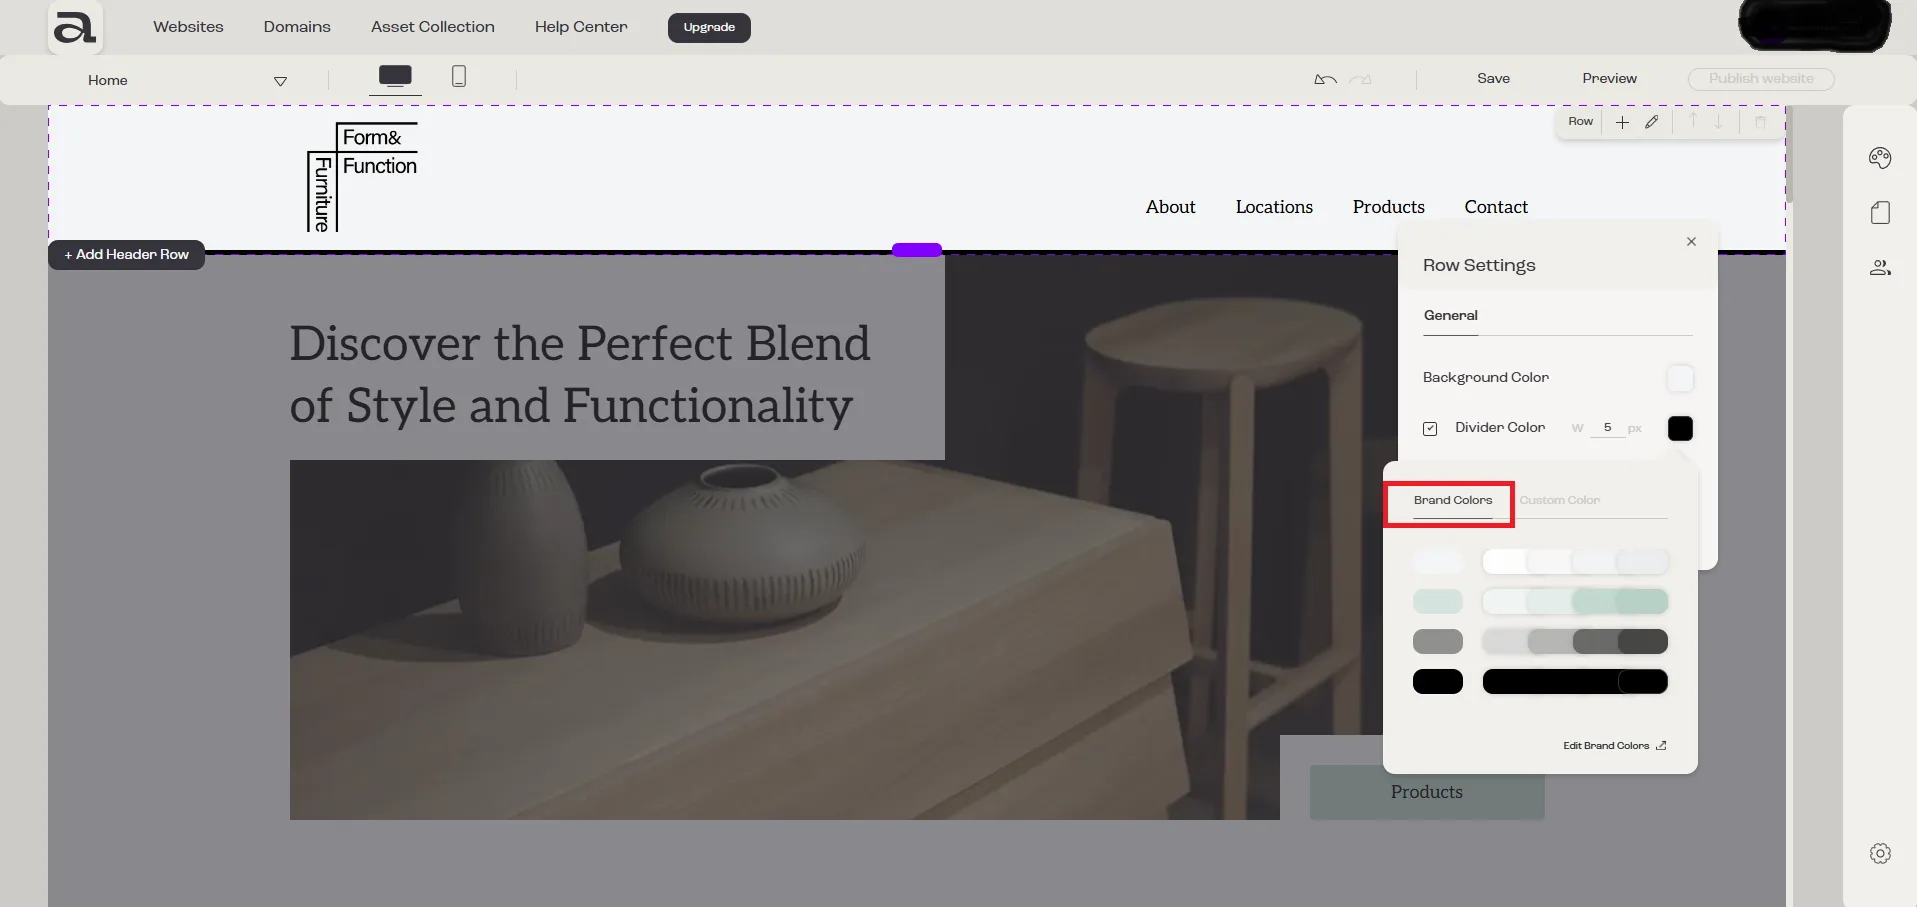
Option two: Brand Color
Section titled “Option two: Brand Color”Choose a color from your pre-configured brand palette, ensuring it aligns with the design and theme of your website.
Next steps
Section titled “Next steps”- add / manage header rows
- make header row sticky
- change navigation links
- change header / footer row background color