
How to set up google authentication
Introduction
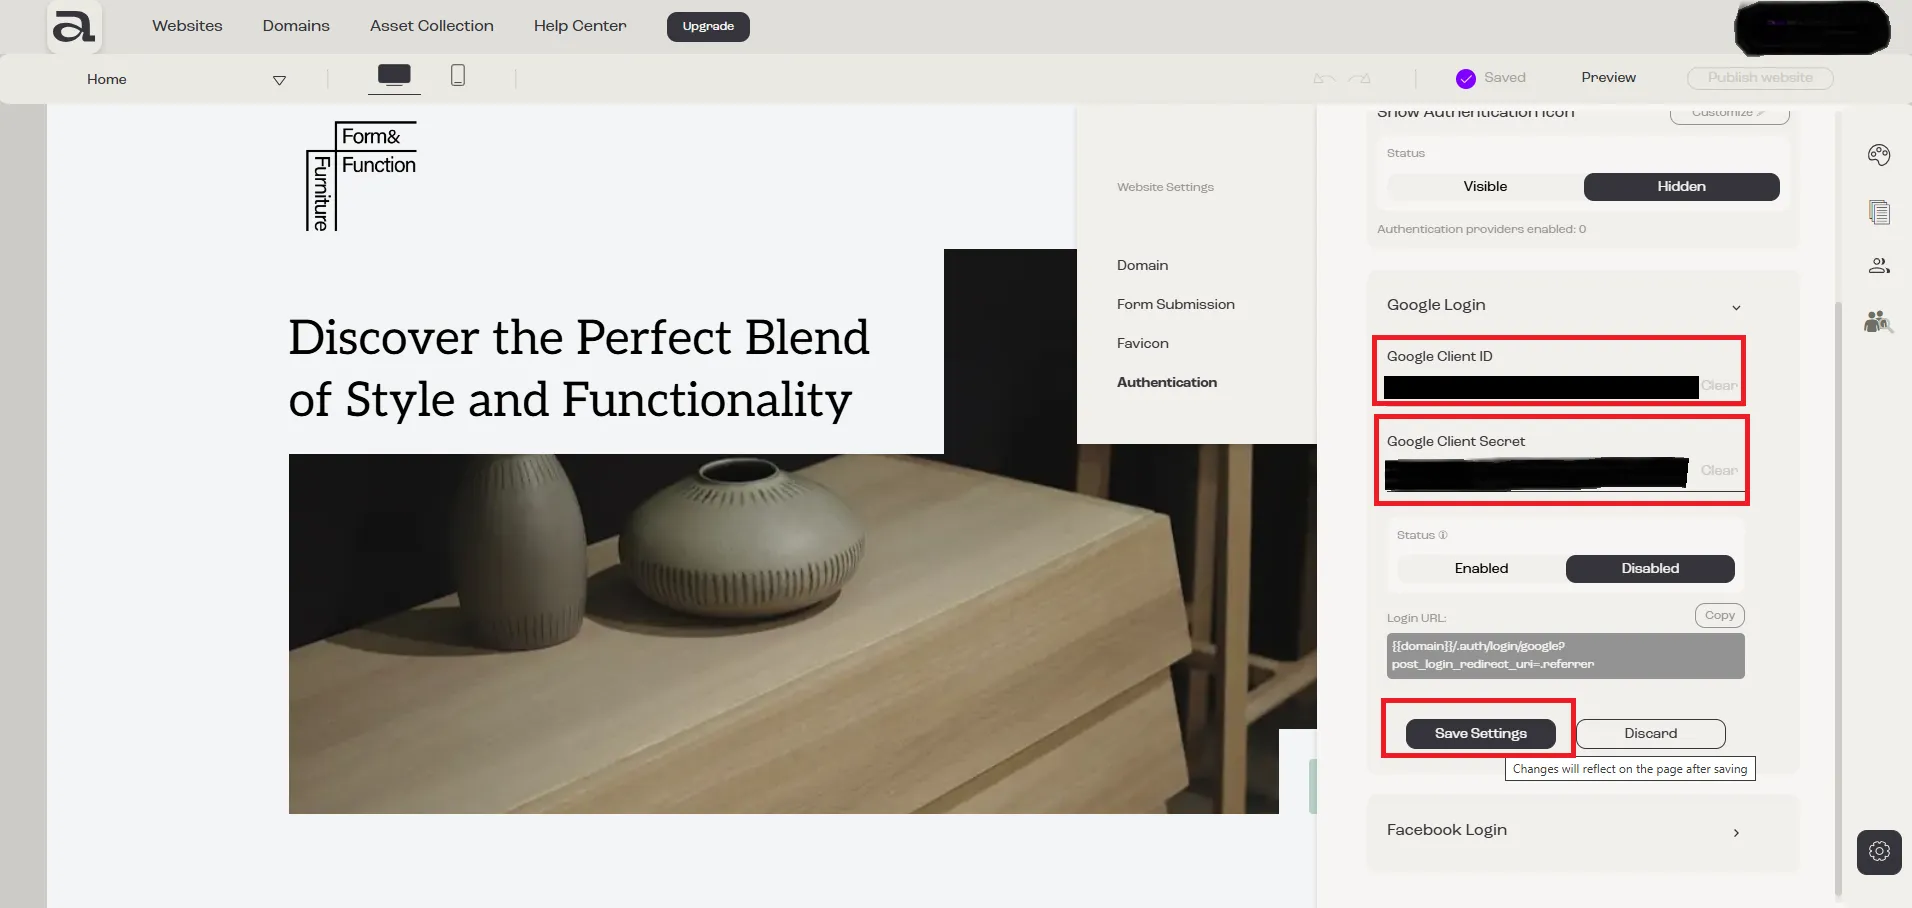
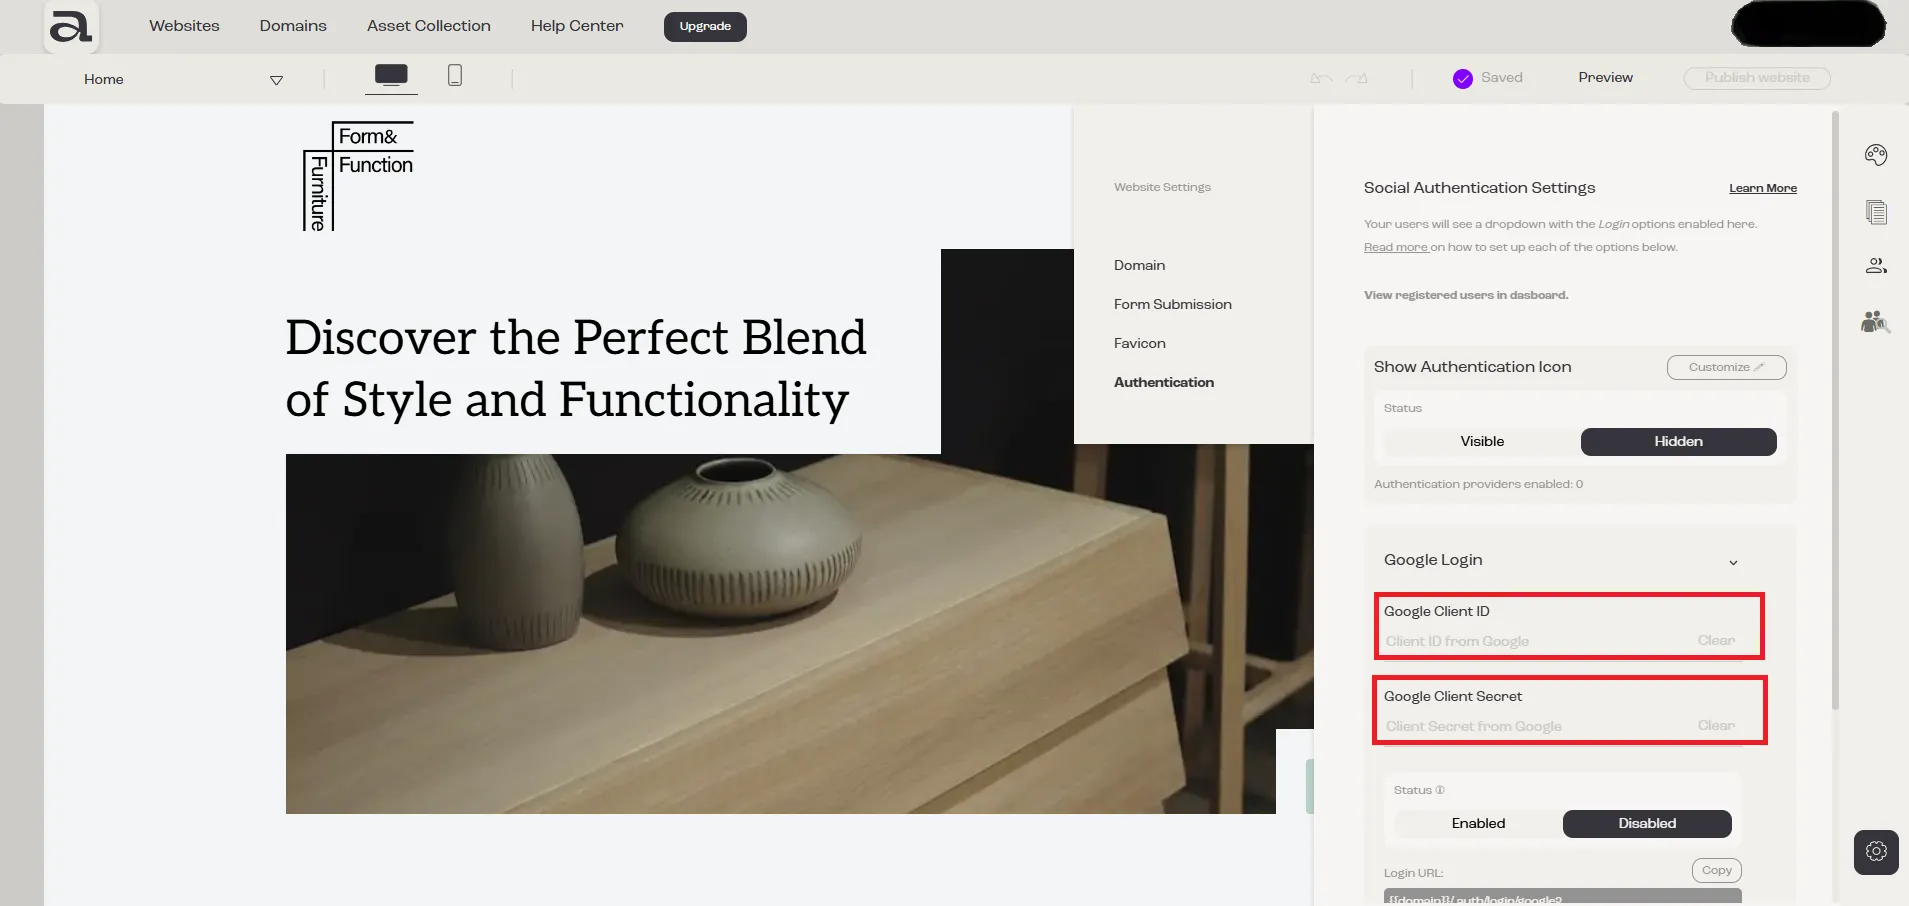
Section titled “Introduction”Google authentication is configured by navigating to Website Settings → Authentication → Google Login, and filling in the two fields: Client ID and Client Secret.
In the following section, we’ll guide you through the process of obtaining these two values.
The steps below are based on and expanded from Google’s official tutorial: “Integrating Google Sign-In into your web app”, specifically the “Create authorization credentials” section.
Google’s setup tutorial assumes you’ve already: Created a project and Set up branding for your app. If you haven’t completed these steps yet, follow the instructions below from Step 1 “Create a Project”.
1. Prerequisites on Aphyo
Section titled “1. Prerequisites on Aphyo”Before getting started, make sure you meet the following requirements:
- You have a custom domain.
- Your domain is connected to your website.
2. Prerequisites on Google
Section titled “2. Prerequisites on Google”2.1. Google Cloud Project
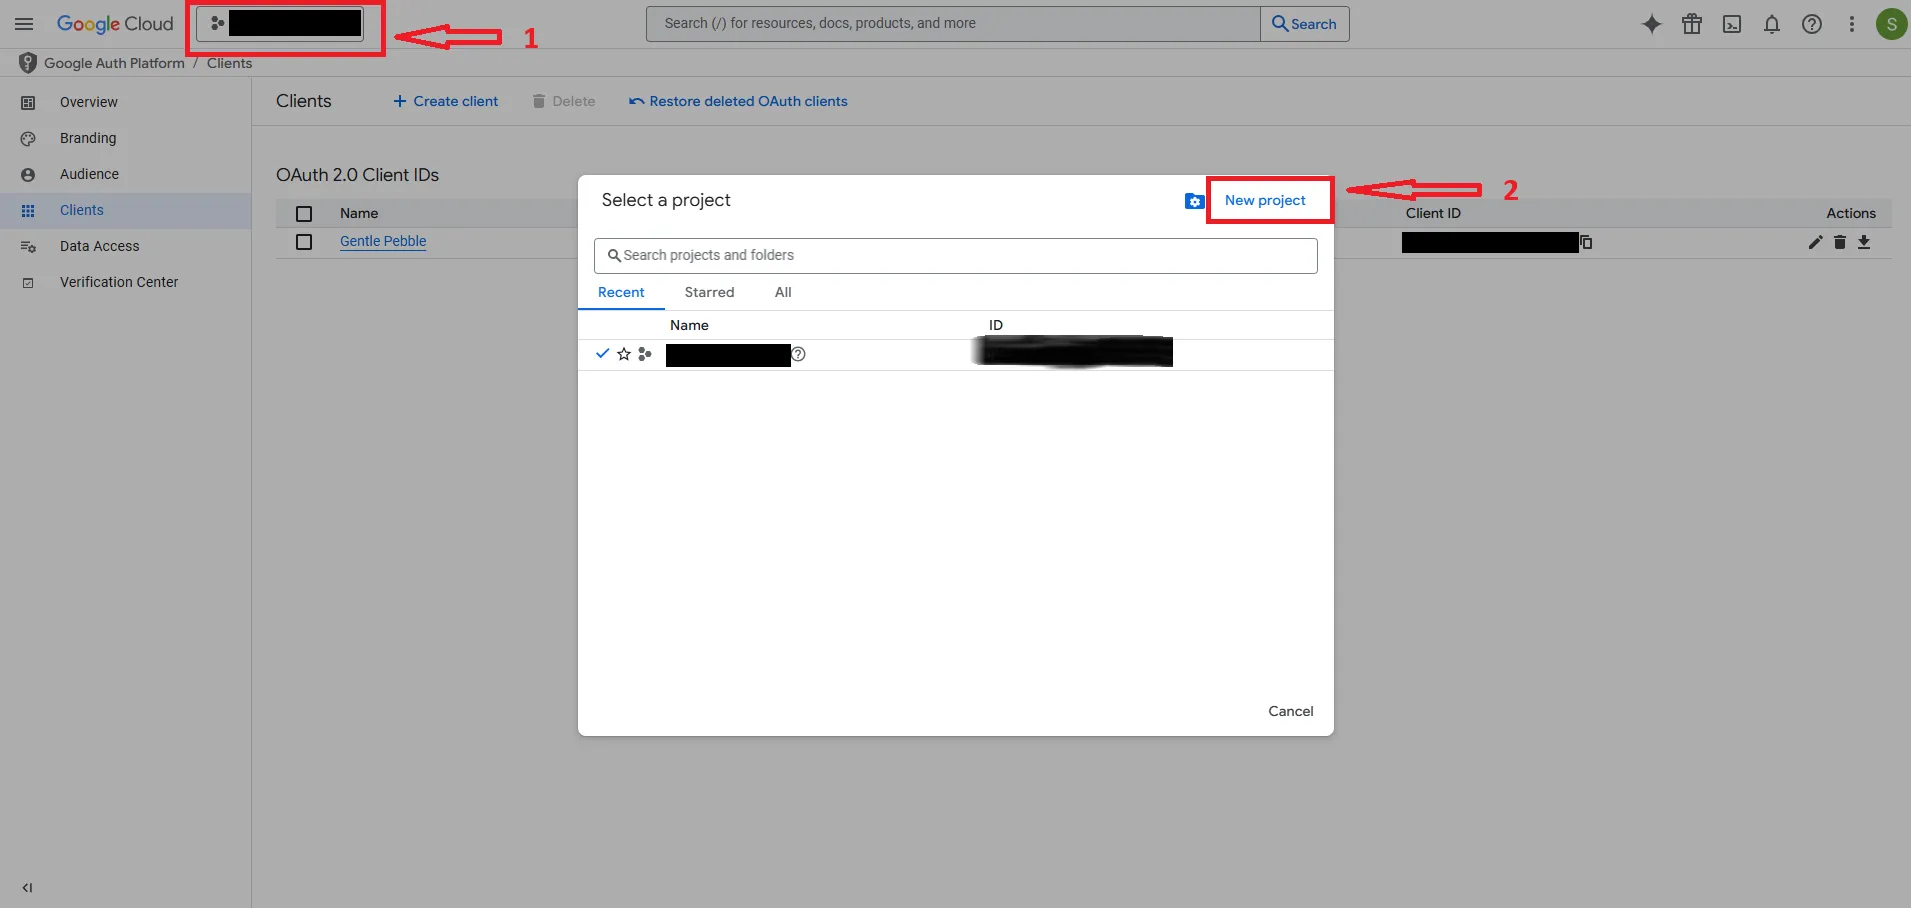
Section titled “2.1. Google Cloud Project”To obtain your Client ID and Client Secret, you first need to create a project in the Google Cloud Console.
Click “Create New Project” to begin.
If you already have a project you will see the name of the project instead of “Create New Project”.
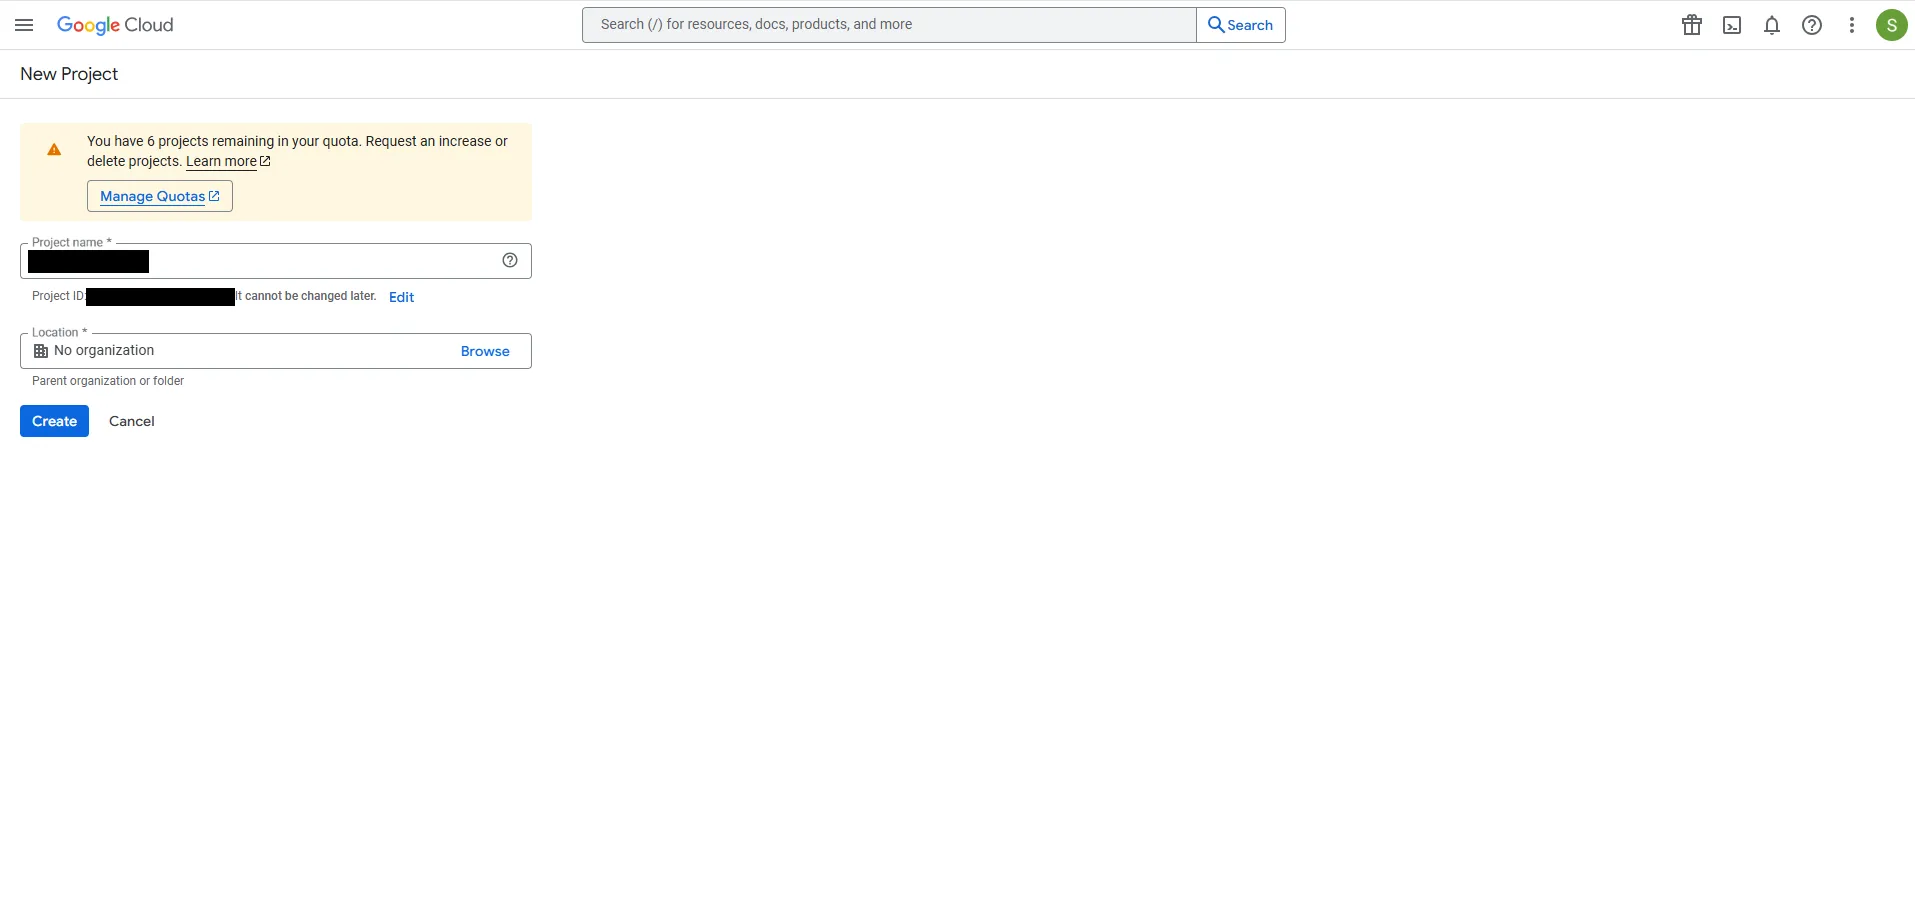
Finish the process by naming your project and click on “Create”.
2.2. Google Cloud Project Branding
Section titled “2.2. Google Cloud Project Branding”After creating the project, you need to configure branding.
(Google requires this step as part of the setup process.)
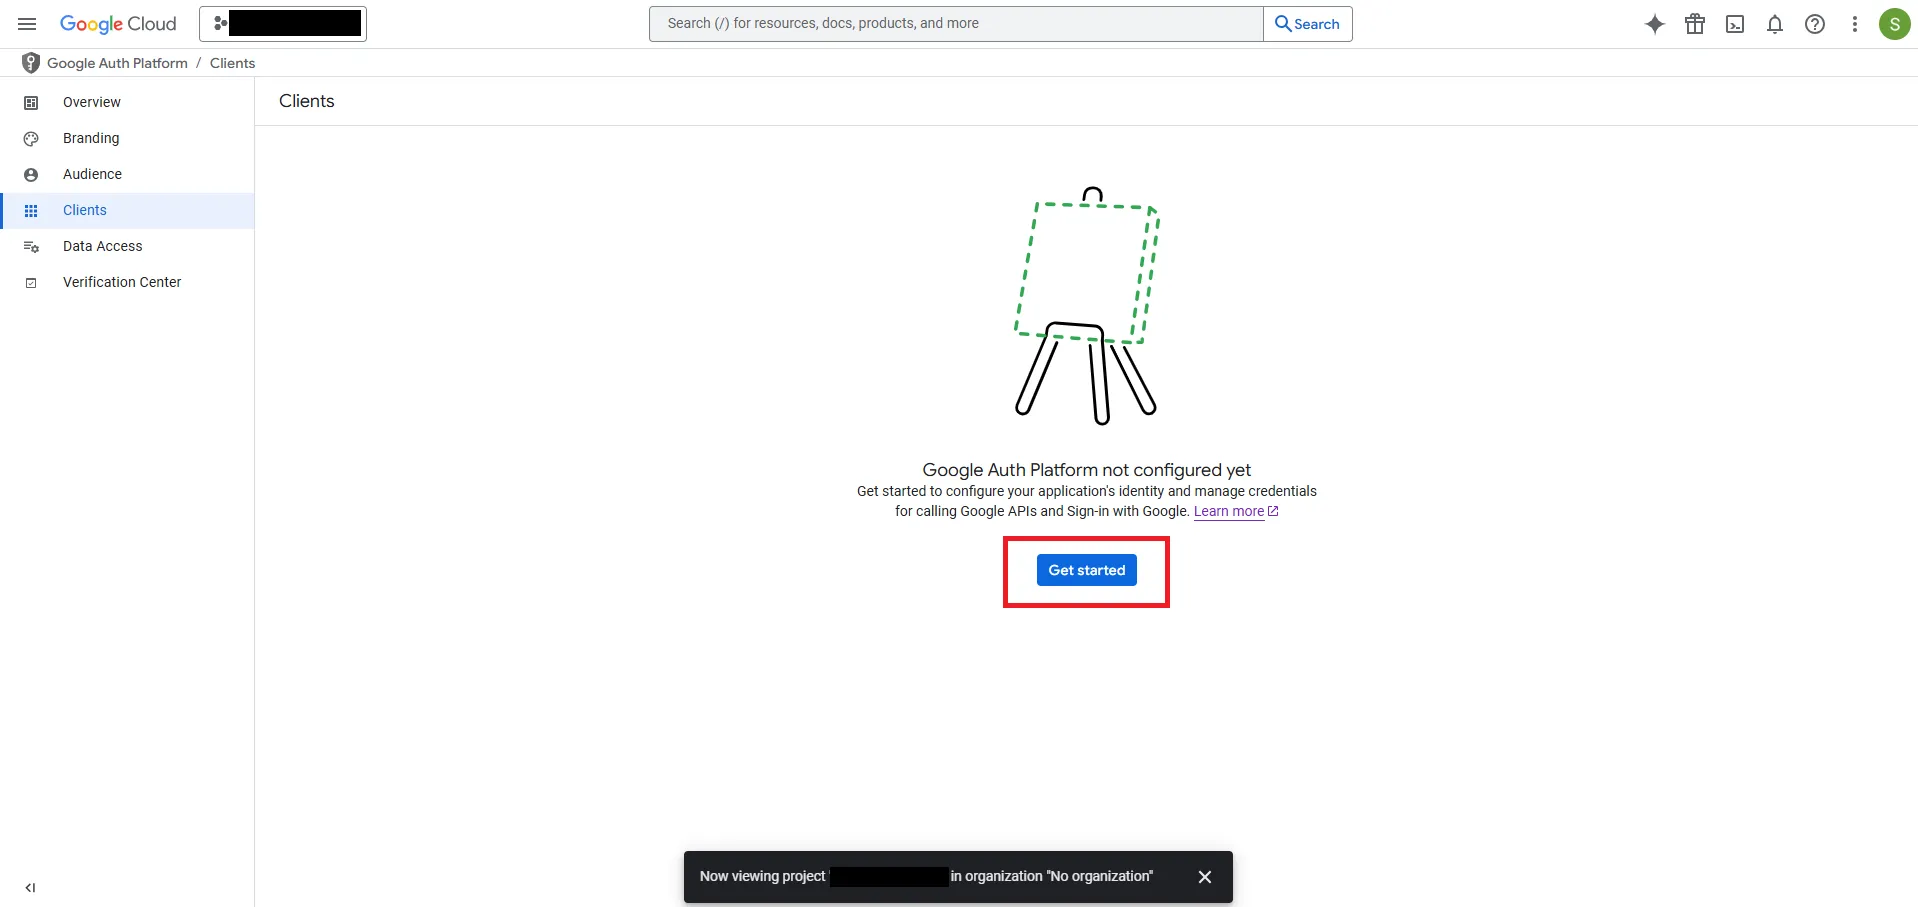
Click “Create Branding” to proceed.
2.2.1. Get Started.
Section titled “2.2.1. Get Started.”Click the “Get Started” button.
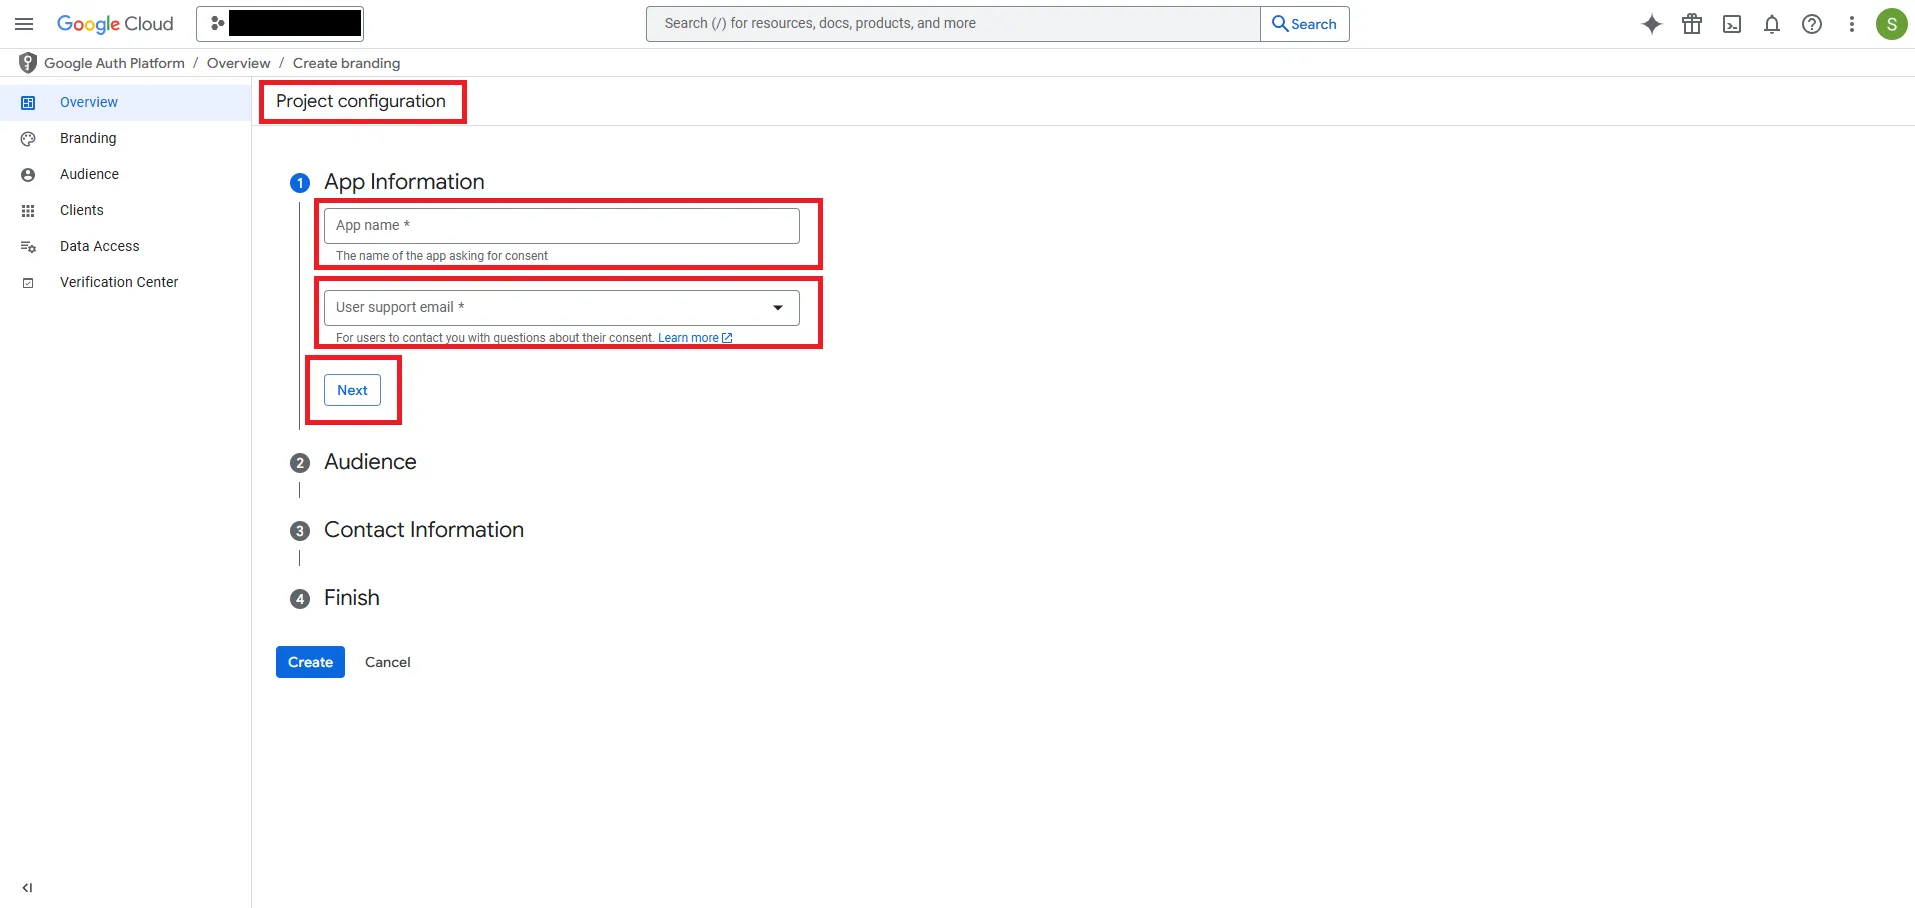
2.2.2. Project Configuration
Section titled “2.2.2. Project Configuration”Under App Information, fill in the following fields:
- Name – Enter a name for your application.
- Email – Enter a valid email address.
Click “Next” to continue.
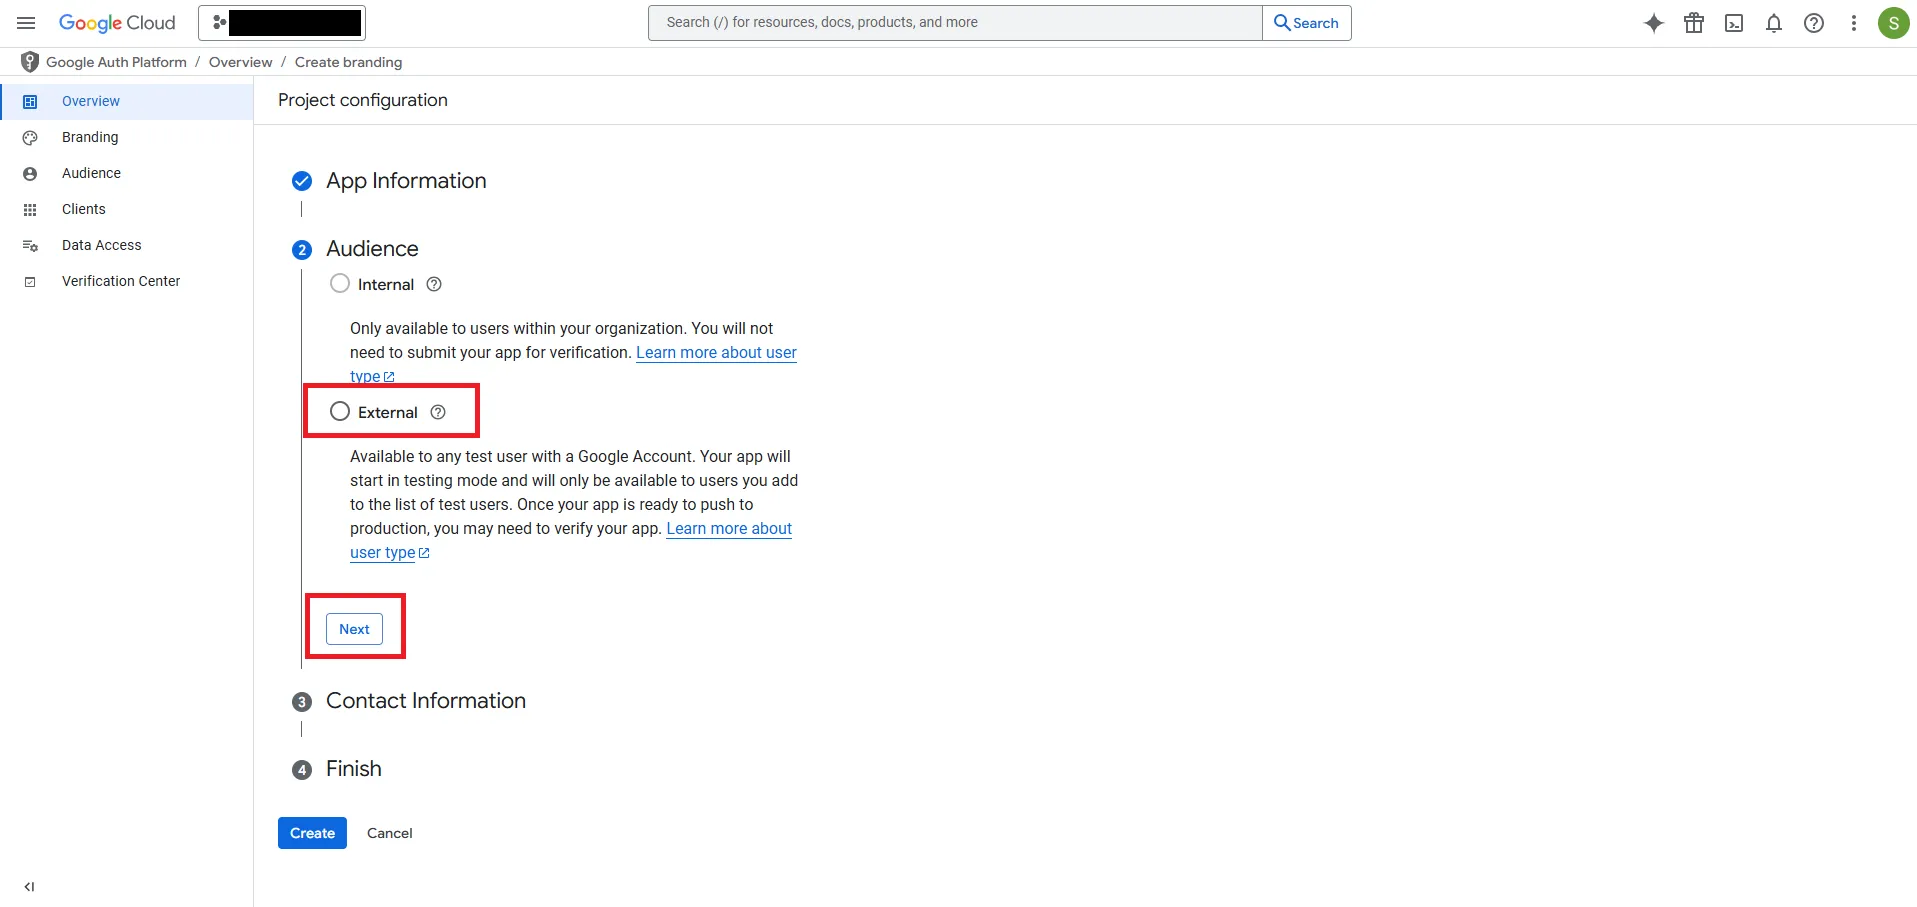
2.2.3. Audience
Section titled “2.2.3. Audience”Select the “External” option.
Click “Next” to proceed.
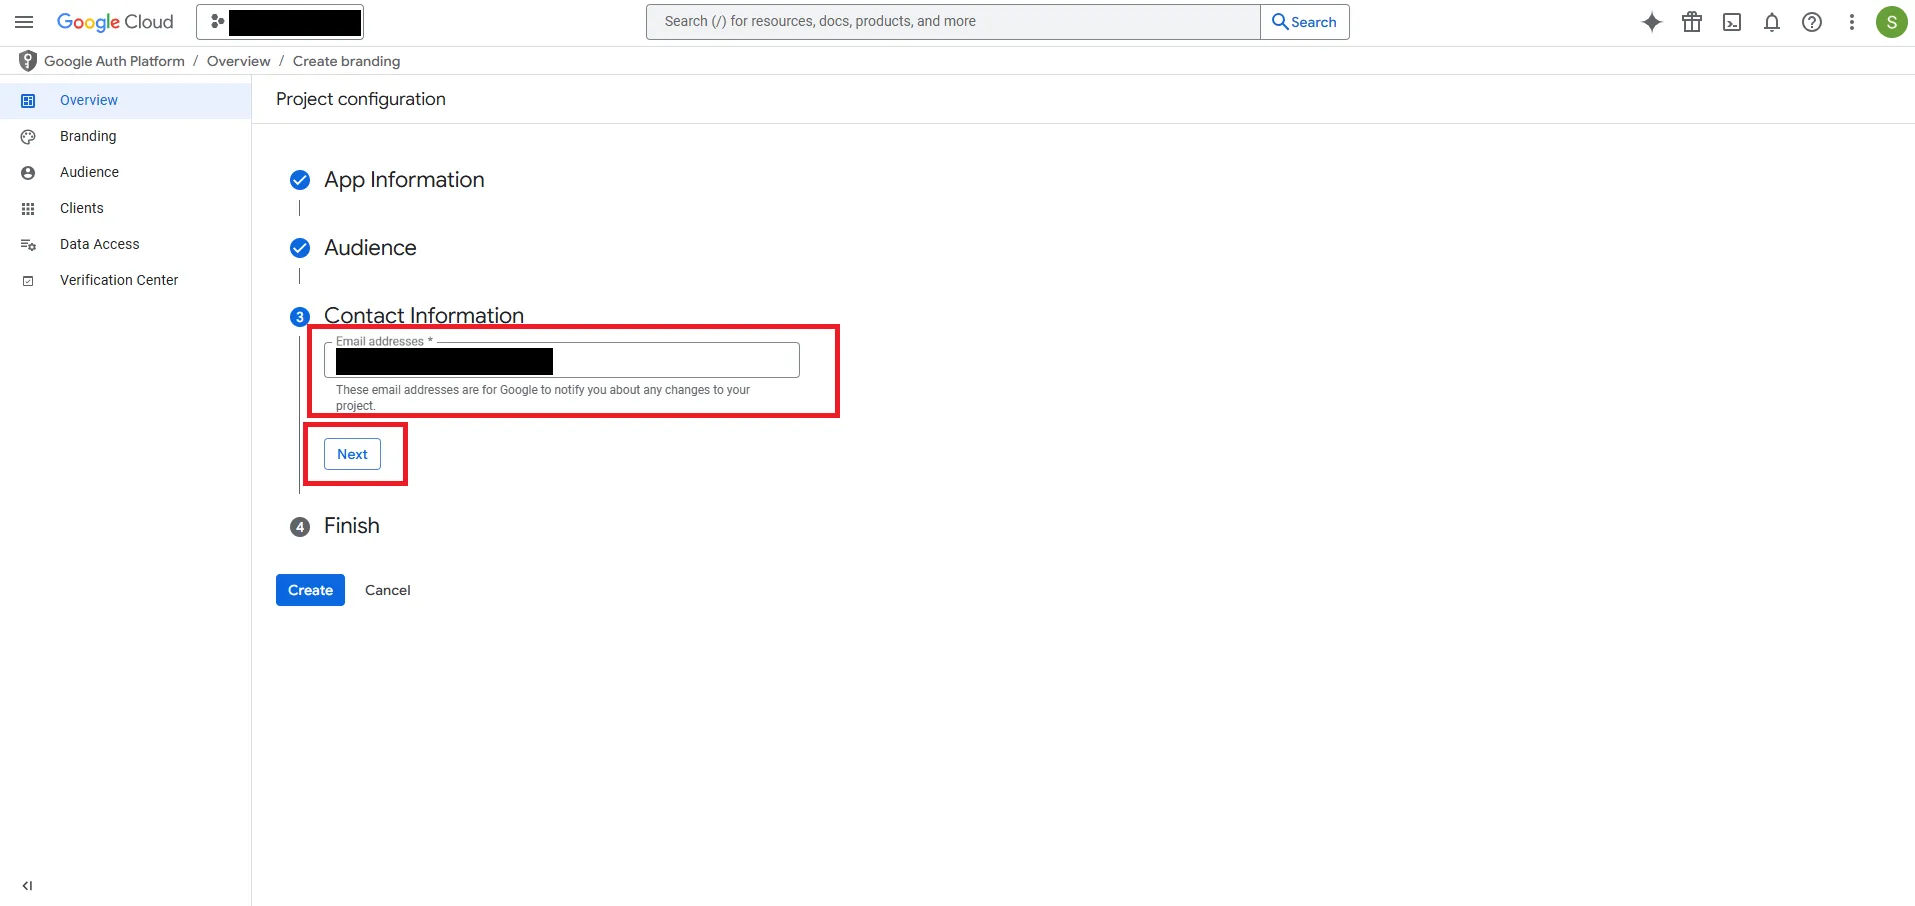
2.2.4. Contact Information
Section titled “2.2.4. Contact Information”In the Email address field, use the same email you entered in Step 2.
Click “Next”.
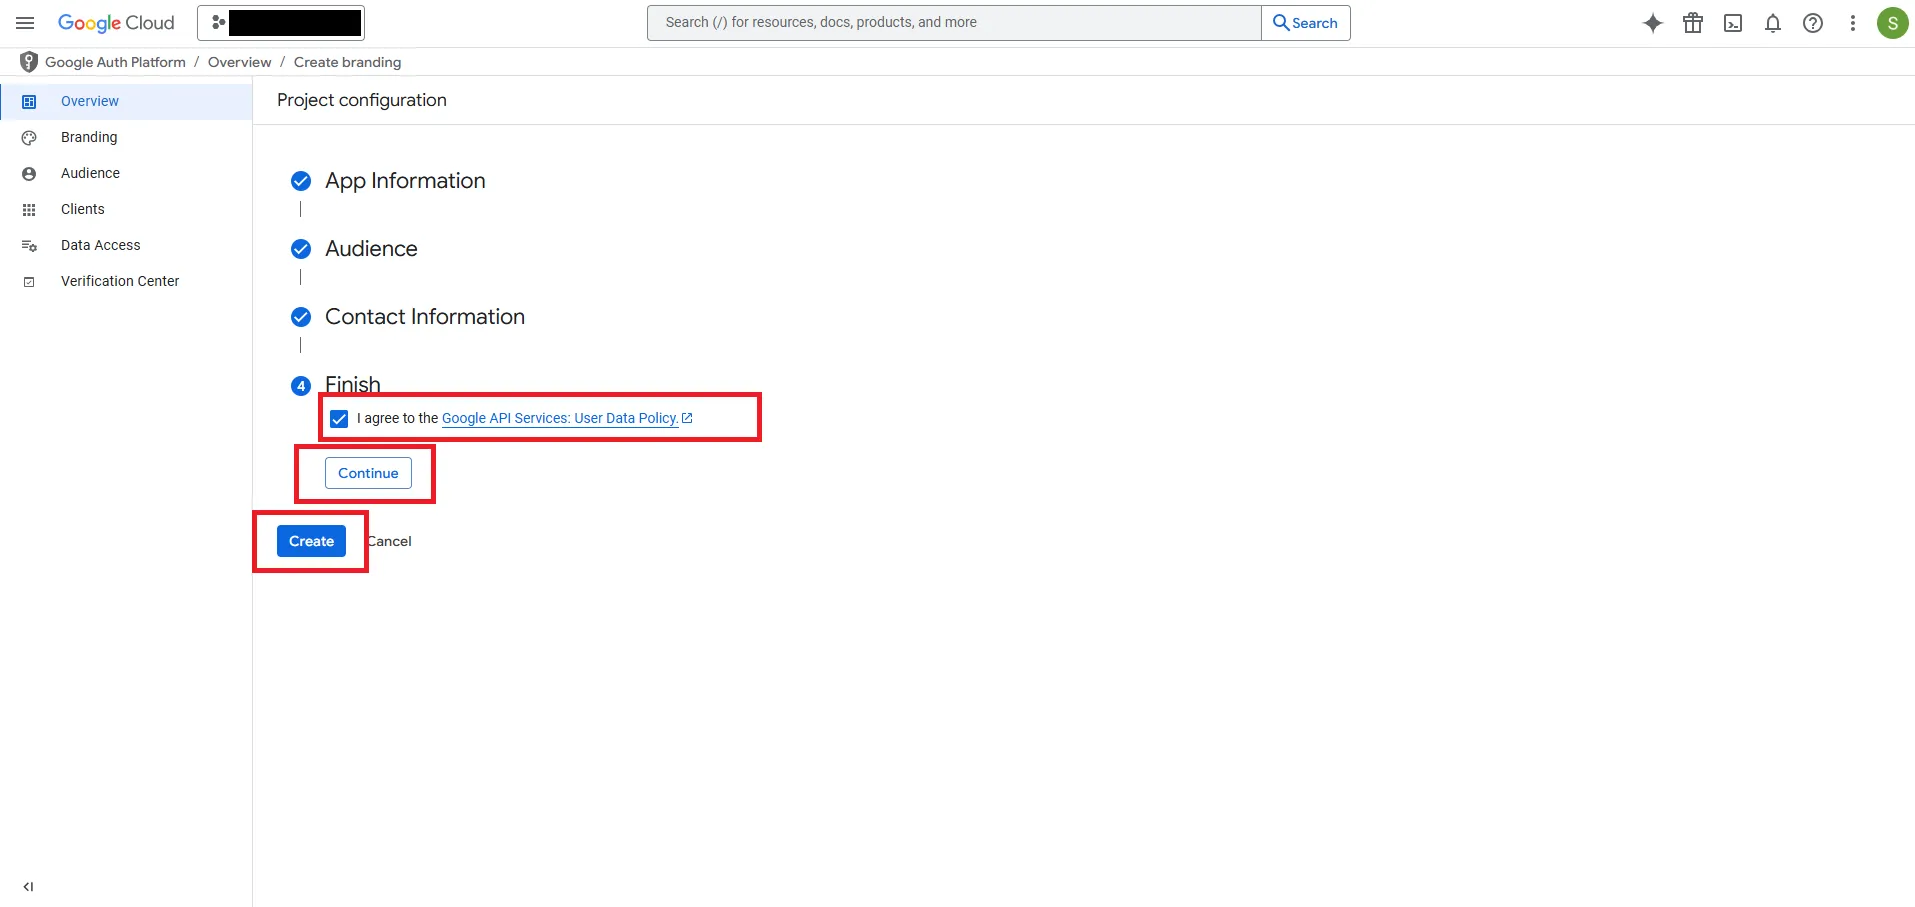
2.2.5. Finish
Section titled “2.2.5. Finish”Check the box to accept the Google API Services: User Data Policy.
Click “Continue”, then “Create”.
3. Create Auth Client
Section titled “3. Create Auth Client”We’ll now walk you through the process of obtaining your Client ID and Client Secret.
We are now at the beginning of Google’s tutorial section titled “Create authorization credentials”.
At this point, you may also consult Google’s official documentation for additional context and guidance.
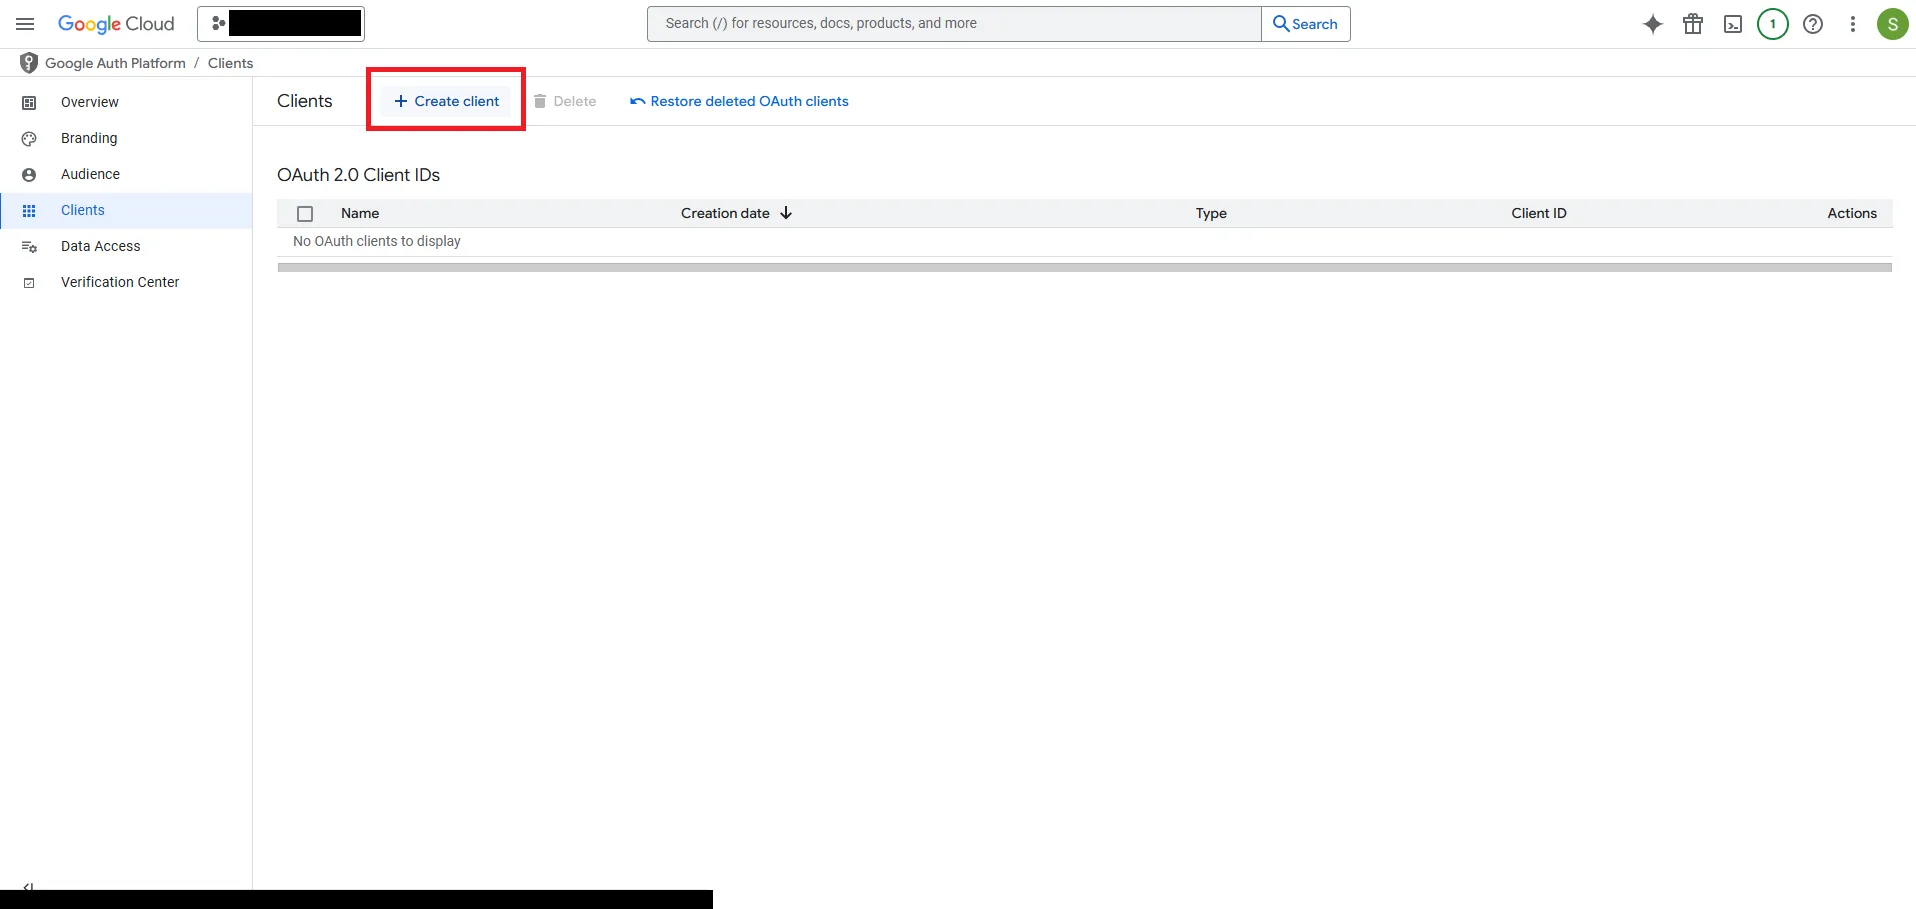
3.1. Create Client
Section titled “3.1. Create Client”Click “Create client”.
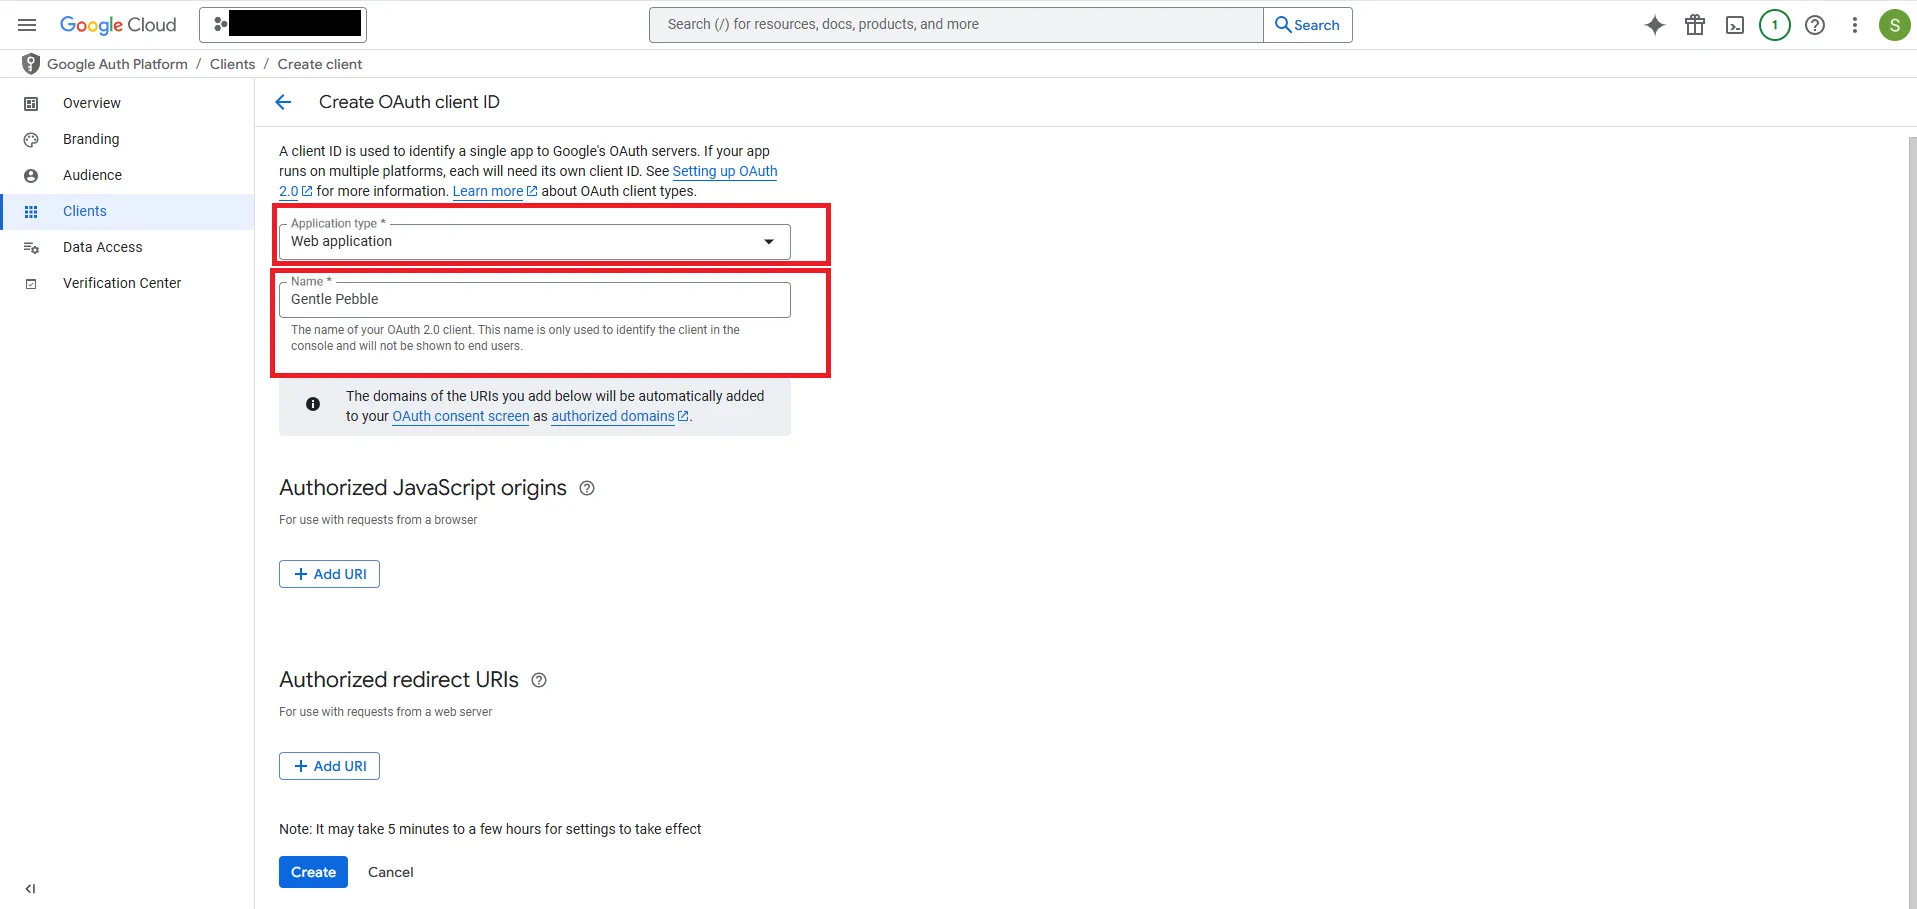
3.2. Create OAuth Client ID
Section titled “3.2. Create OAuth Client ID”Under Application Type, select Web application.
In the Name field, enter a name for your client.
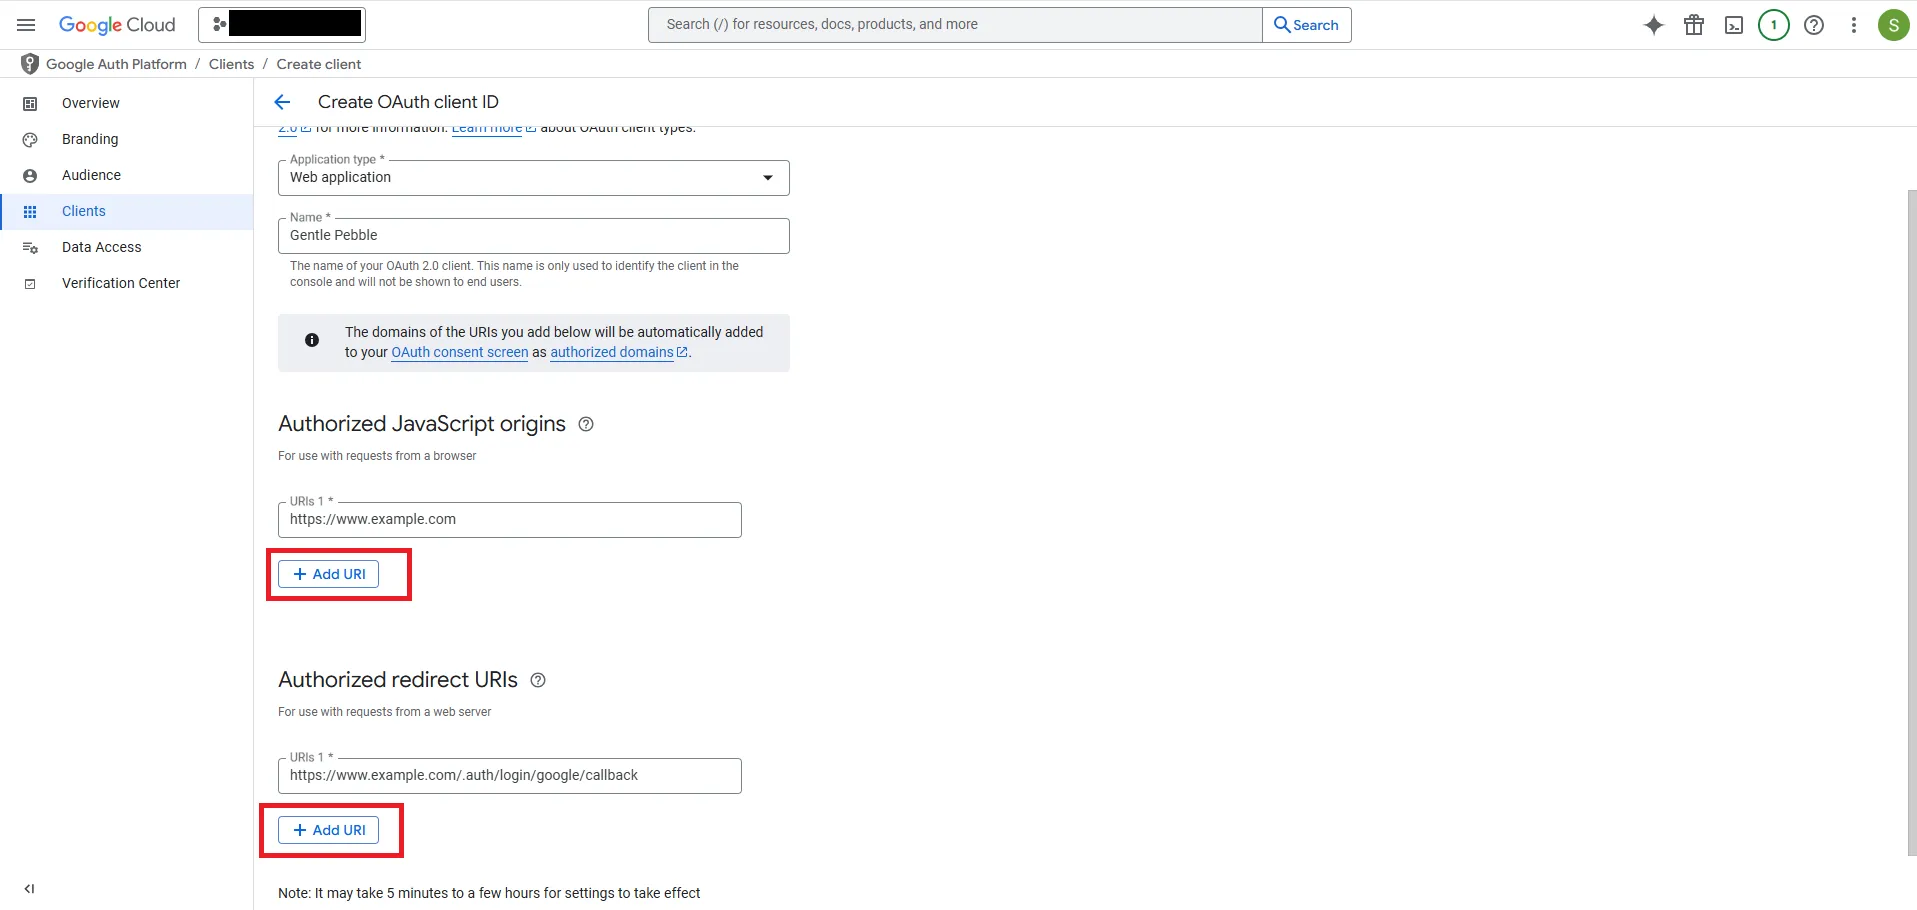
3.3. Add Authorized URIs
Section titled “3.3. Add Authorized URIs”Click “Add URI”, then:
- For Authorized JavaScript origins, add your website’s domain.
- For Authorized redirect URIs, add your domain followed by
/.auth/login/google/callback.
Click “Create” to continue.
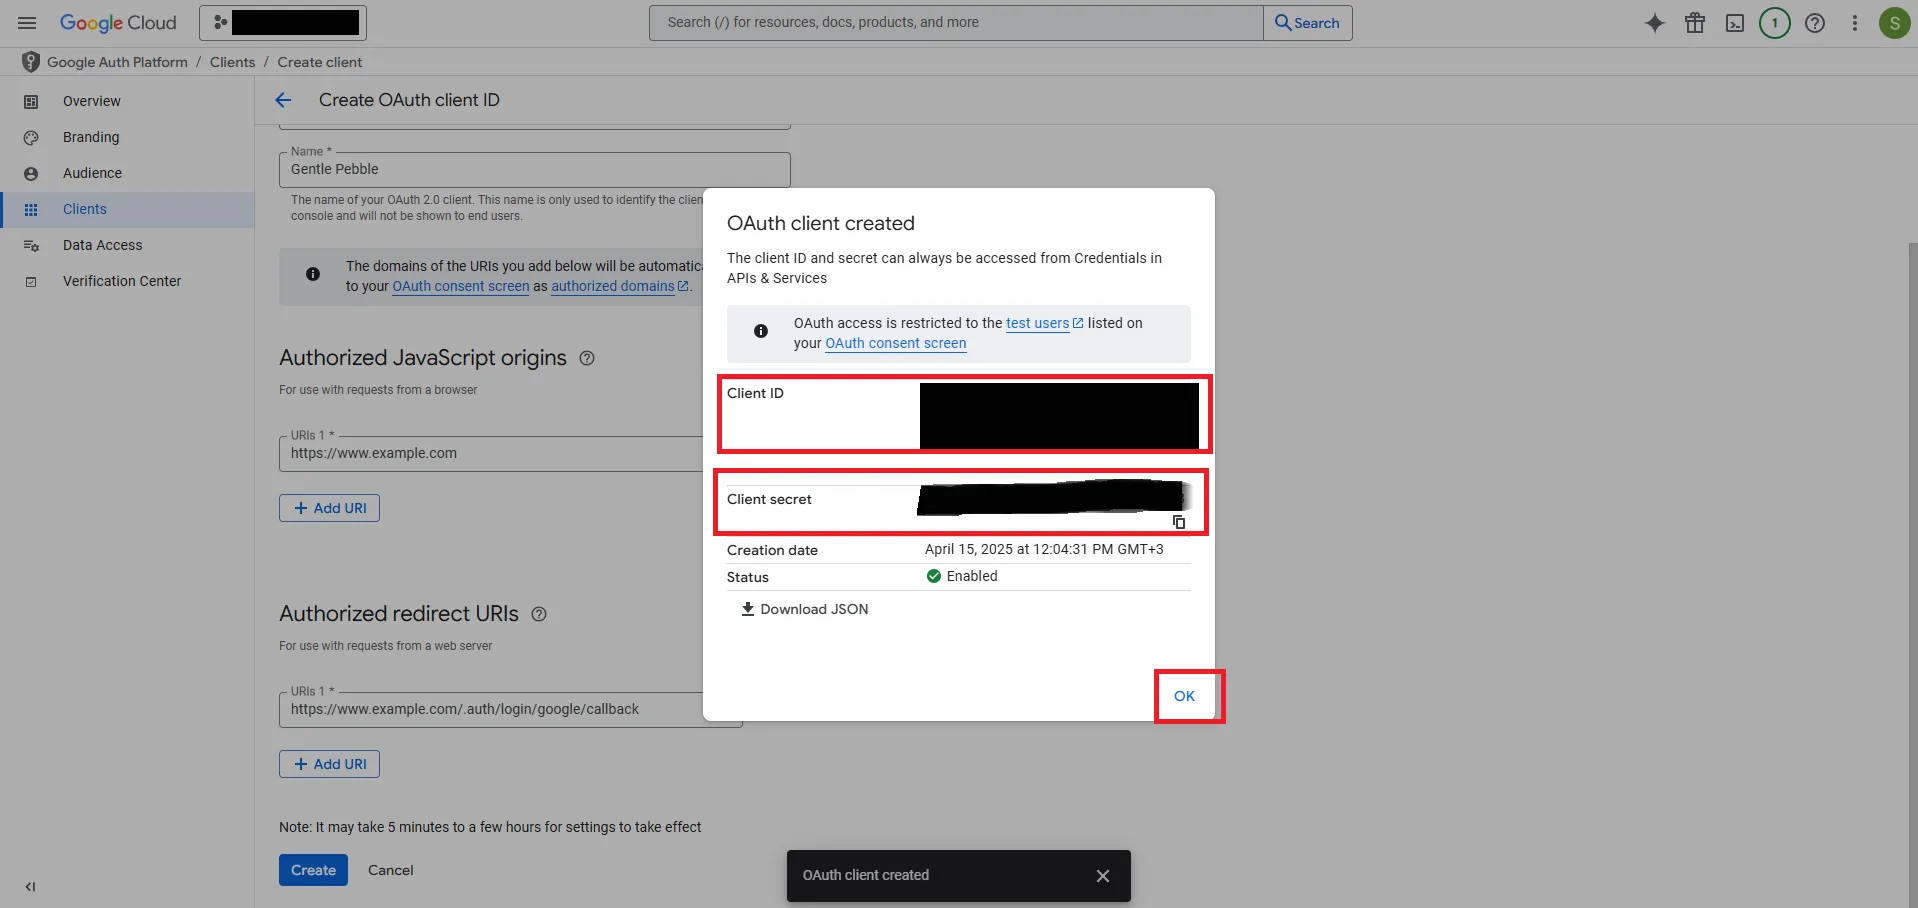
3.4. OAuth Client Created
Section titled “3.4. OAuth Client Created”Your Client ID and Client Secret have been generated.
Click “OK” to finish.
3.5. Additional Information
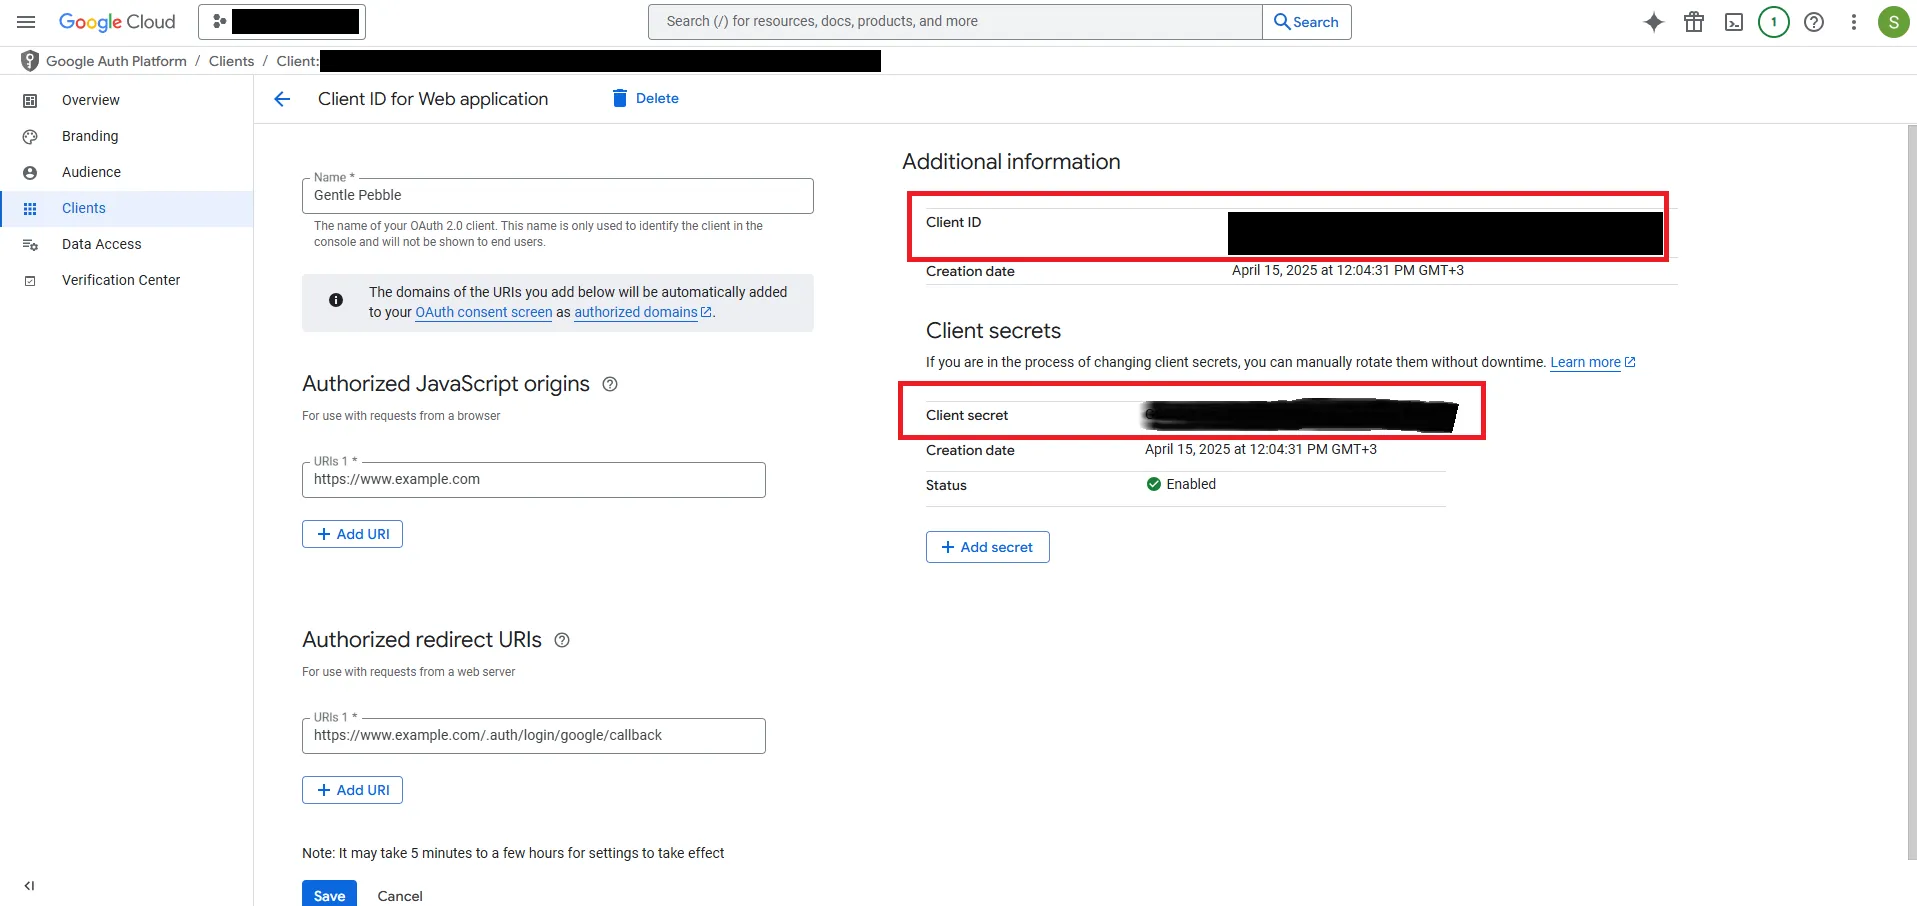
Section titled “3.5. Additional Information”To view your Client ID and Client Secret again, click on the project name.
4. Setup Google Login
Section titled “4. Setup Google Login”4.1. Navigate to Google Login Setup Card
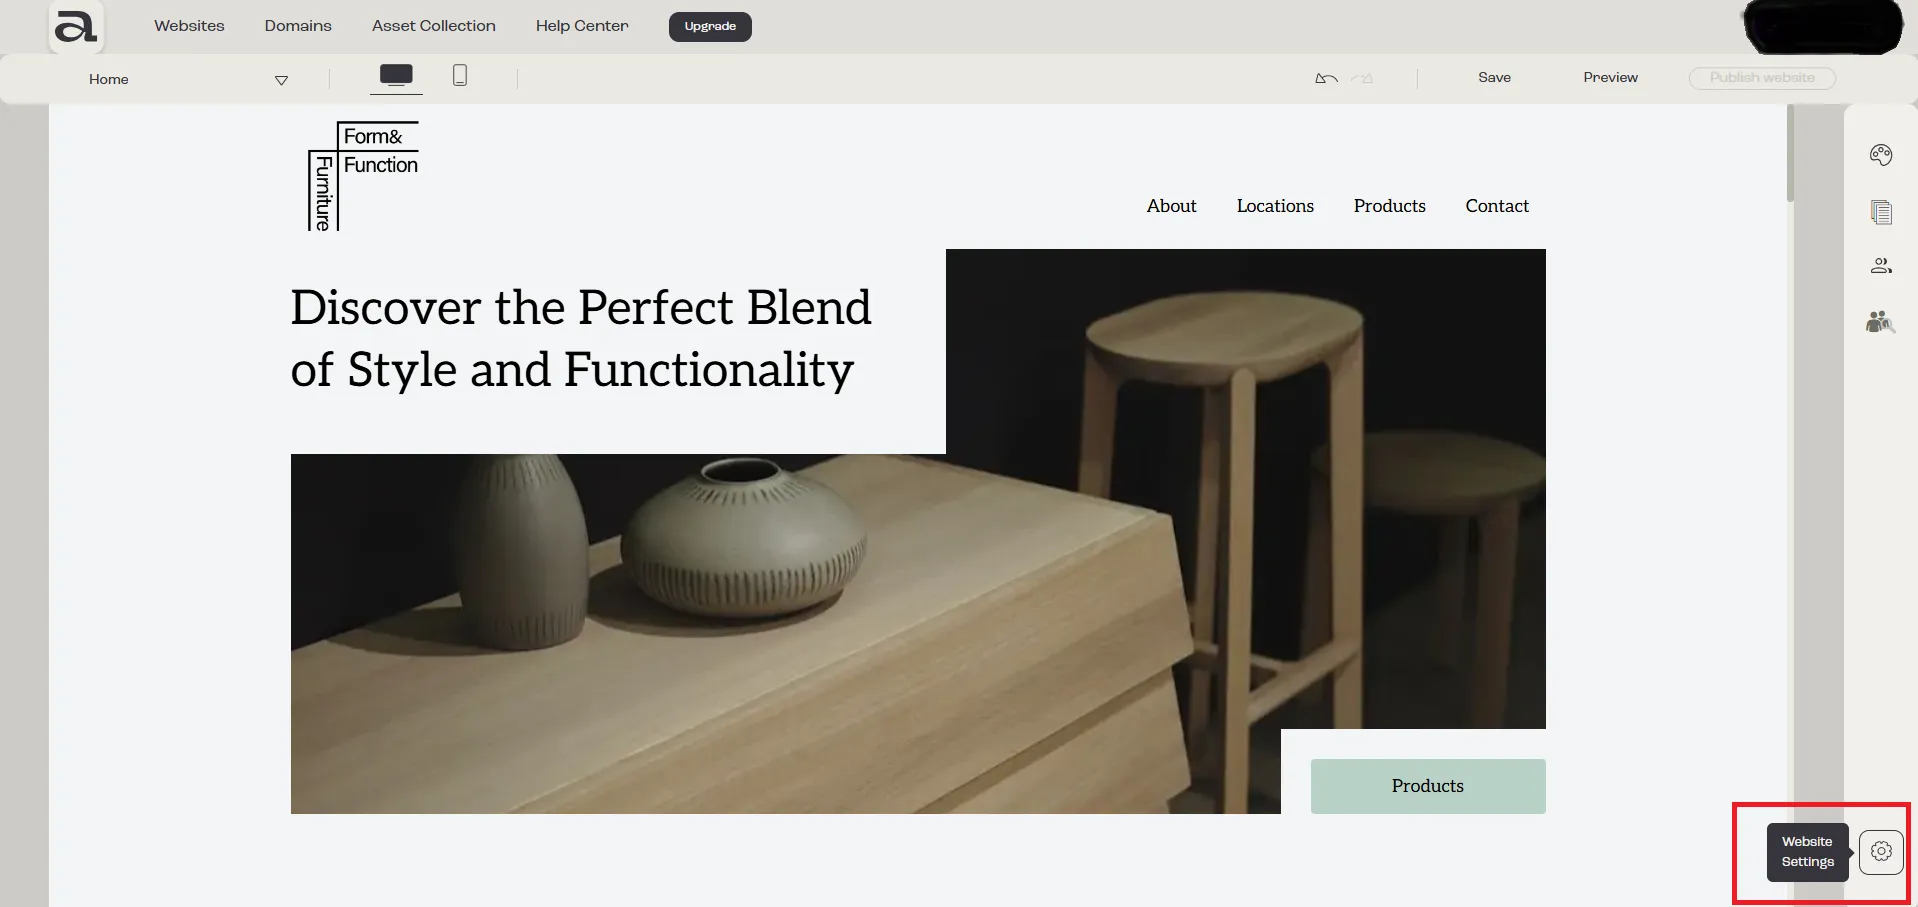
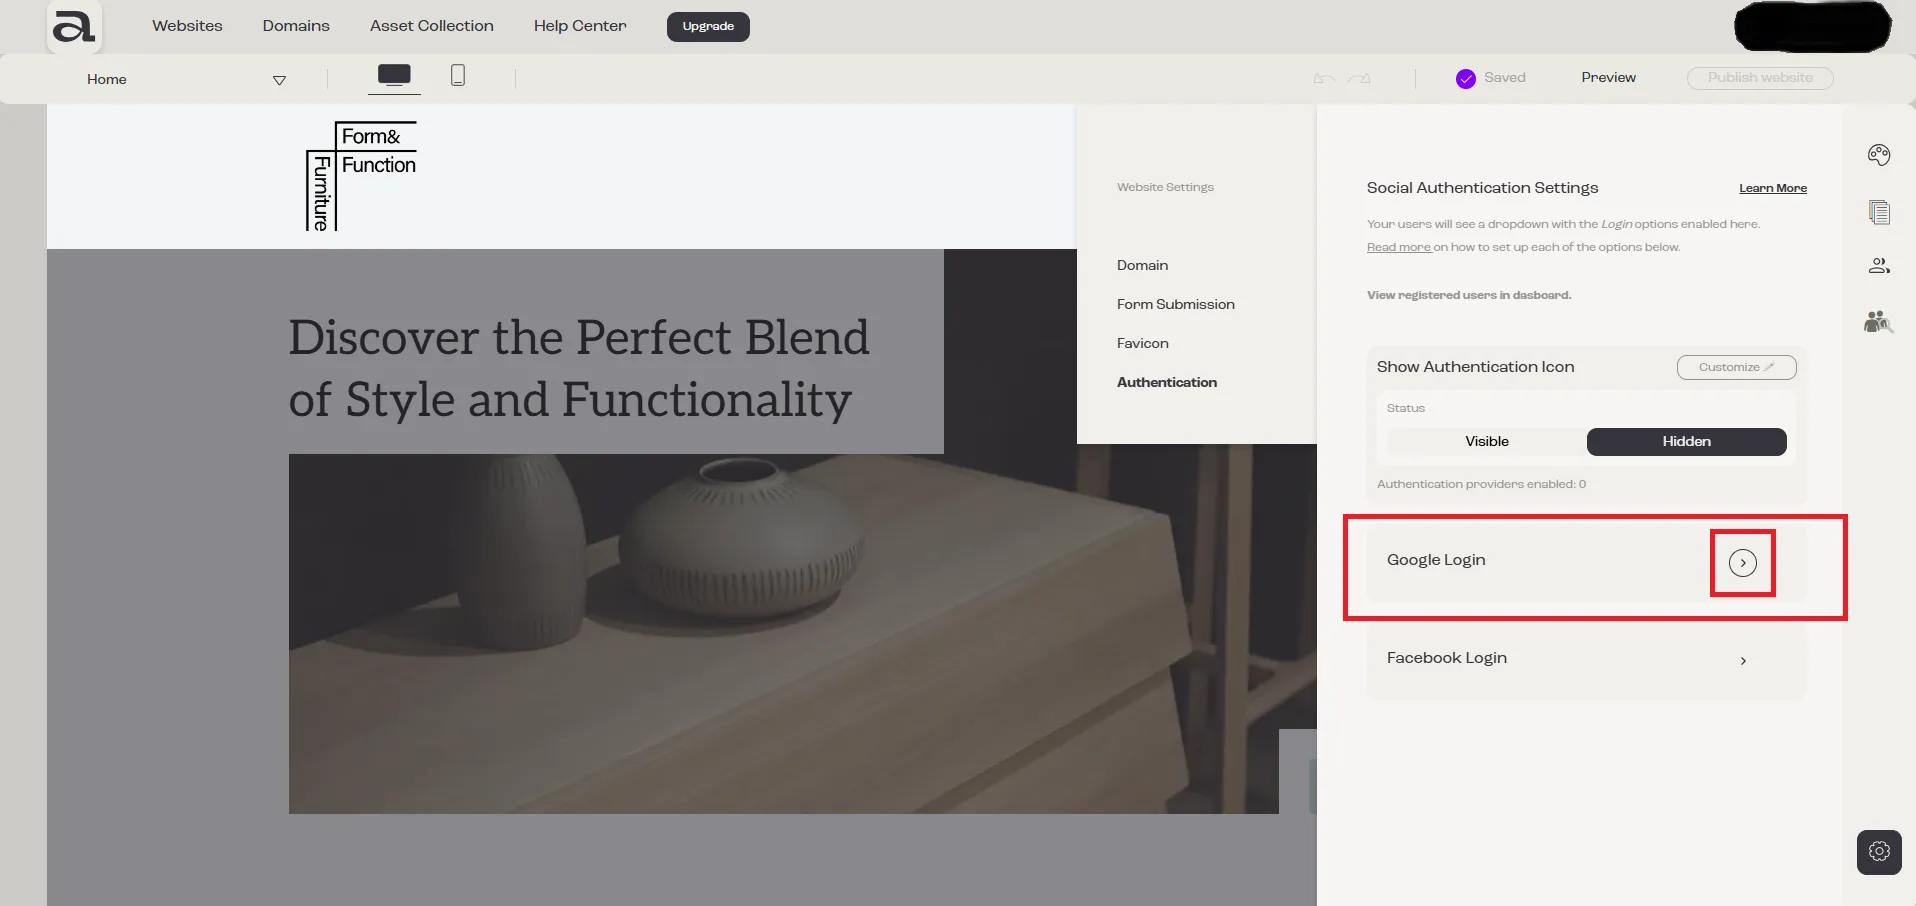
Section titled “4.1. Navigate to Google Login Setup Card”Go to Website Settings.
Click on Authentication.
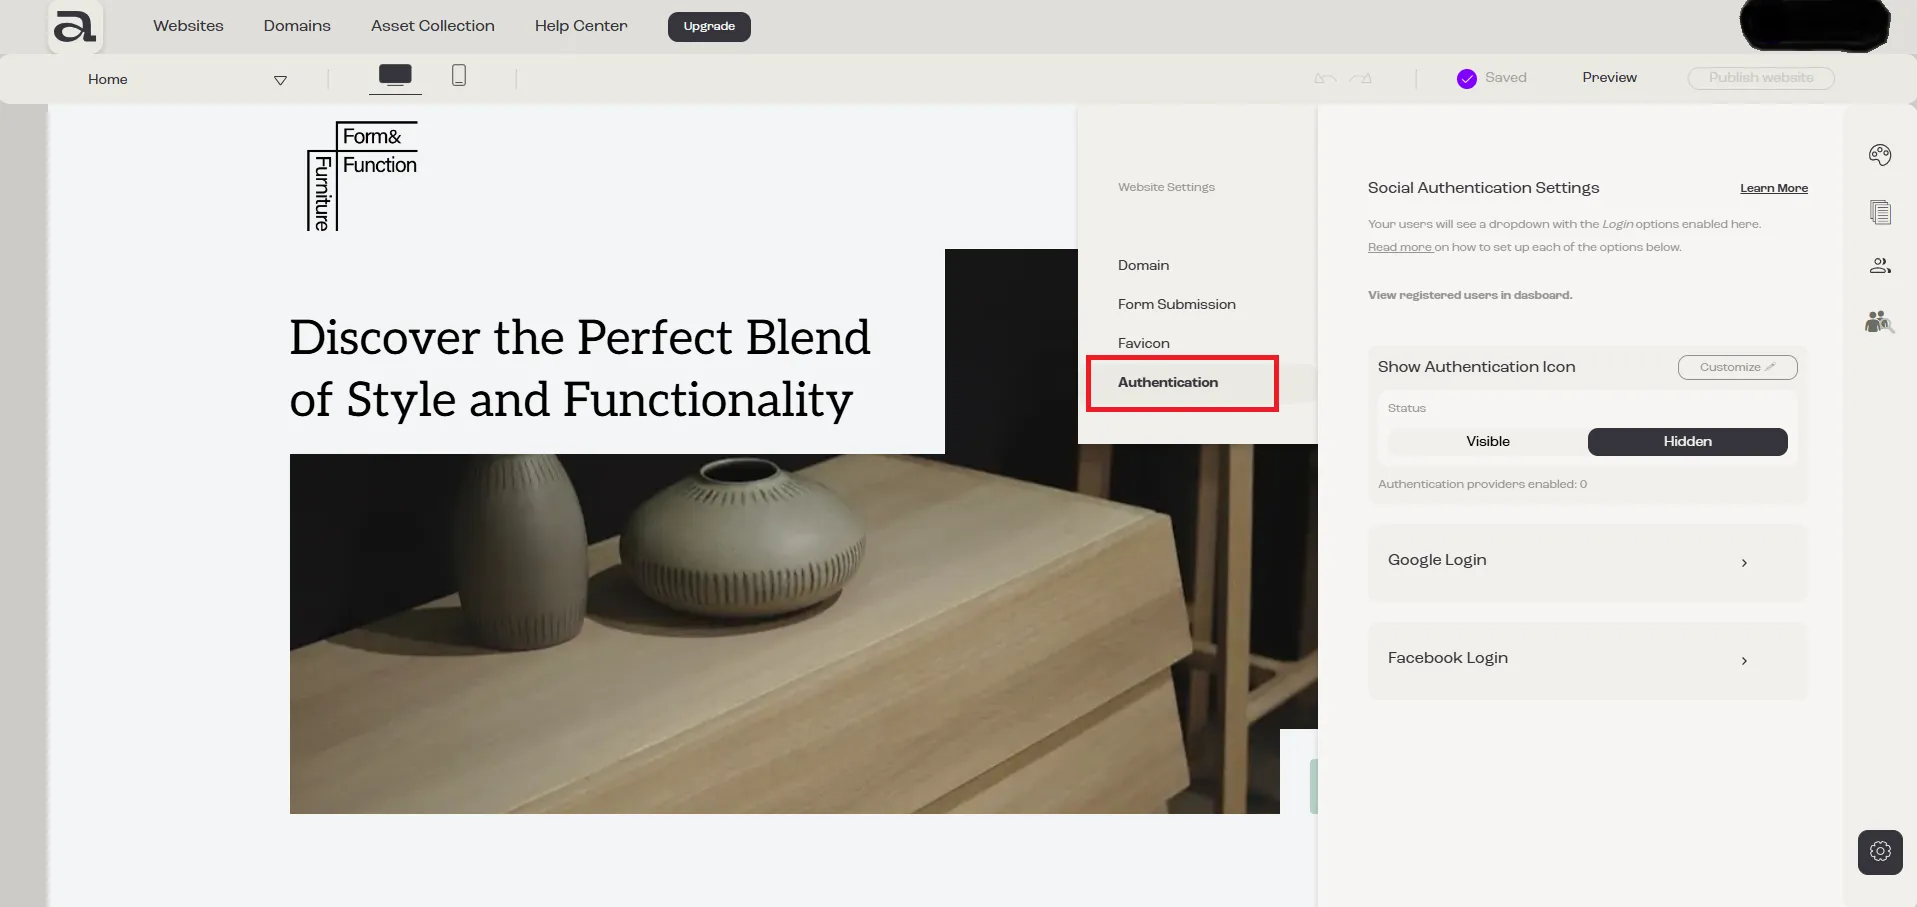
Select Google Login.
4.2. Submit the Required Information
Section titled “4.2. Submit the Required Information”Enter your Google Client ID and Google Client Secret in the corresponding input fields.
Click “Save Settings” to apply the changes.