

How to customize a website text style
This tutorial will guide you on how to customize a default, custom or button text style.
Info regarding font resize
Section titled “Info regarding font resize”Info regarding Button Text Styles
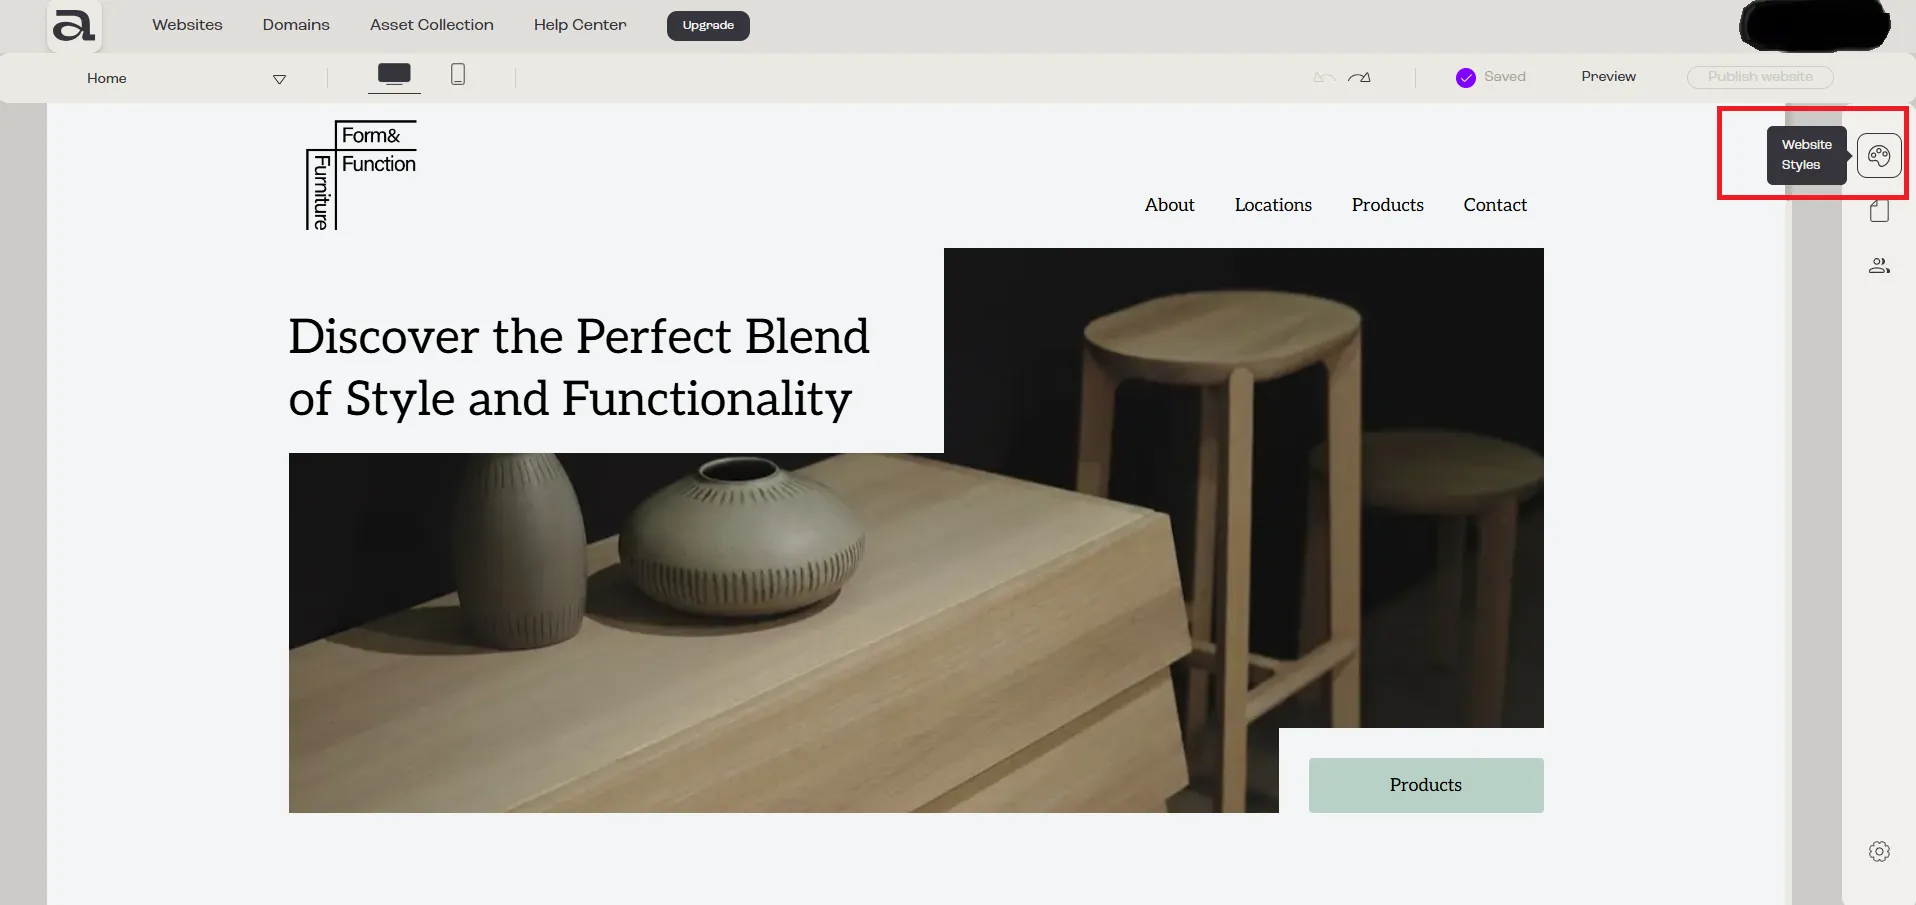
Section titled “Info regarding Button Text Styles”Step 1 - Open Website Styles
Section titled “Step 1 - Open Website Styles”Click on the “Website Styles” button.
Step 2 - Open Typography
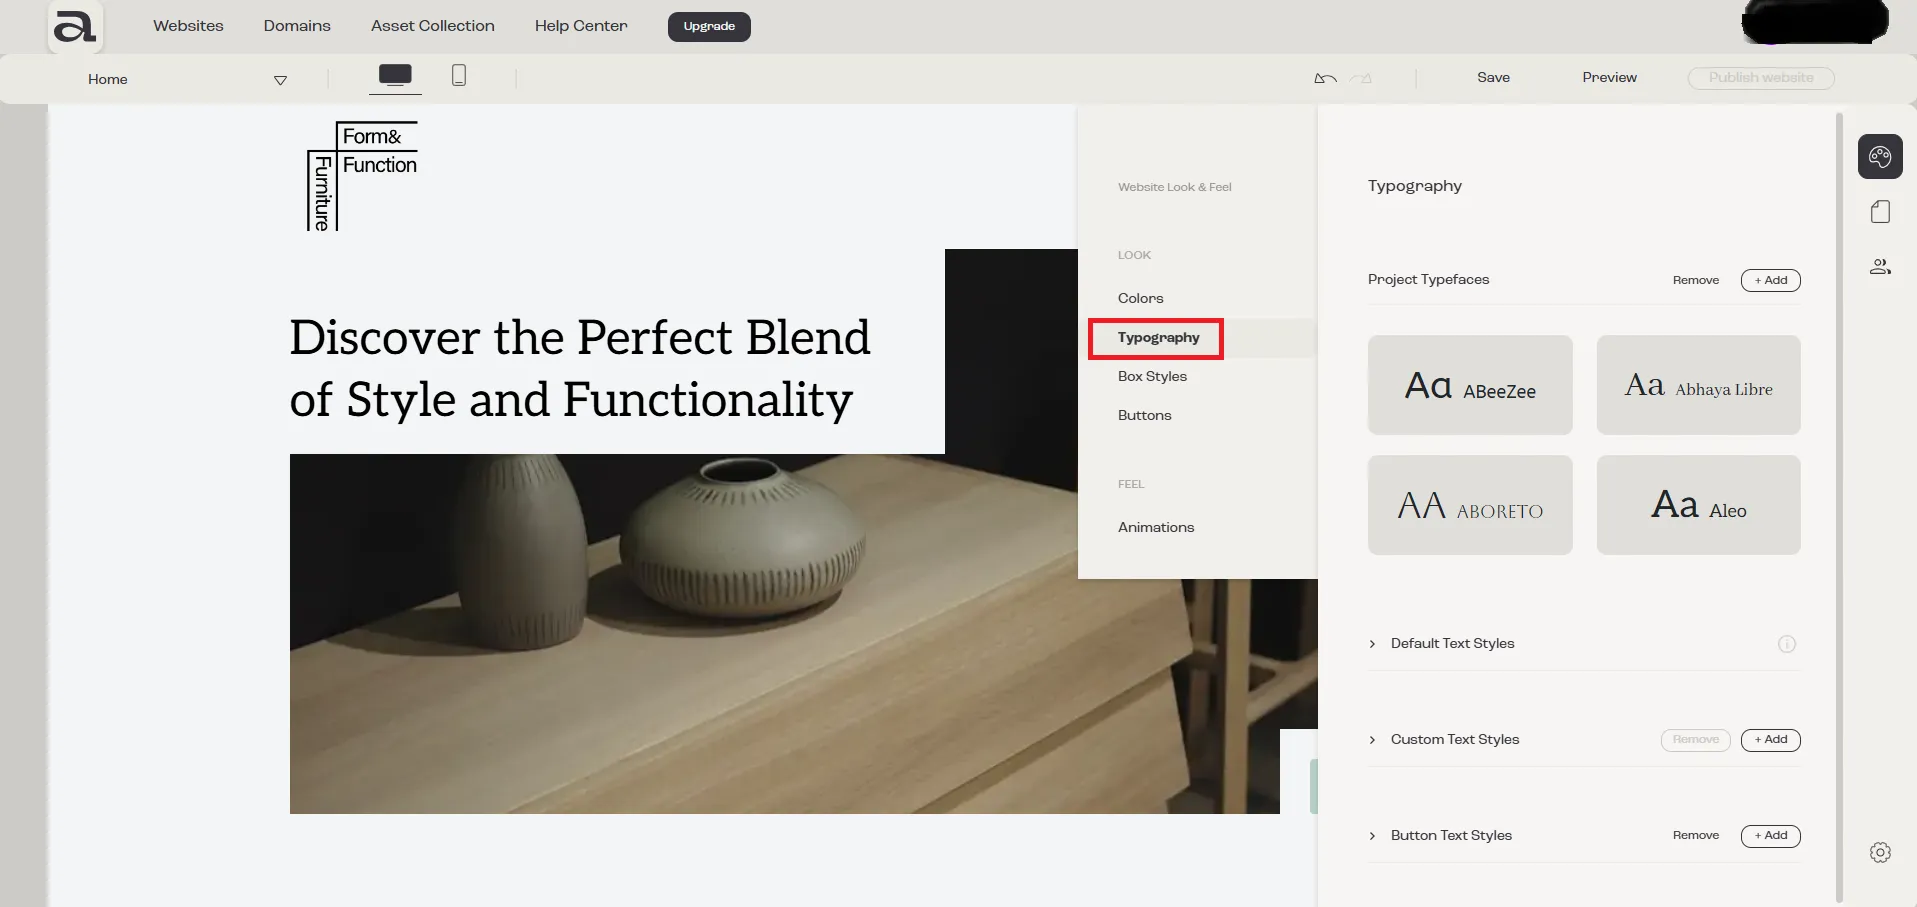
Section titled “Step 2 - Open Typography”In the “Website Look & Feel” menu, select “Typography”.
Step 3 - Customize Text Style
Section titled “Step 3 - Customize Text Style”3.1 - Naming the Style
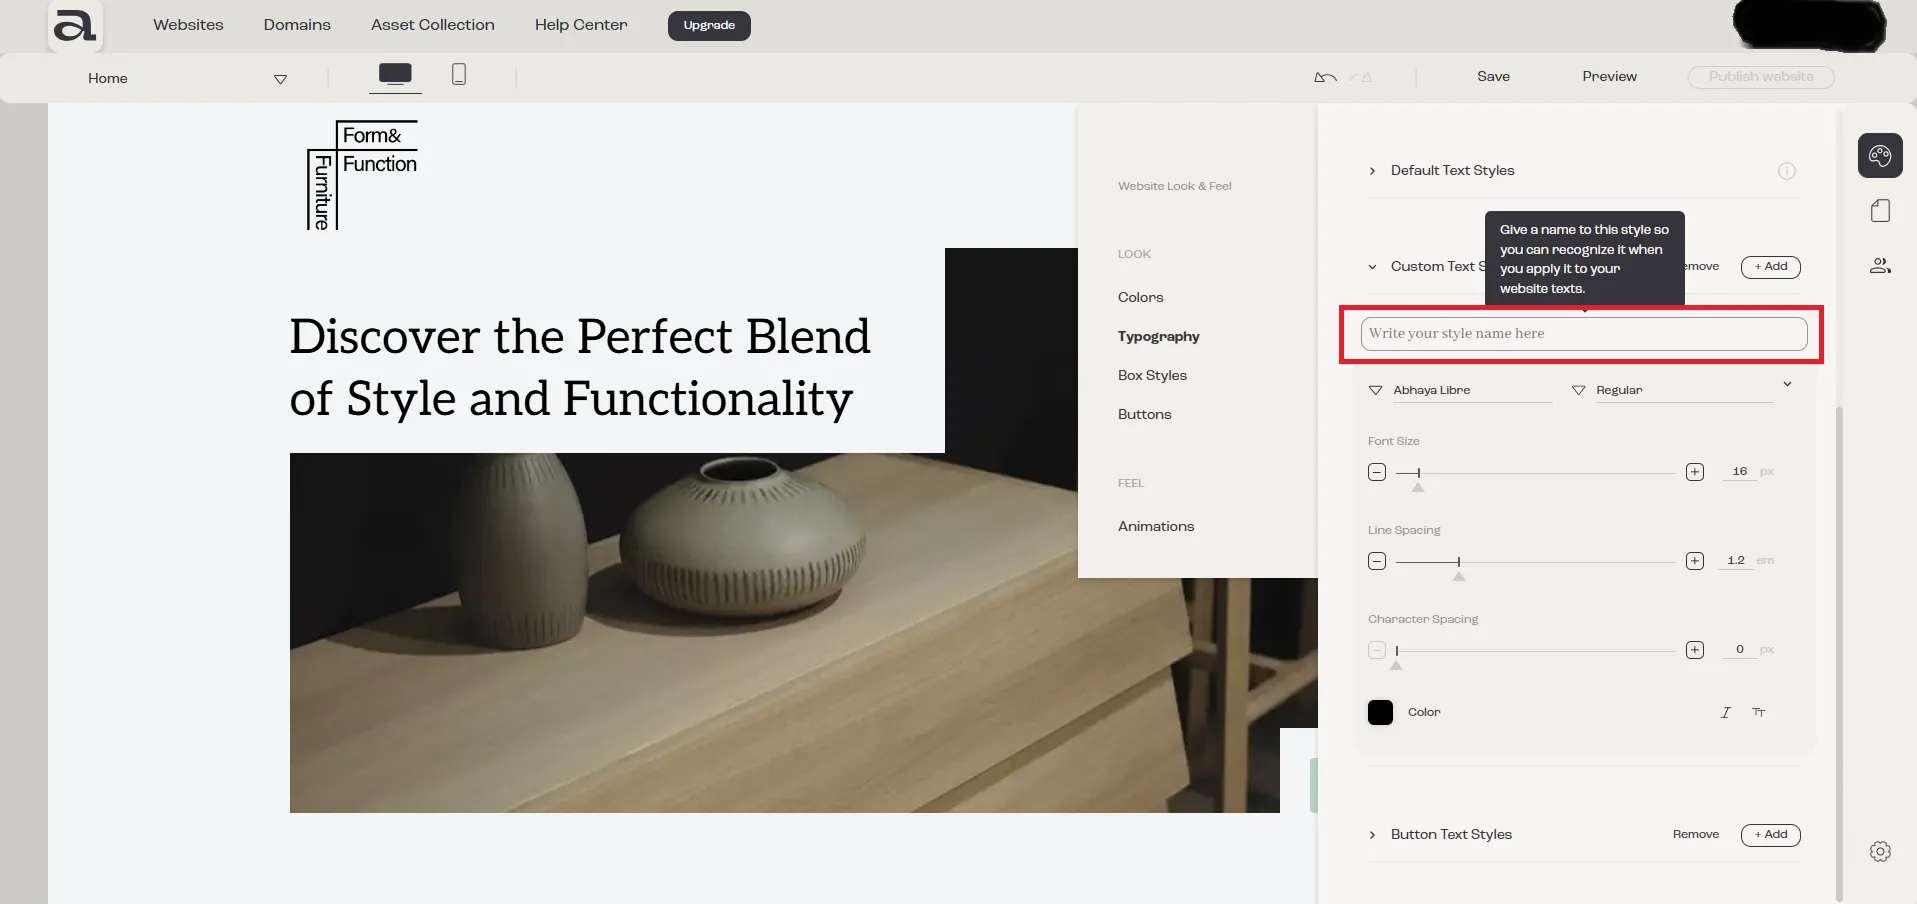
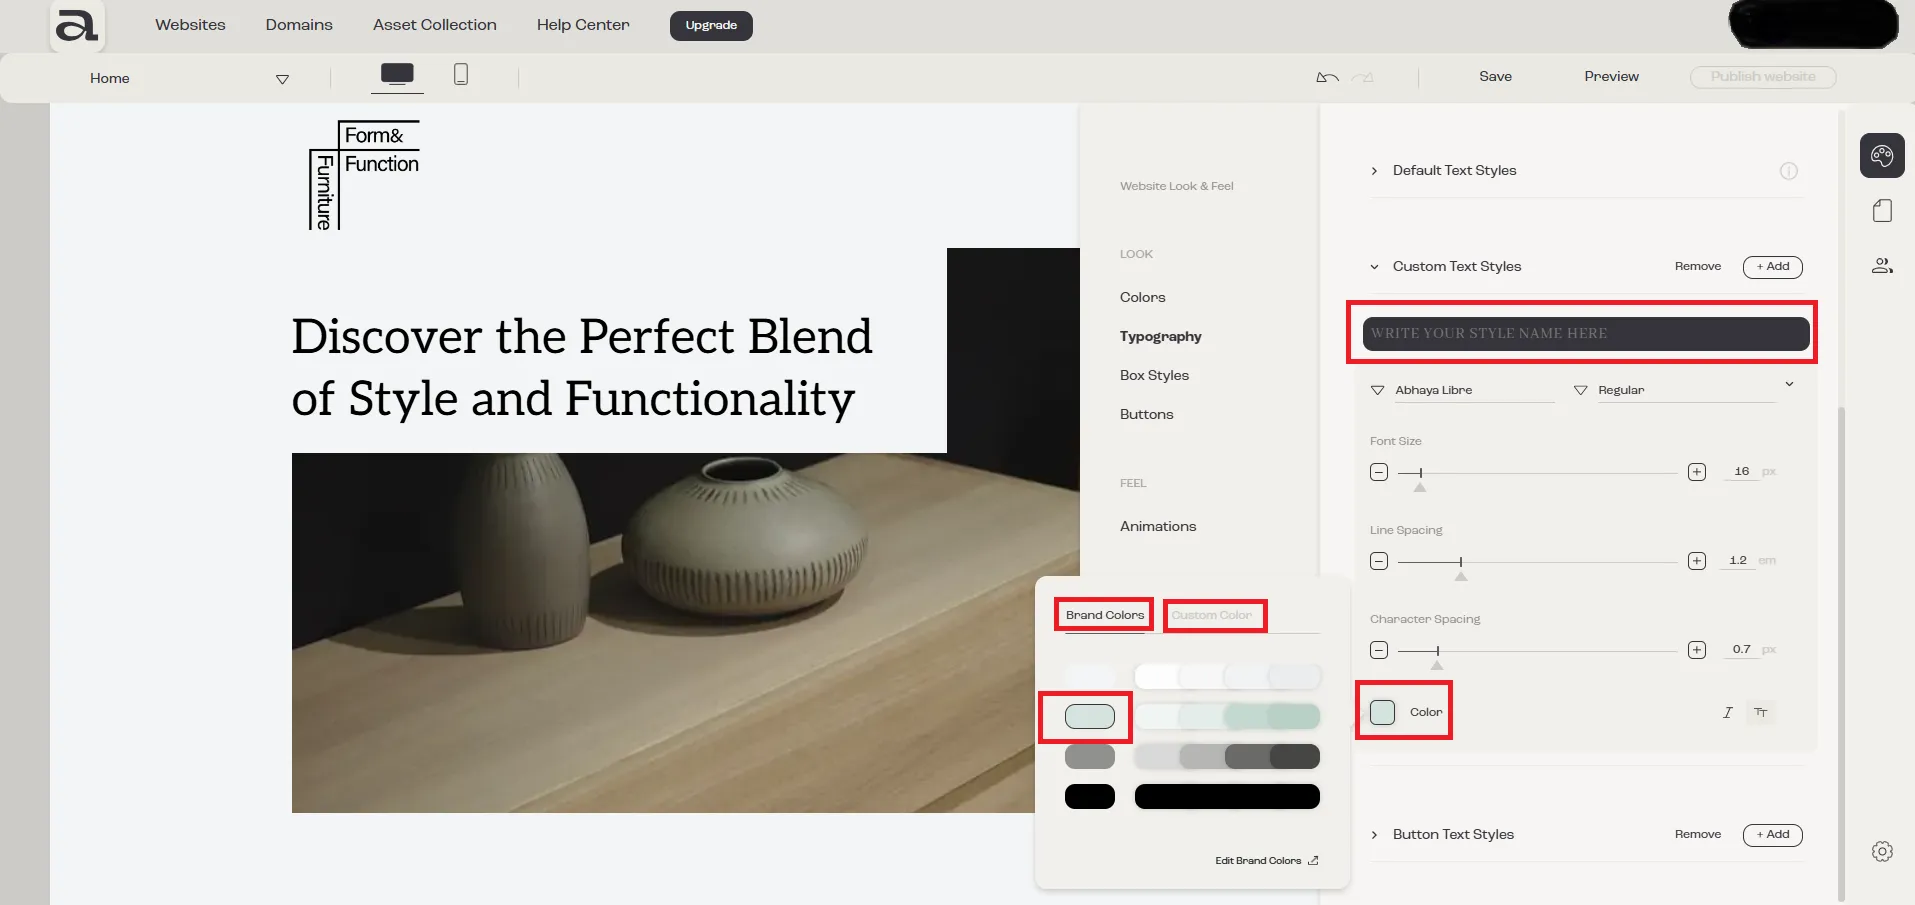
Section titled “3.1 - Naming the Style”First, you need to give your text style a name so you can easily recognize it when using it in your project. Click on the “Write your style name here” input field to name it.
3.2 - Choosing the Font
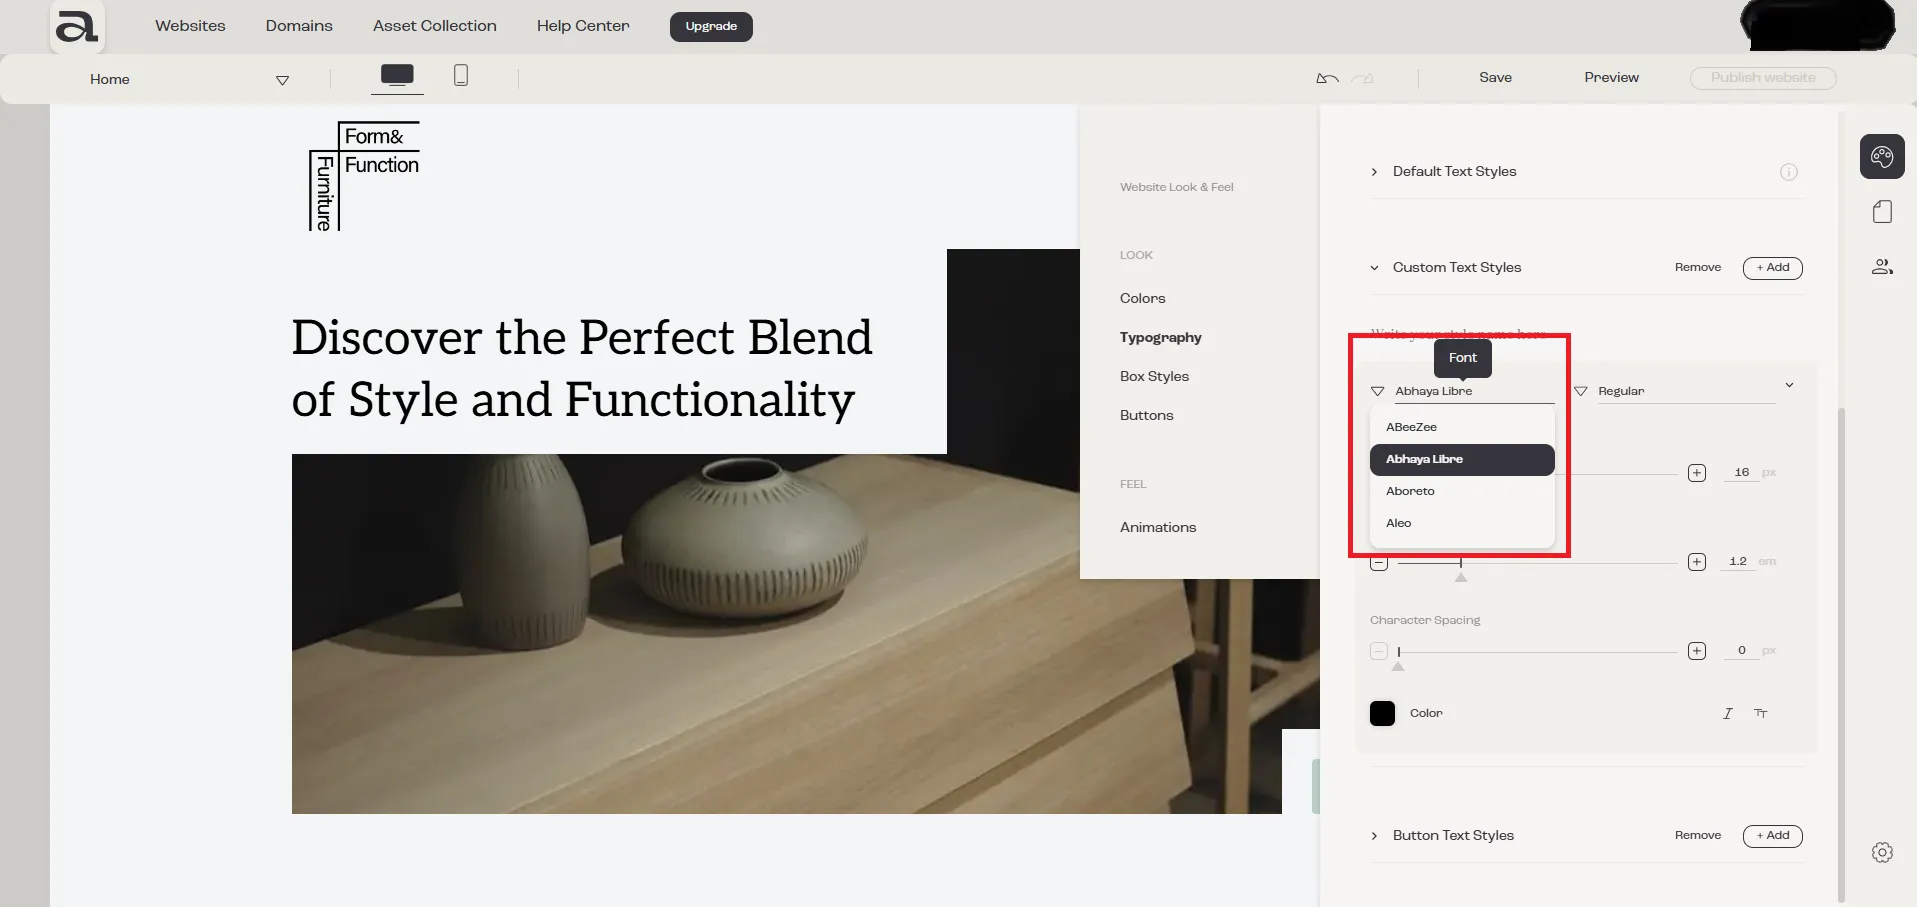
Section titled “3.2 - Choosing the Font”To select your desired font, click on the “Font” dropdown and choose from the available options.
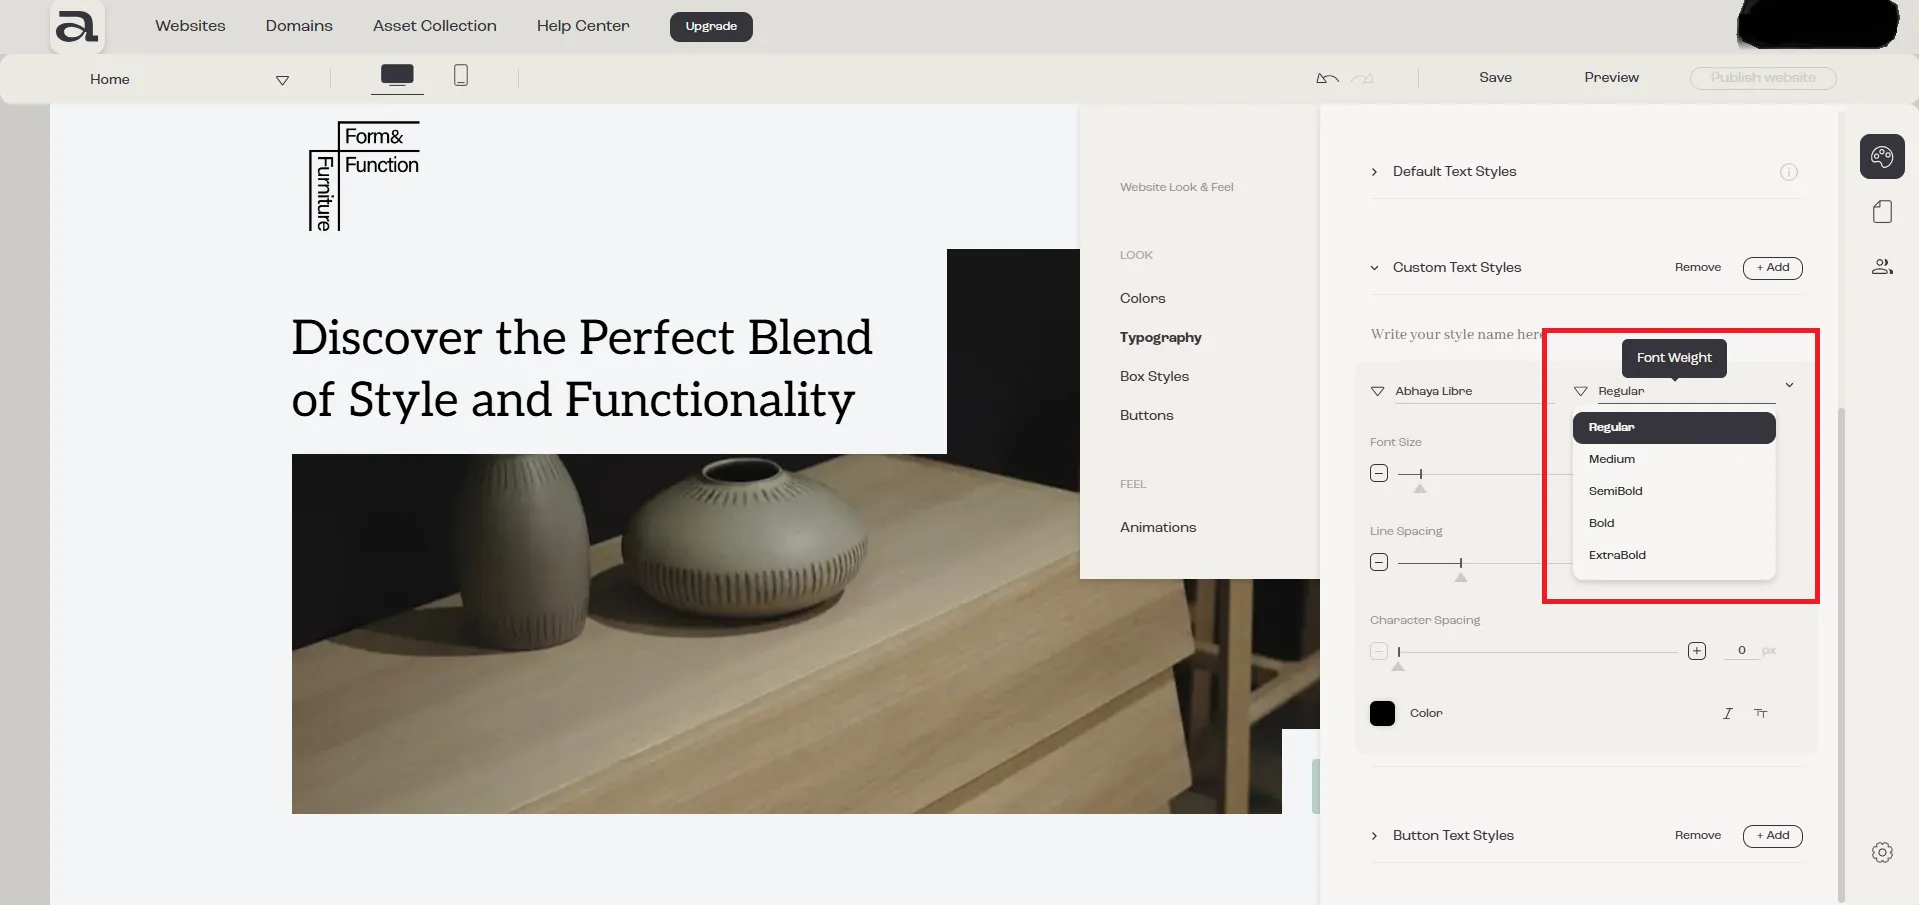
3.3 - Choosing the Font Weight (Bold, Thin, etc)
Section titled “3.3 - Choosing the Font Weight (Bold, Thin, etc)”To select the desired font weight, click on the “Font Weight” dropdown and choose the appropriate value.
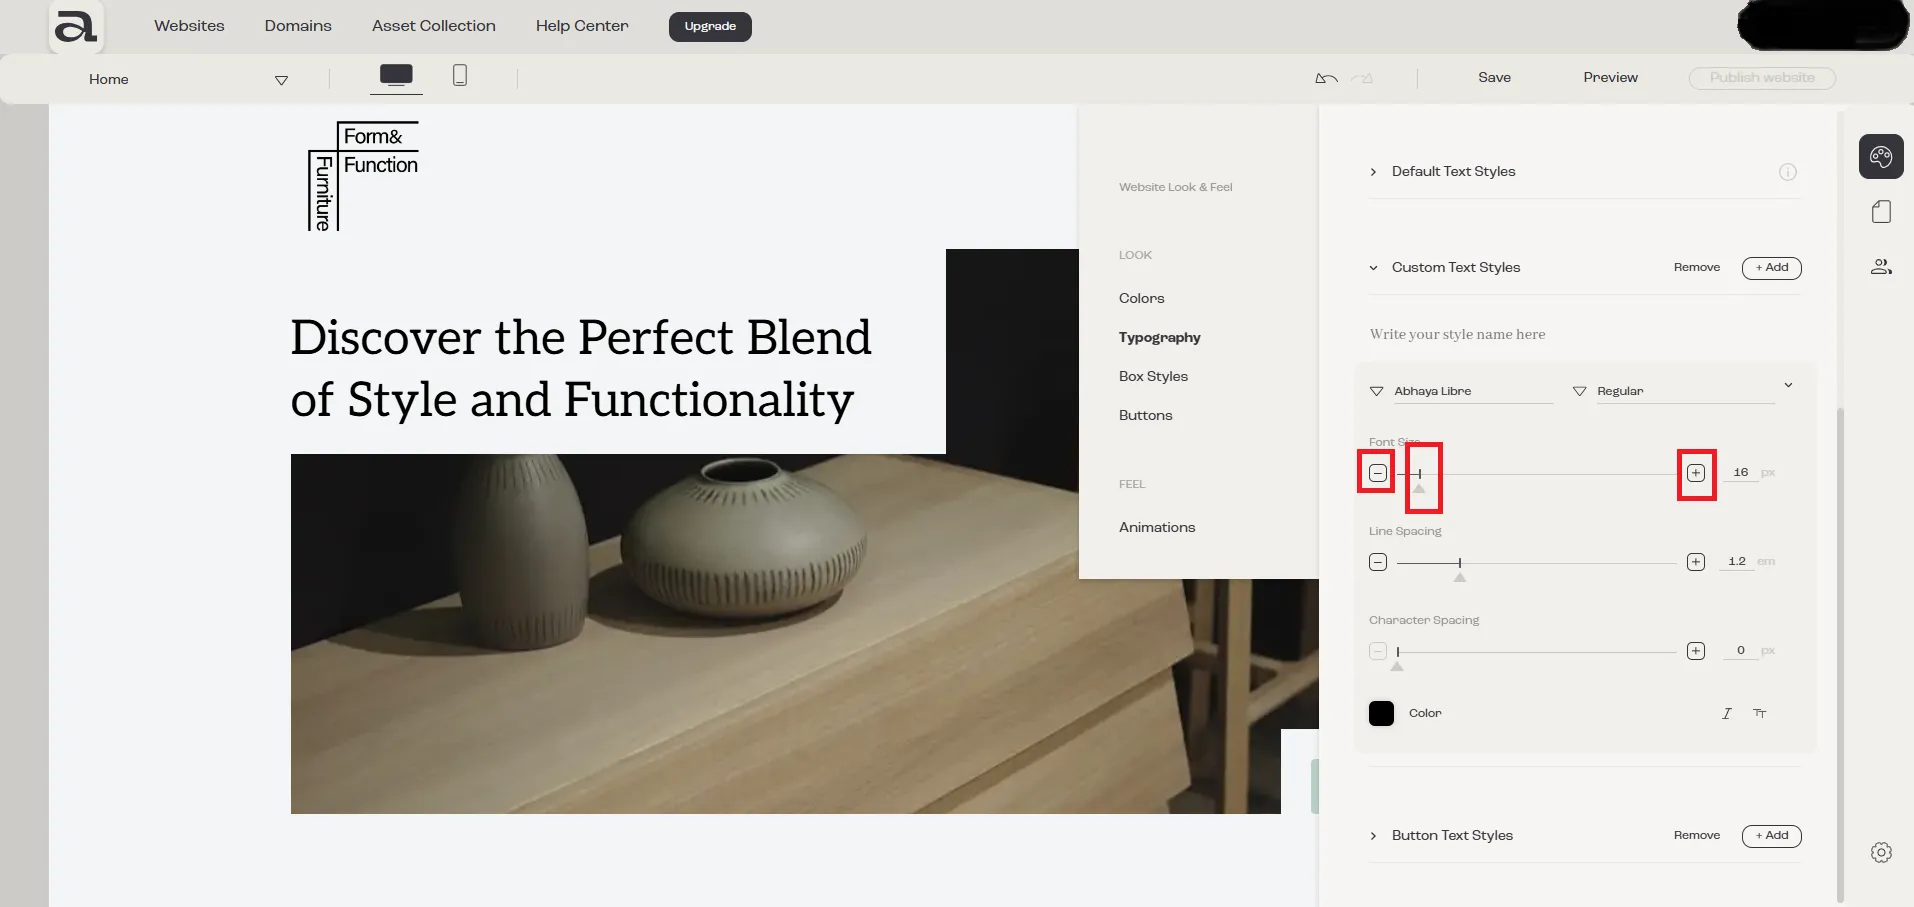
3.4 - Adjusting Font Size
Section titled “3.4 - Adjusting Font Size”- To increase the font size, click the “+” button.
- To decrease the font size, click the “-” button.
- You can also enter a numeric value in the input field (in pixels).
- Alternatively, you can adjust it by dragging the cursor left or right on the bar.
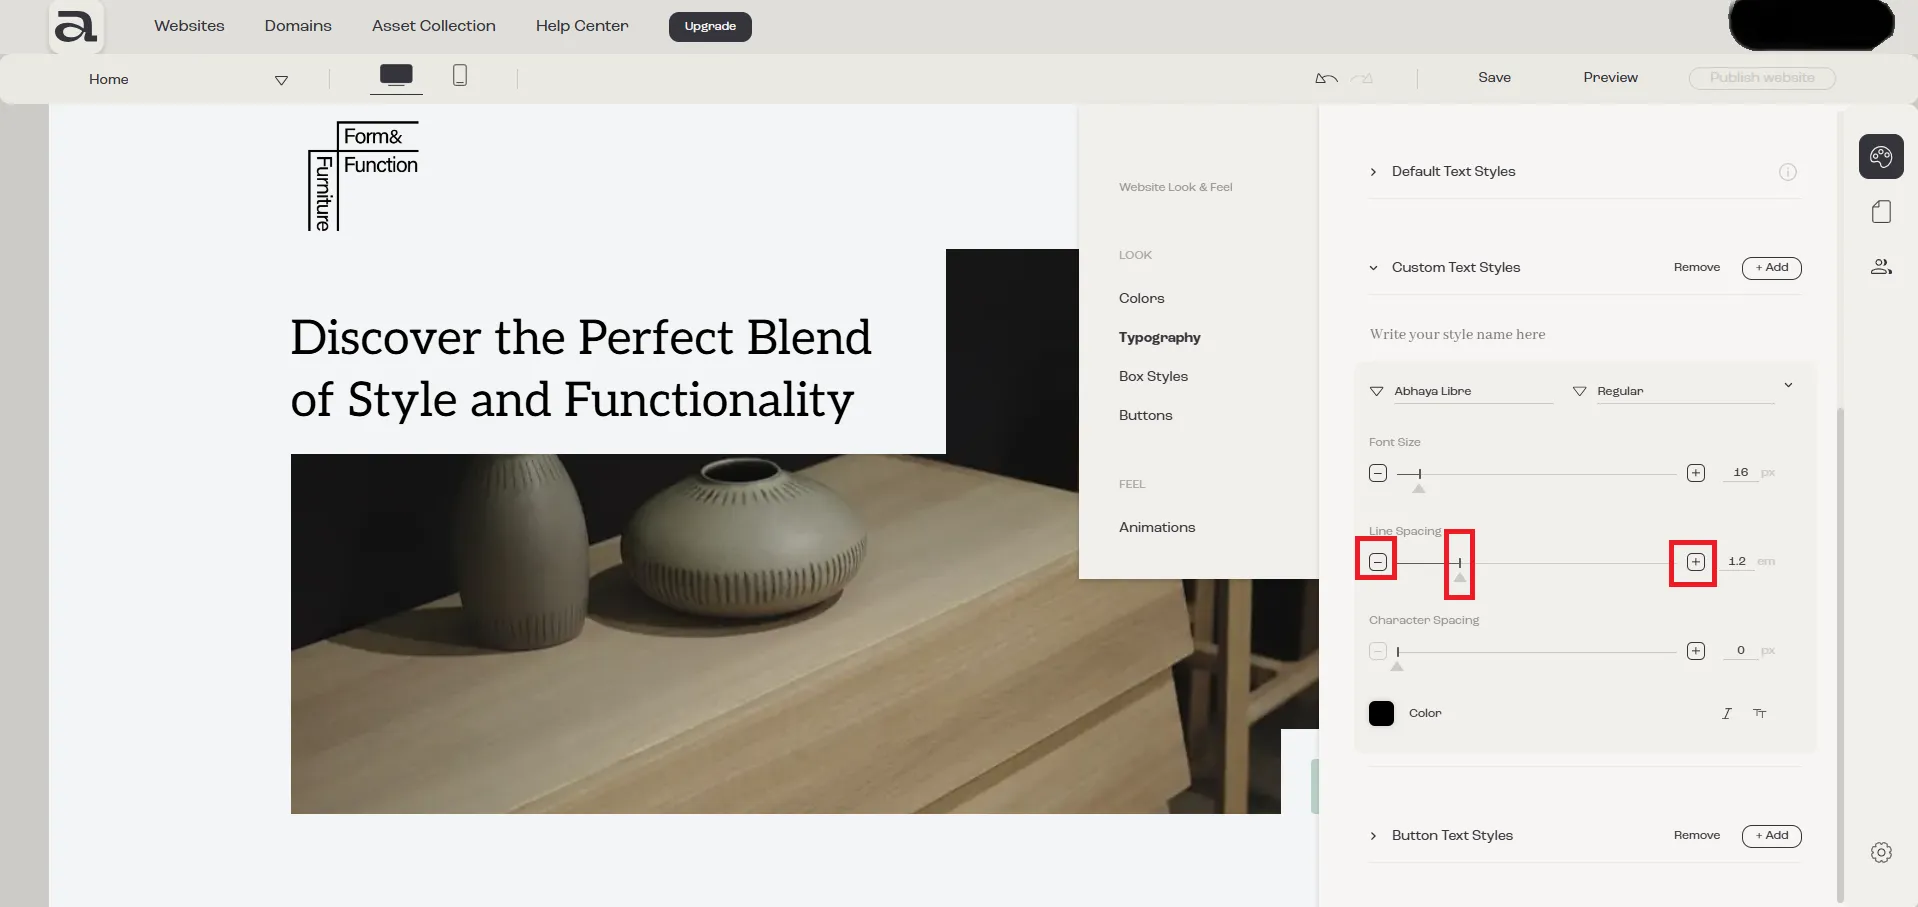
3.5 - Adjusting Line Spacing
Section titled “3.5 - Adjusting Line Spacing”- To increase line spacing, click the “+” button.
- To decrease line spacing, click the “-” button.
- You can also enter a numeric value in the input field (in em).
- You can also adjust it by dragging the cursor left or right on the bar.
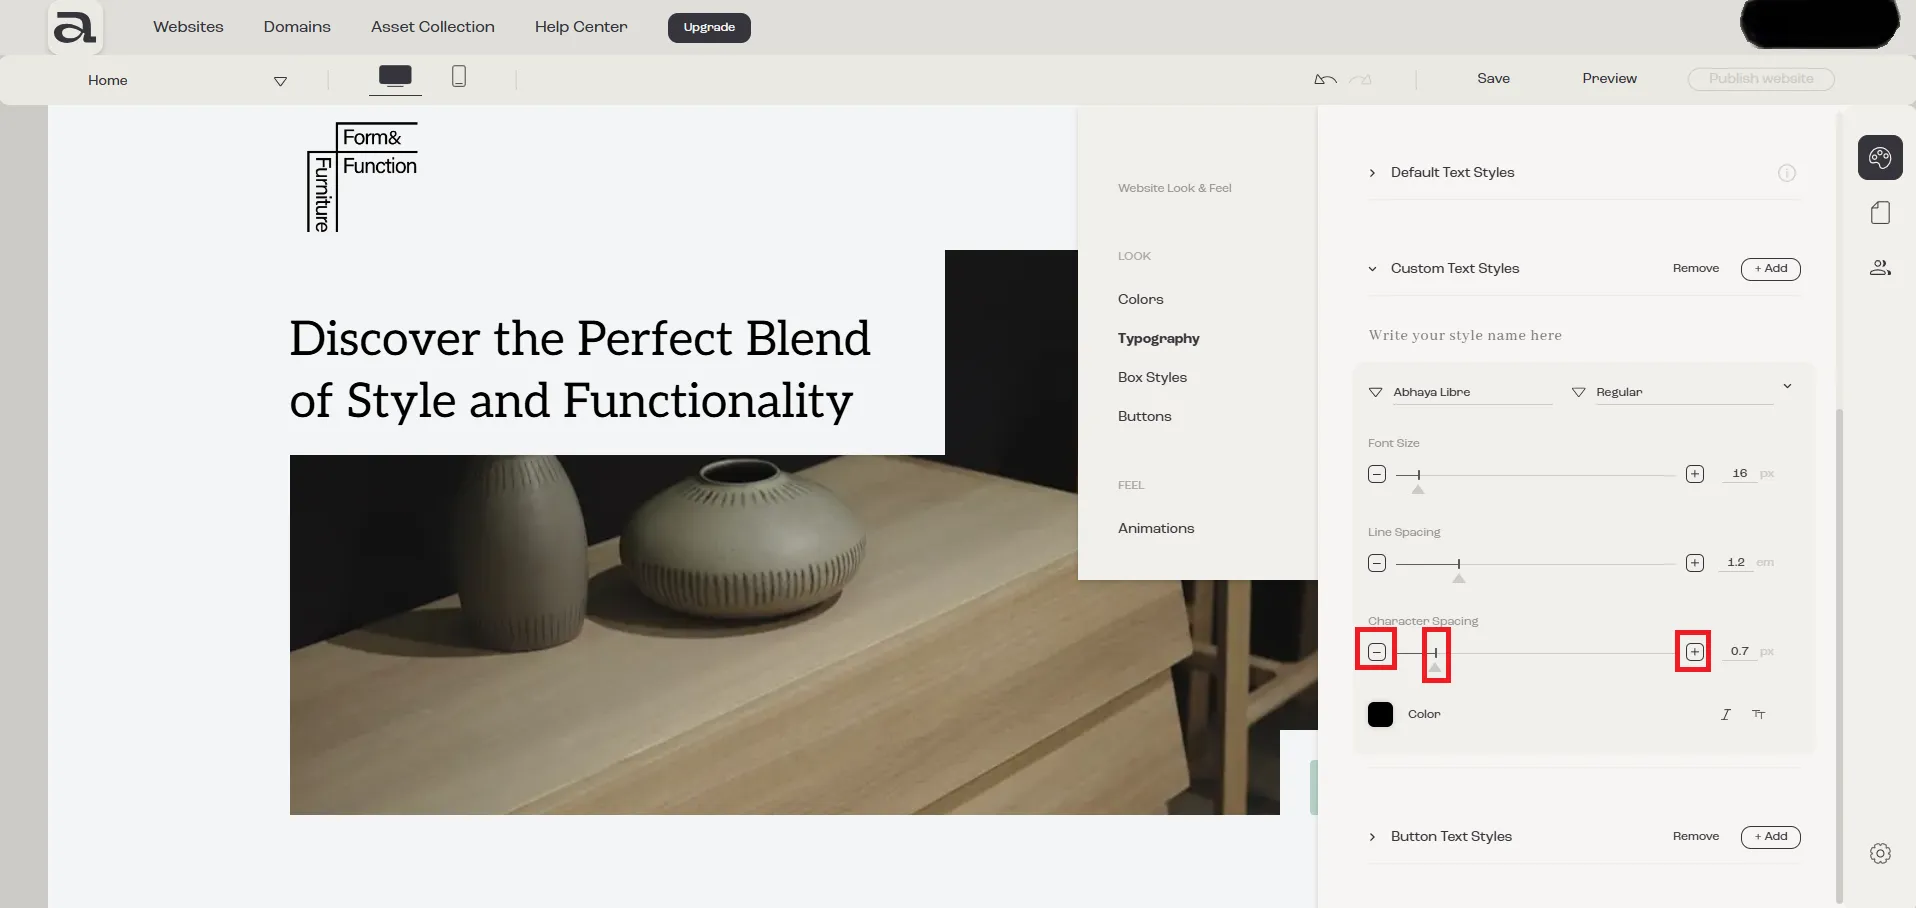
3.6 - Adjusting Character Spacing
Section titled “3.6 - Adjusting Character Spacing”- To increase character spacing, click the “+” button.
- To decrease character spacing, click the “-” button.
- You can also enter a numeric value in the input field (in pixels).
- You can also adjust it by dragging the cursor left or right on the bar.
3.7 - Choosing a Color
Section titled “3.7 - Choosing a Color”To select a color, click on the “Color” icon.
You have two options for selecting a color:
- Brand Colors – Choose from the predefined brand colors you previously added.
- Custom Colors – Select a custom color.
3.8 - Italic
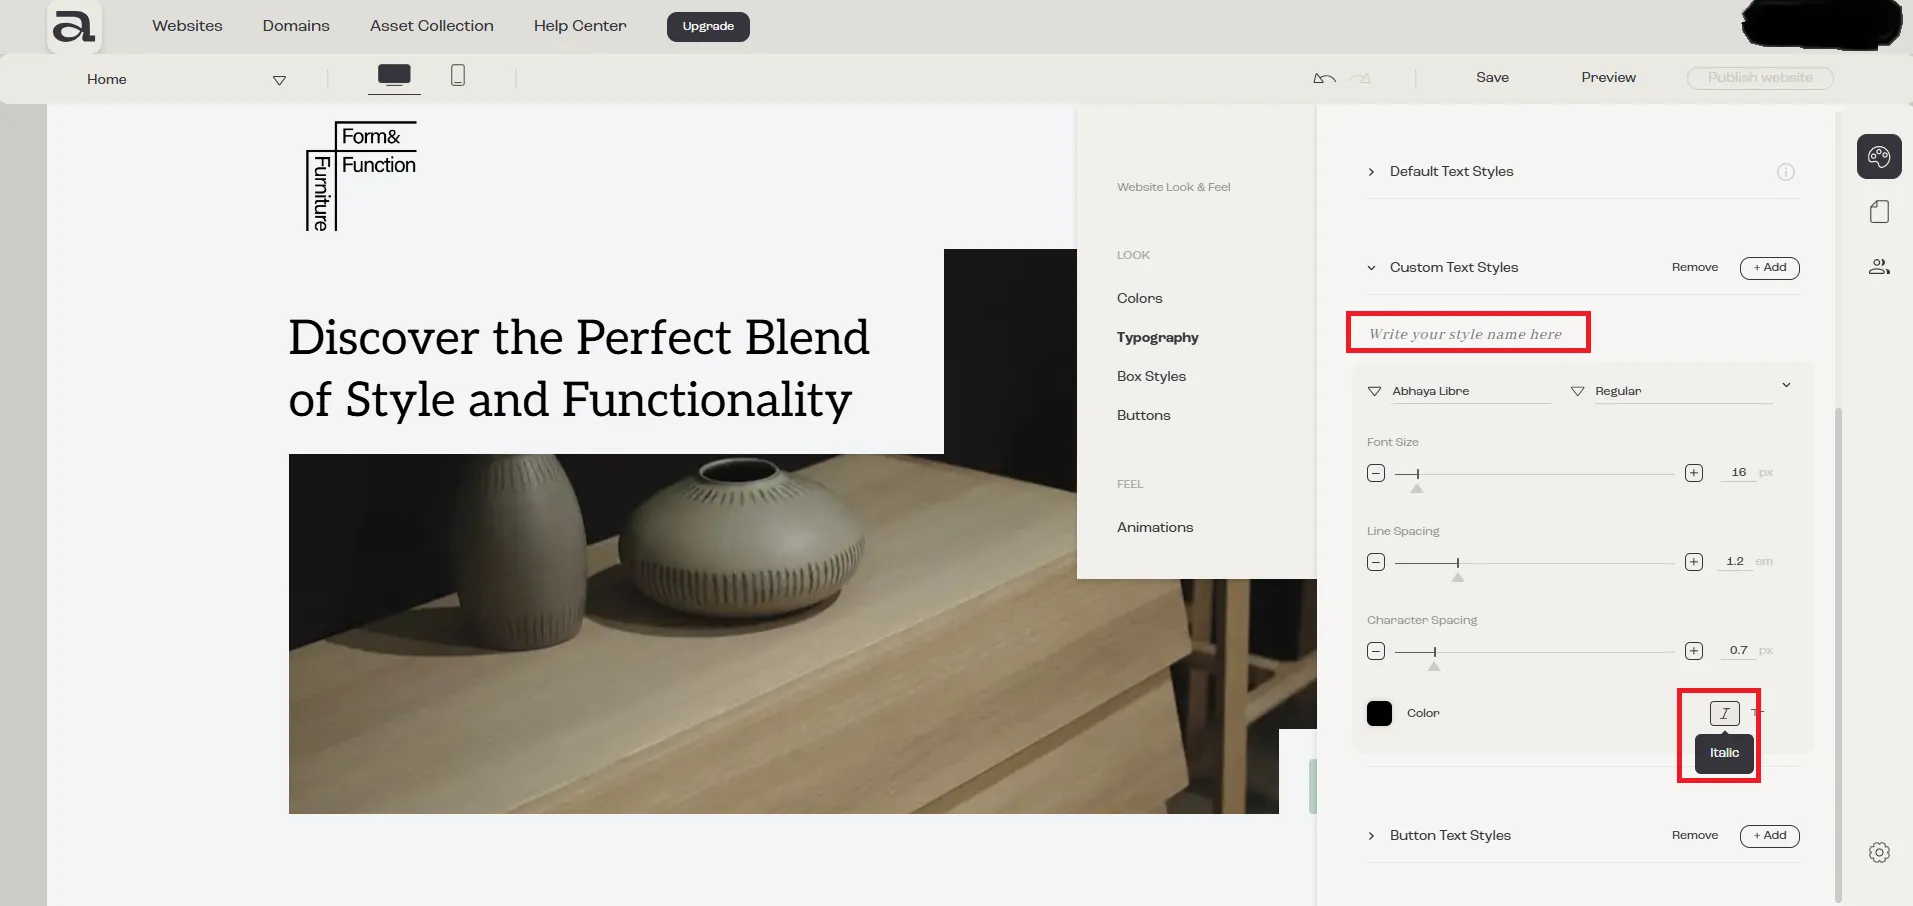
Section titled “3.8 - Italic”If you want the text to be italic, click on the “Italic” button.
3.9 - Uppercase
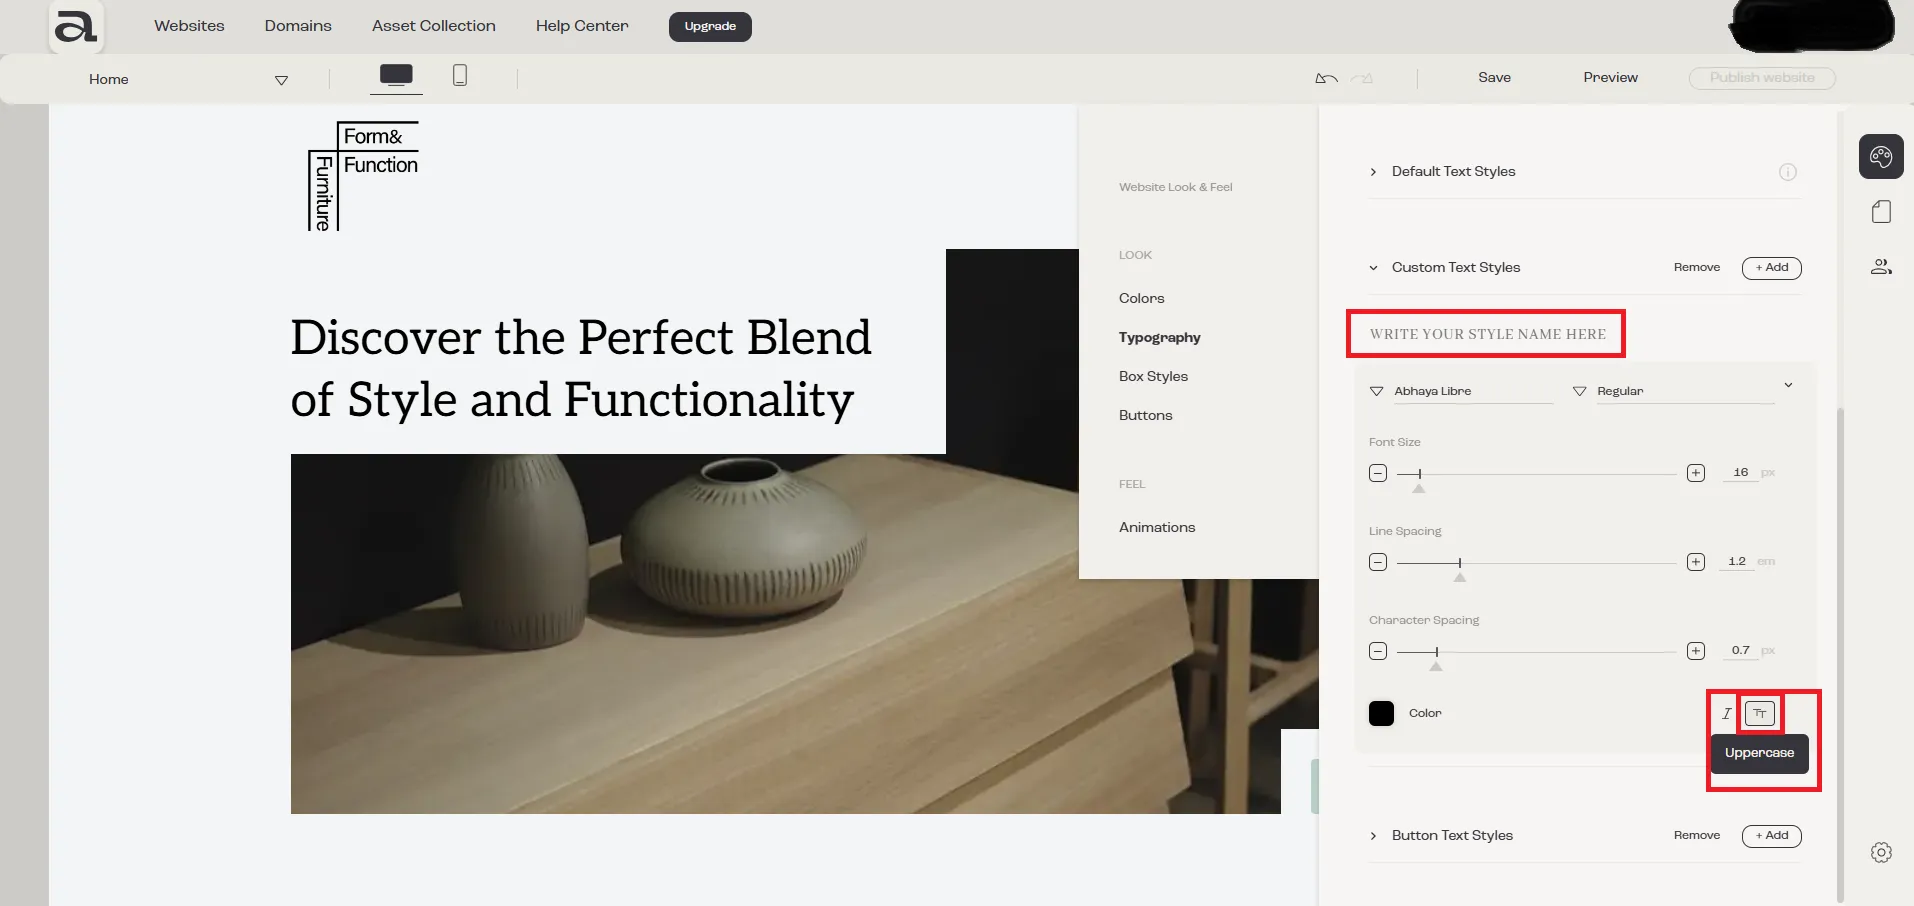
Section titled “3.9 - Uppercase”If you want the text to be uppercase, click on the “Uppercase” button.
3.10 - Underline
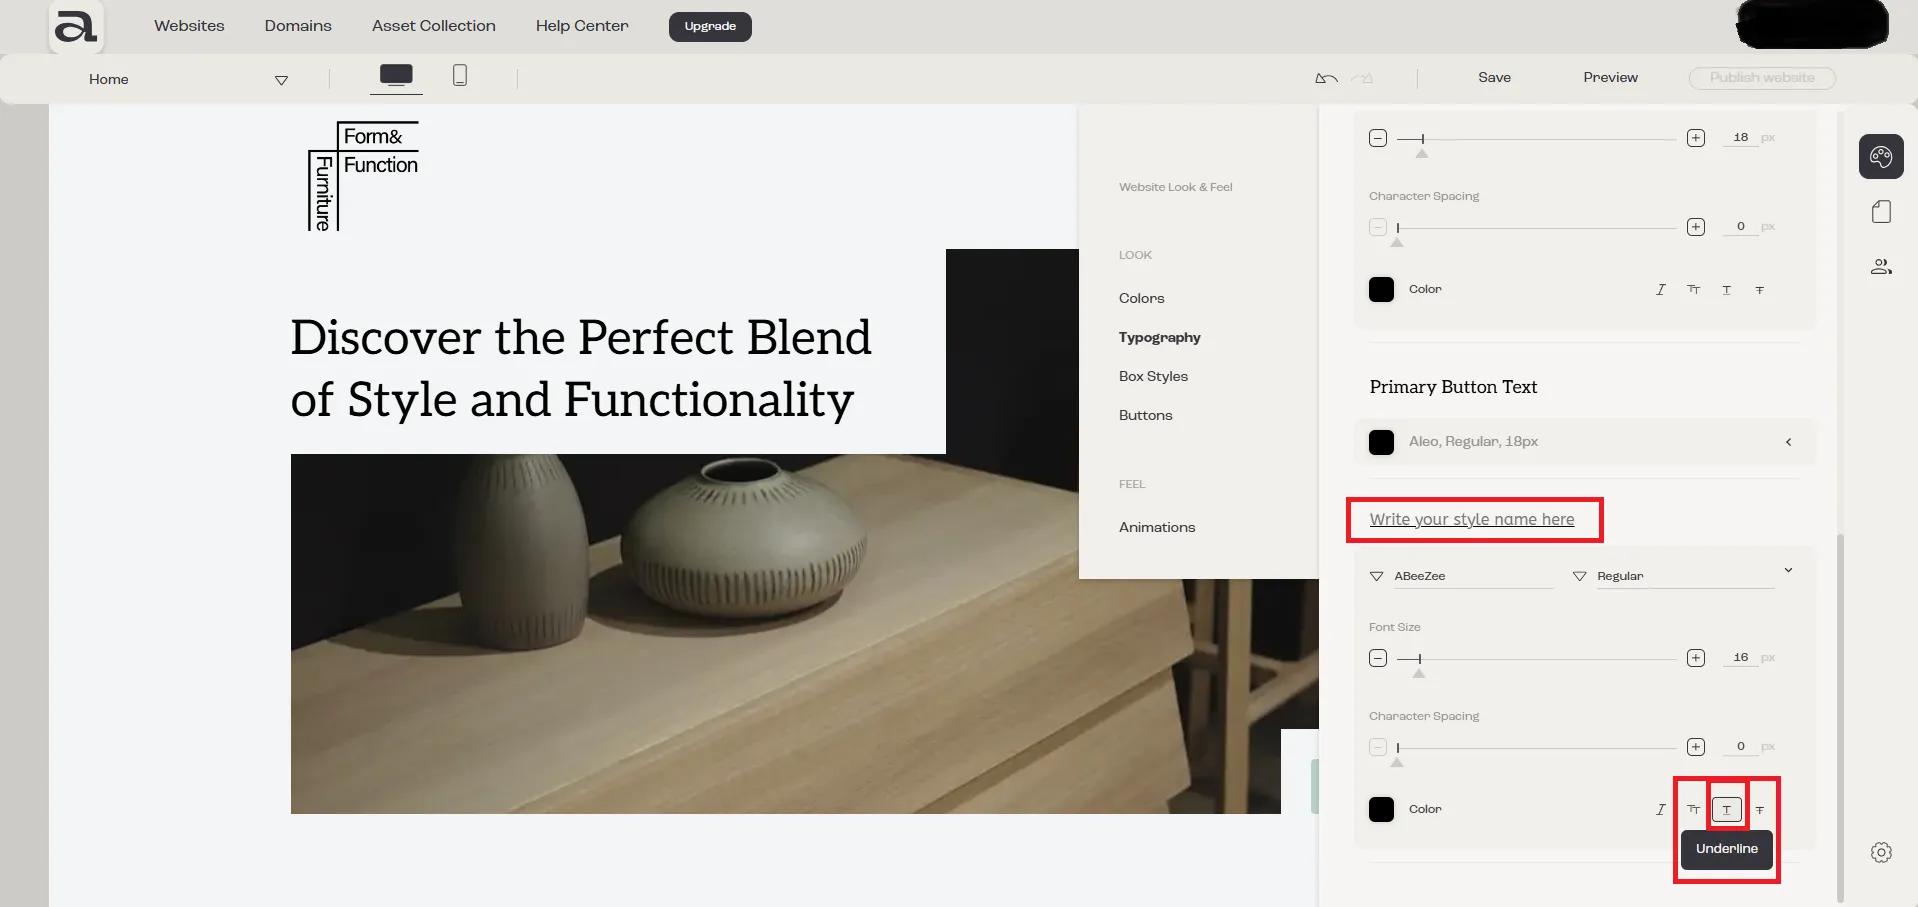
Section titled “3.10 - Underline”If you want the text to be underlined, click on the “Underline” button.
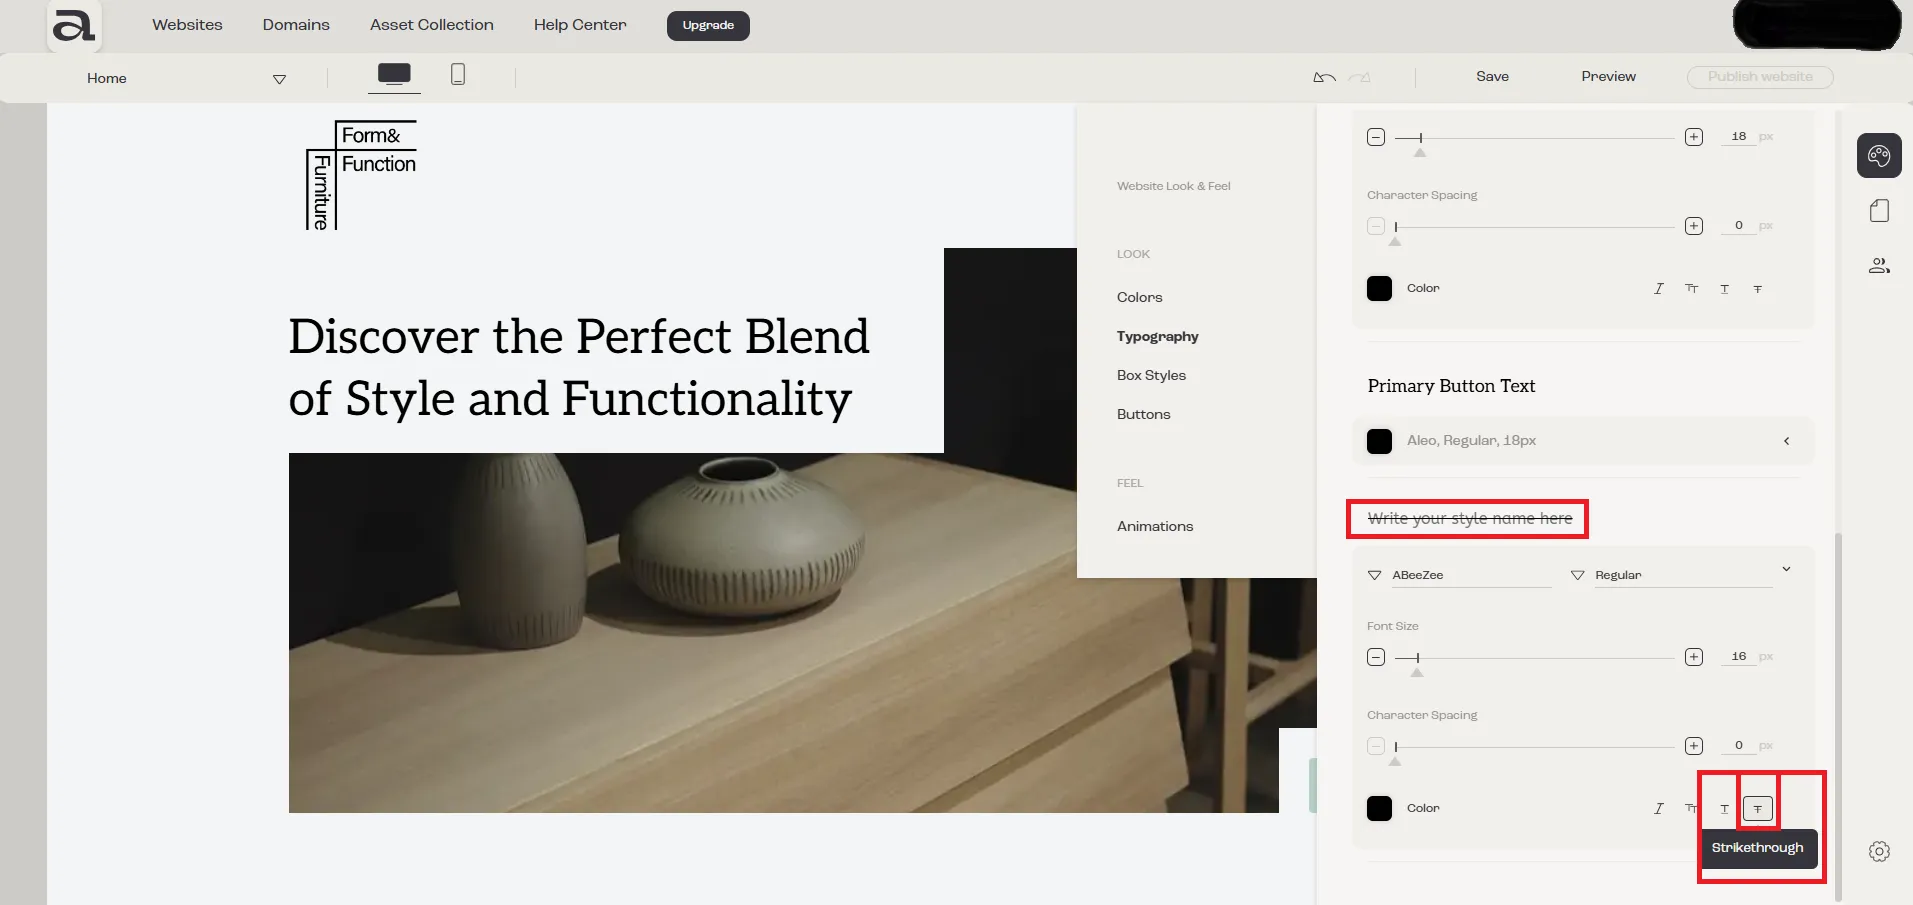
3.11 - Strikethrough
Section titled “3.11 - Strikethrough”If you want the text to have a strikethrough effect, click on the “Strikethrough” button.
Next steps
Section titled “Next steps”- how to add a button text style
- how to remove a button text style