

How to add and use an anchor element
In this tutorial, we will guide you on how to add and use an anchor element.
Step 1 - Open “Add Element” Menu
Section titled “Step 1 - Open “Add Element” Menu”To add a new element to the page, you have two options:
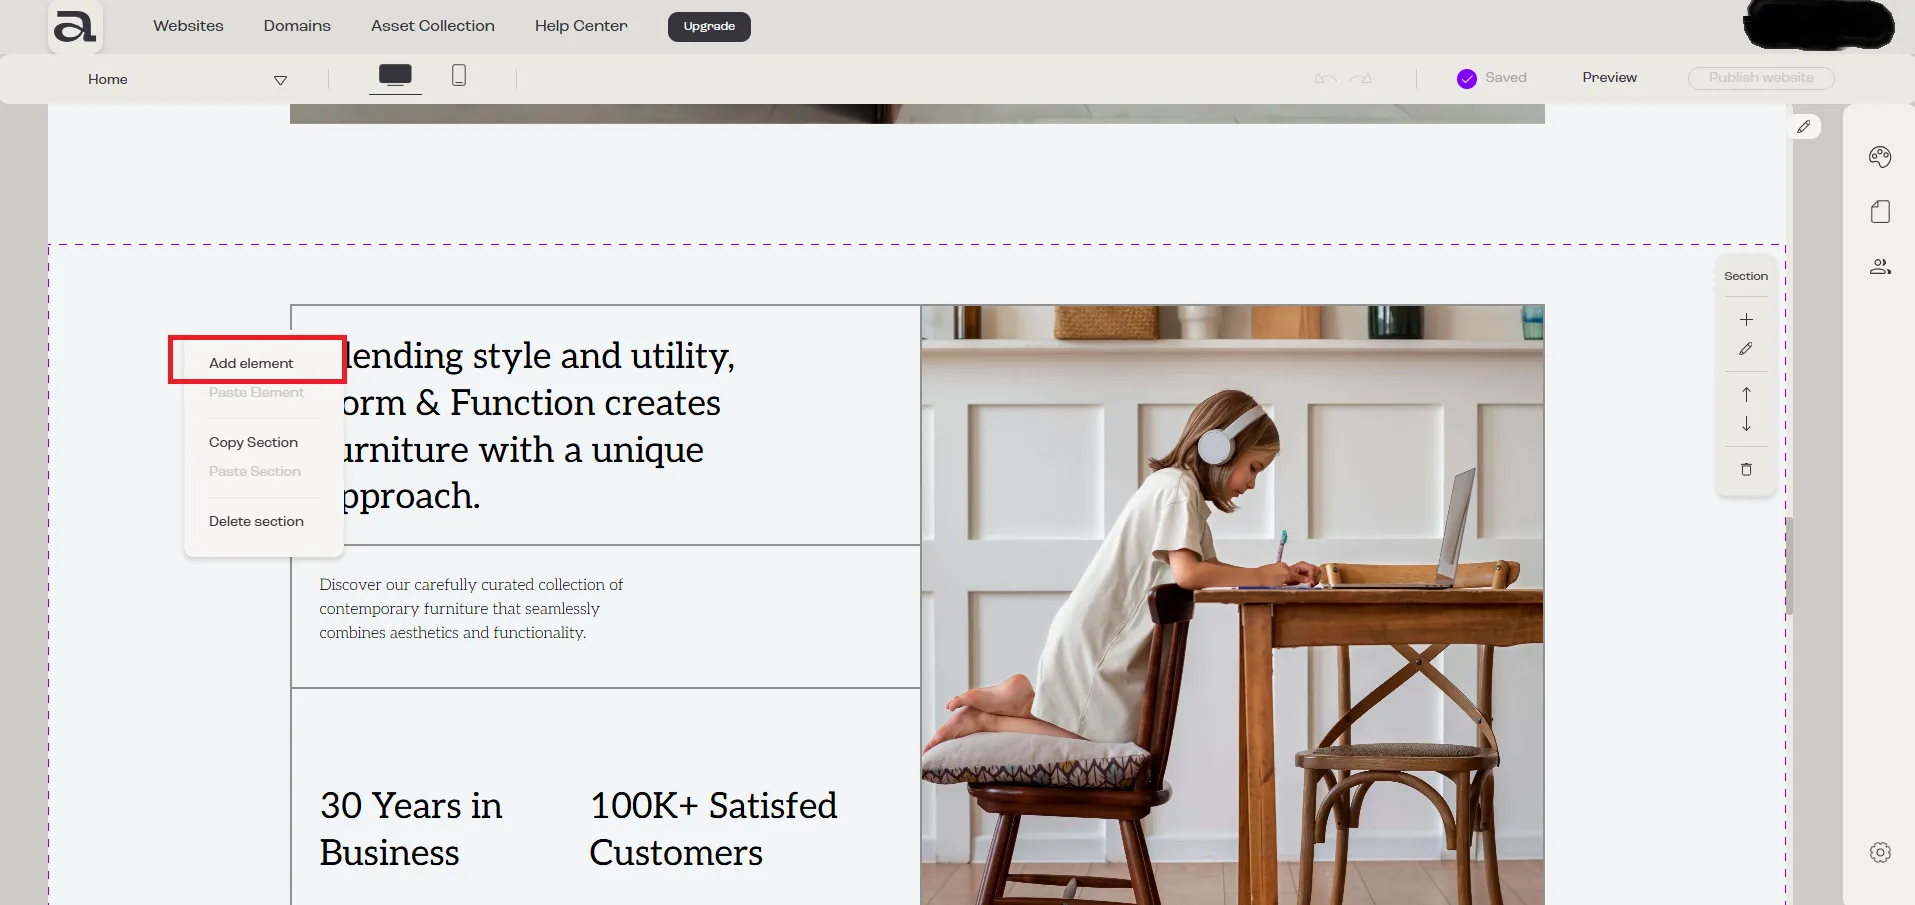
1. Right-click anywhere on the page and select “Add Element”.
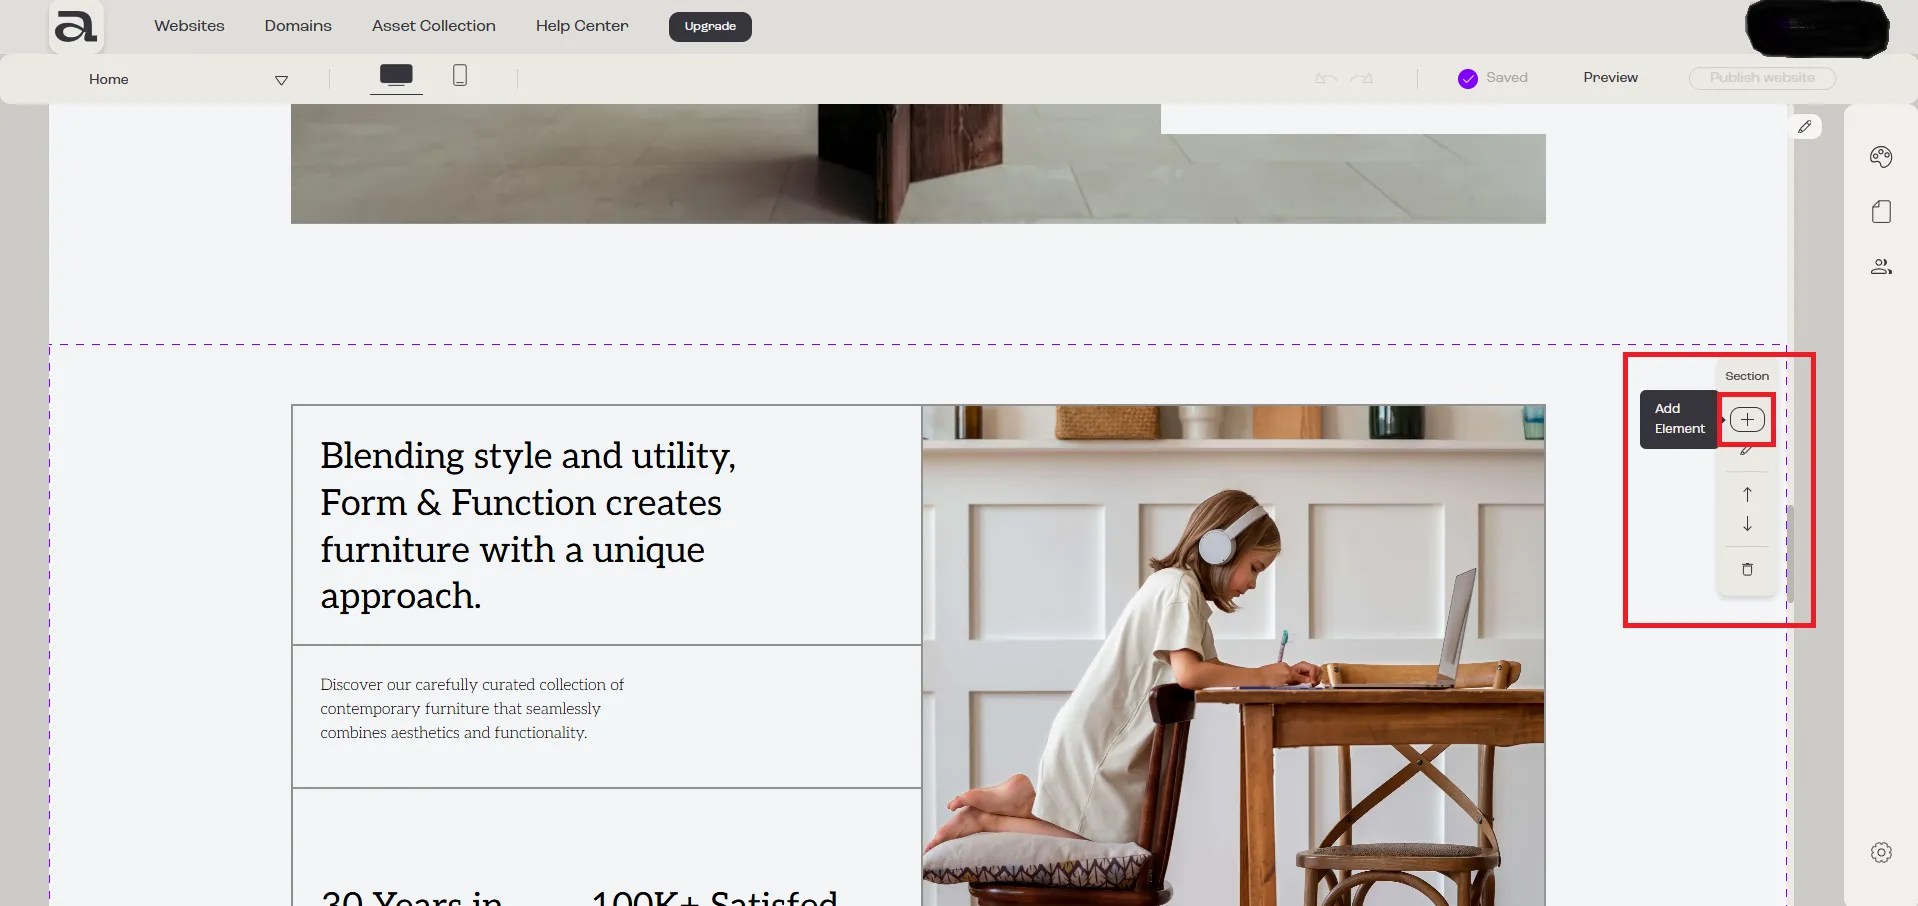
2. In the “Section” menu on the right side of the section where you want to add the element, click the “+” button.
Step 2 - Add Anchor Element
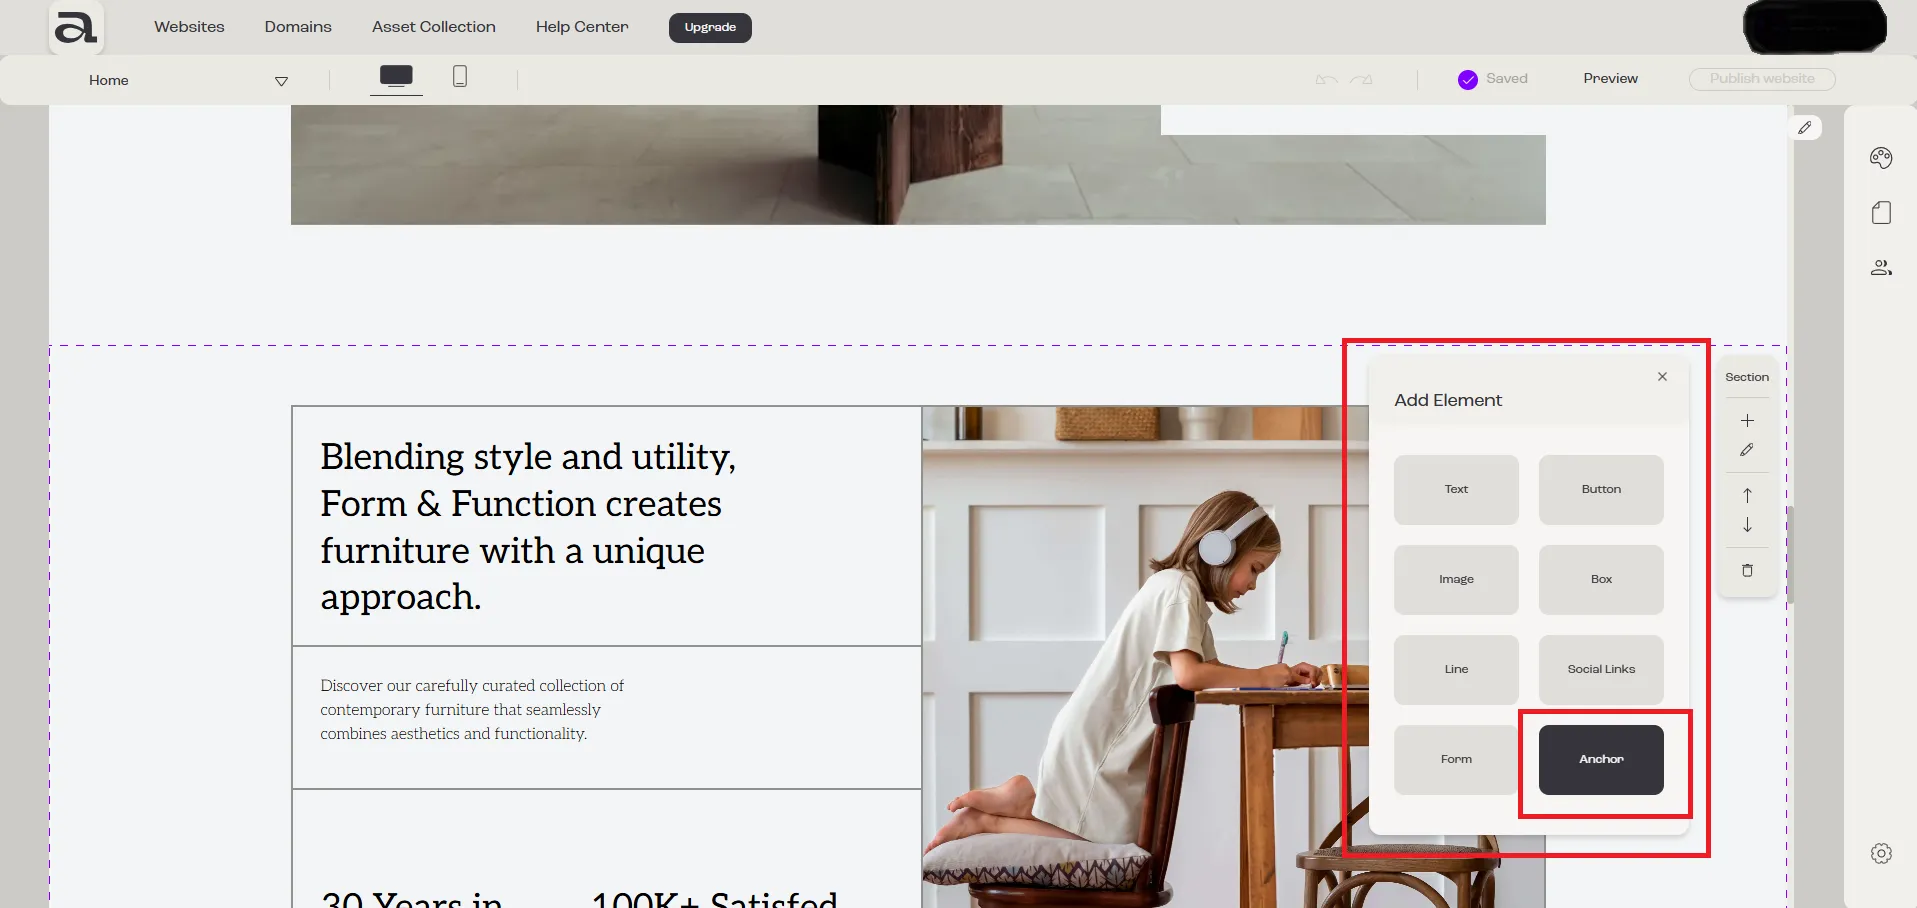
Section titled “Step 2 - Add Anchor Element”In the “Add Element” menu, click on the “Anchor” element.
Step 3 - Open Anchor Settings
Section titled “Step 3 - Open Anchor Settings”You can open the anchor settings in two ways:
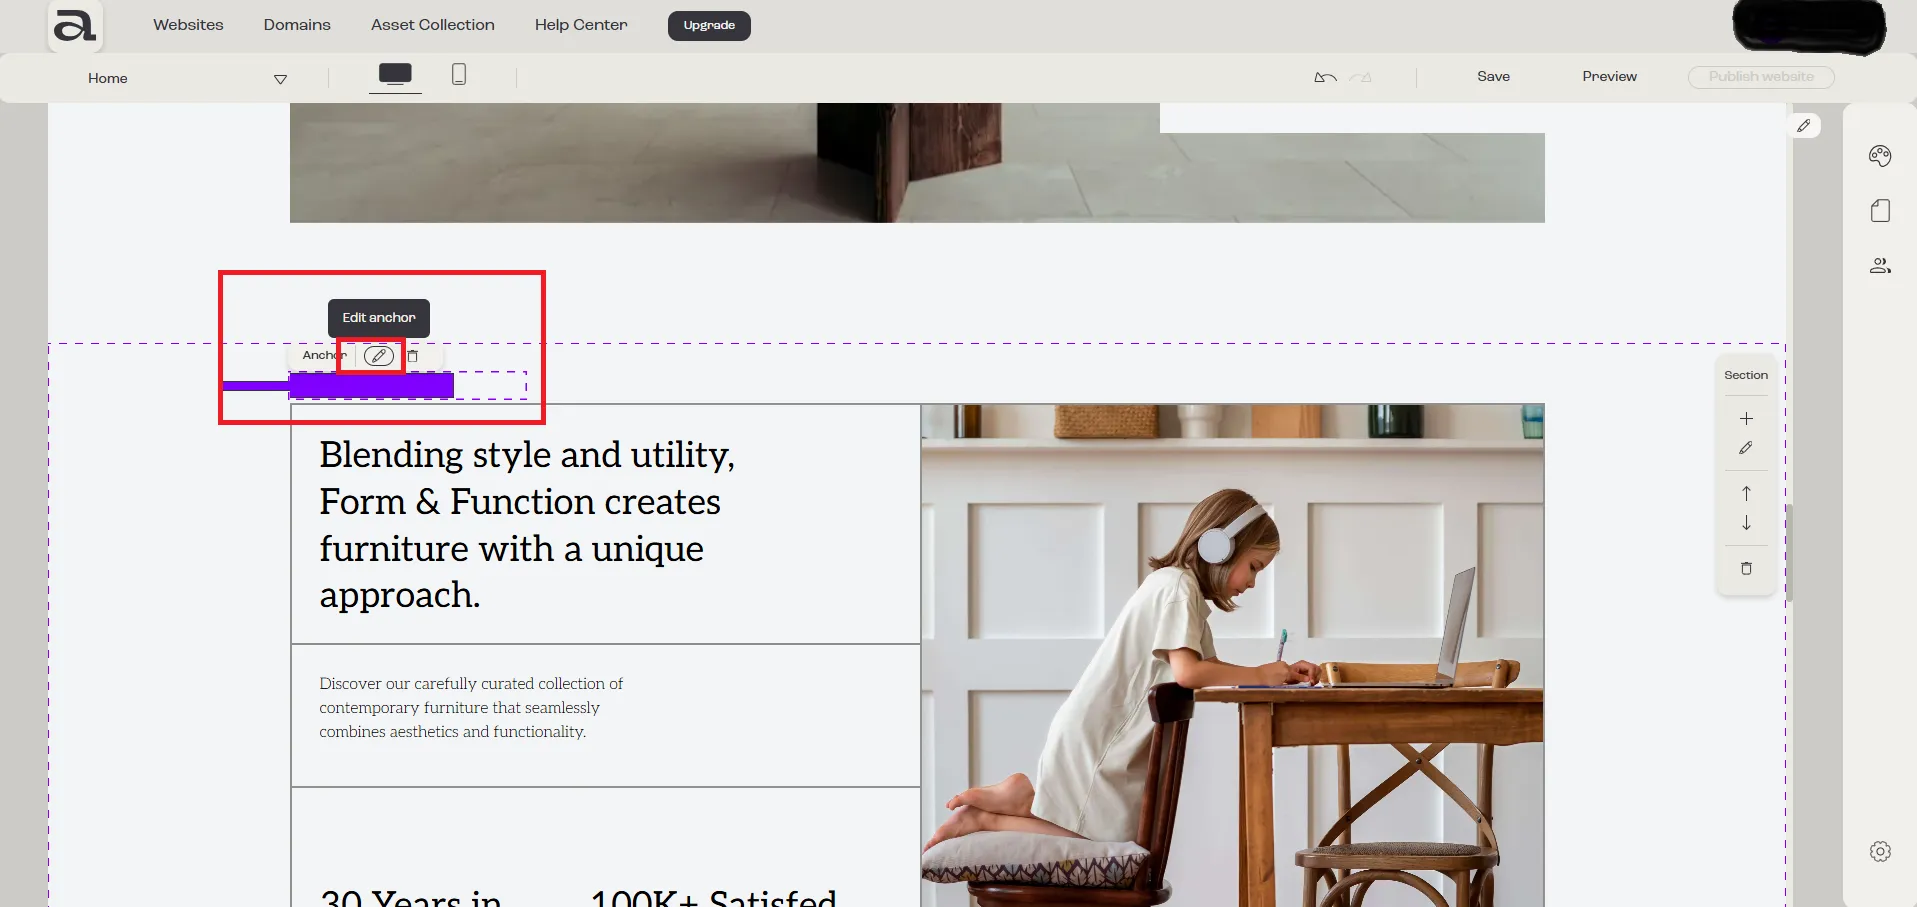
- Double-click on the element.
- Hover over the element and click on “Edit Anchor”.
Step 3.1 - Setting Up the Anchor ID
Section titled “Step 3.1 - Setting Up the Anchor ID”For the anchor to function properly, you must enter a valid Anchor ID in the “Anchor ID” input field.
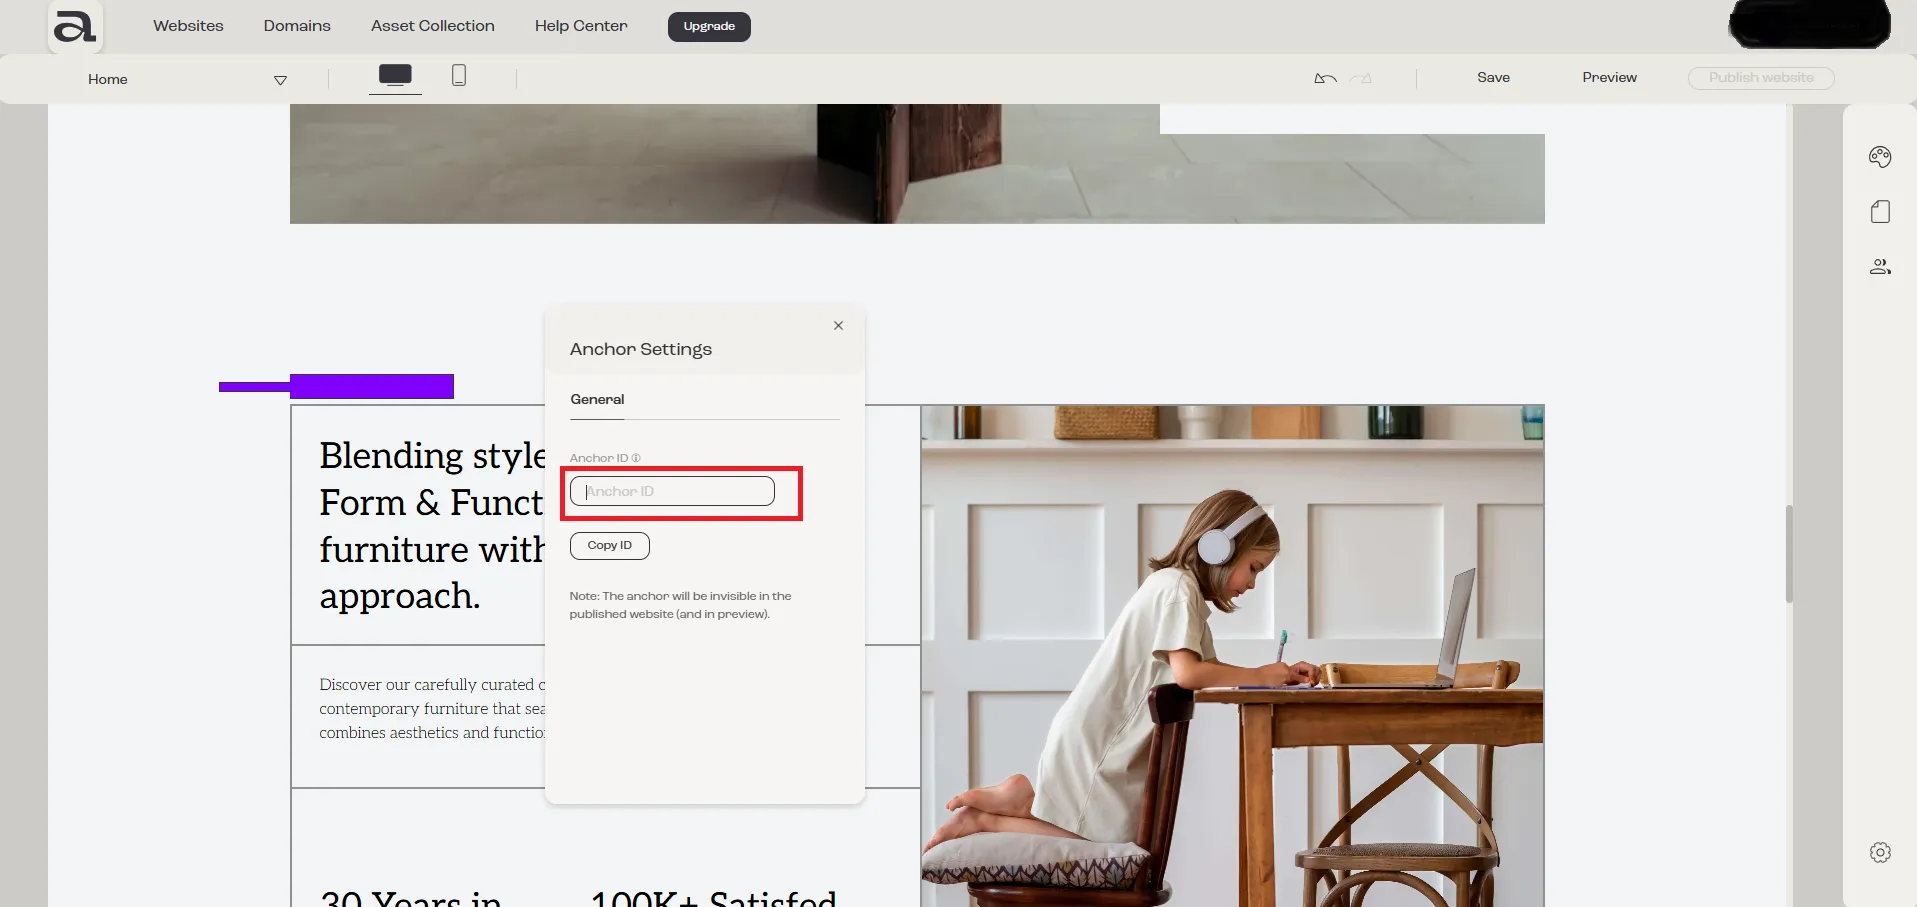
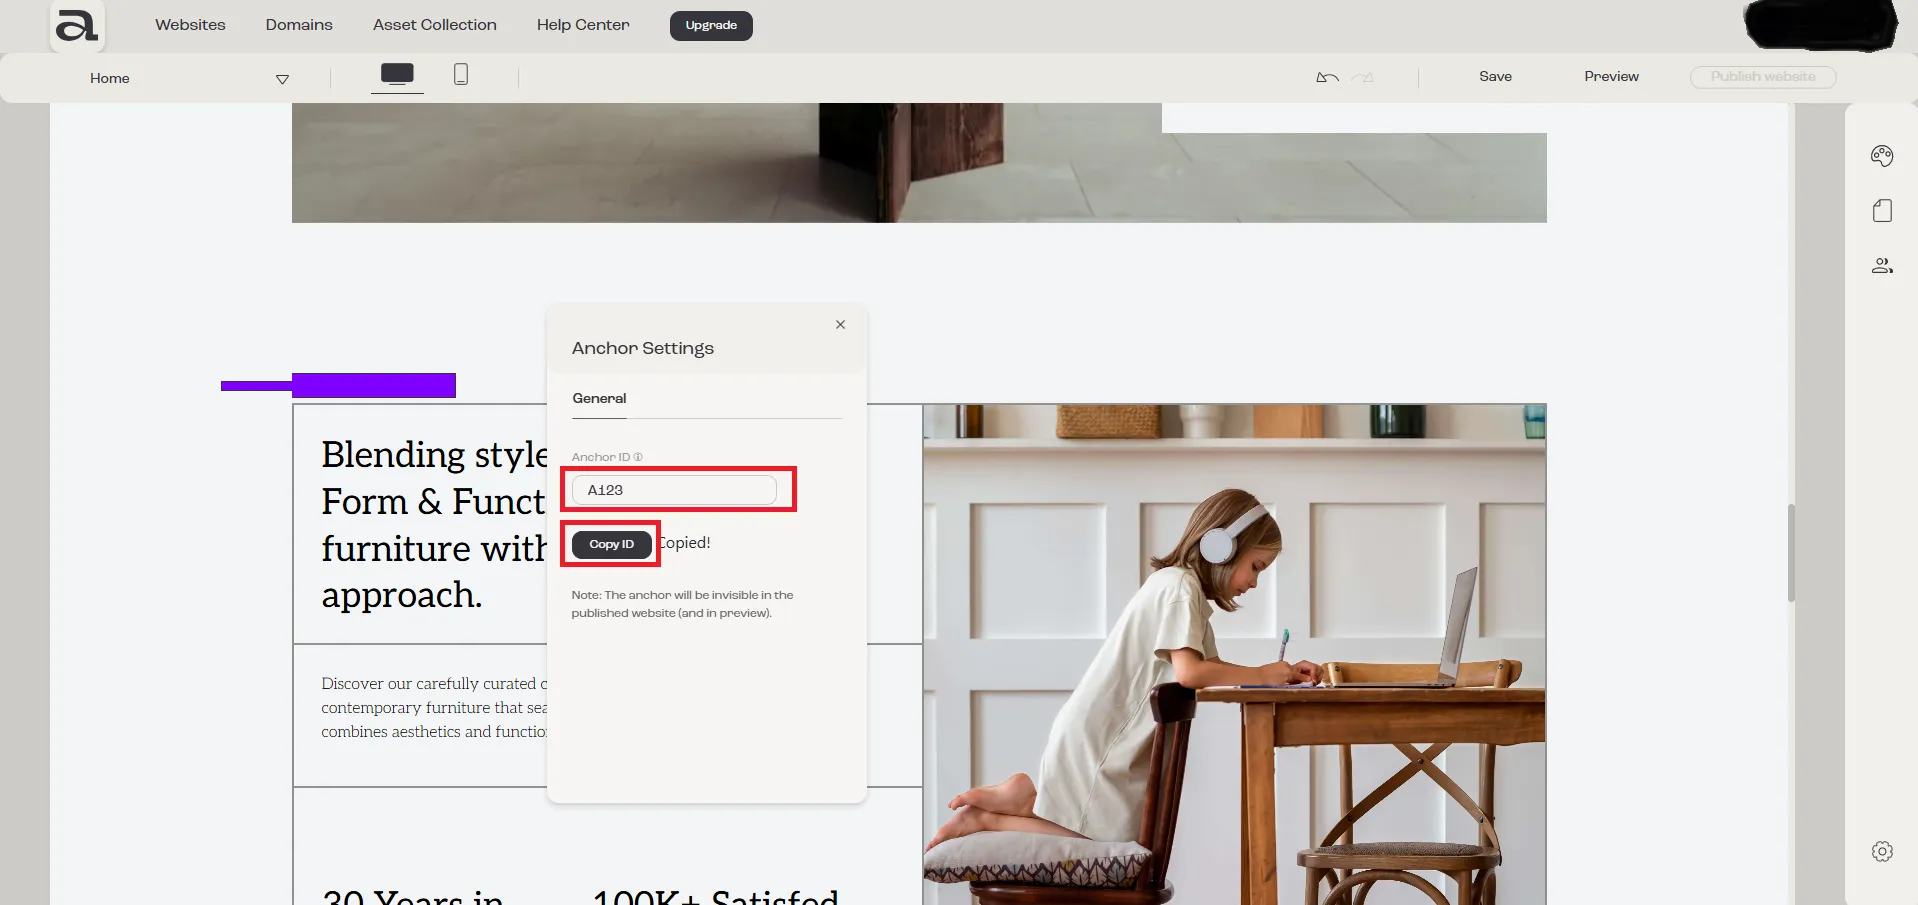
Step 3.2 - Copy ID
Section titled “Step 3.2 - Copy ID”After adding the Anchor ID, click on the “Copy” button.
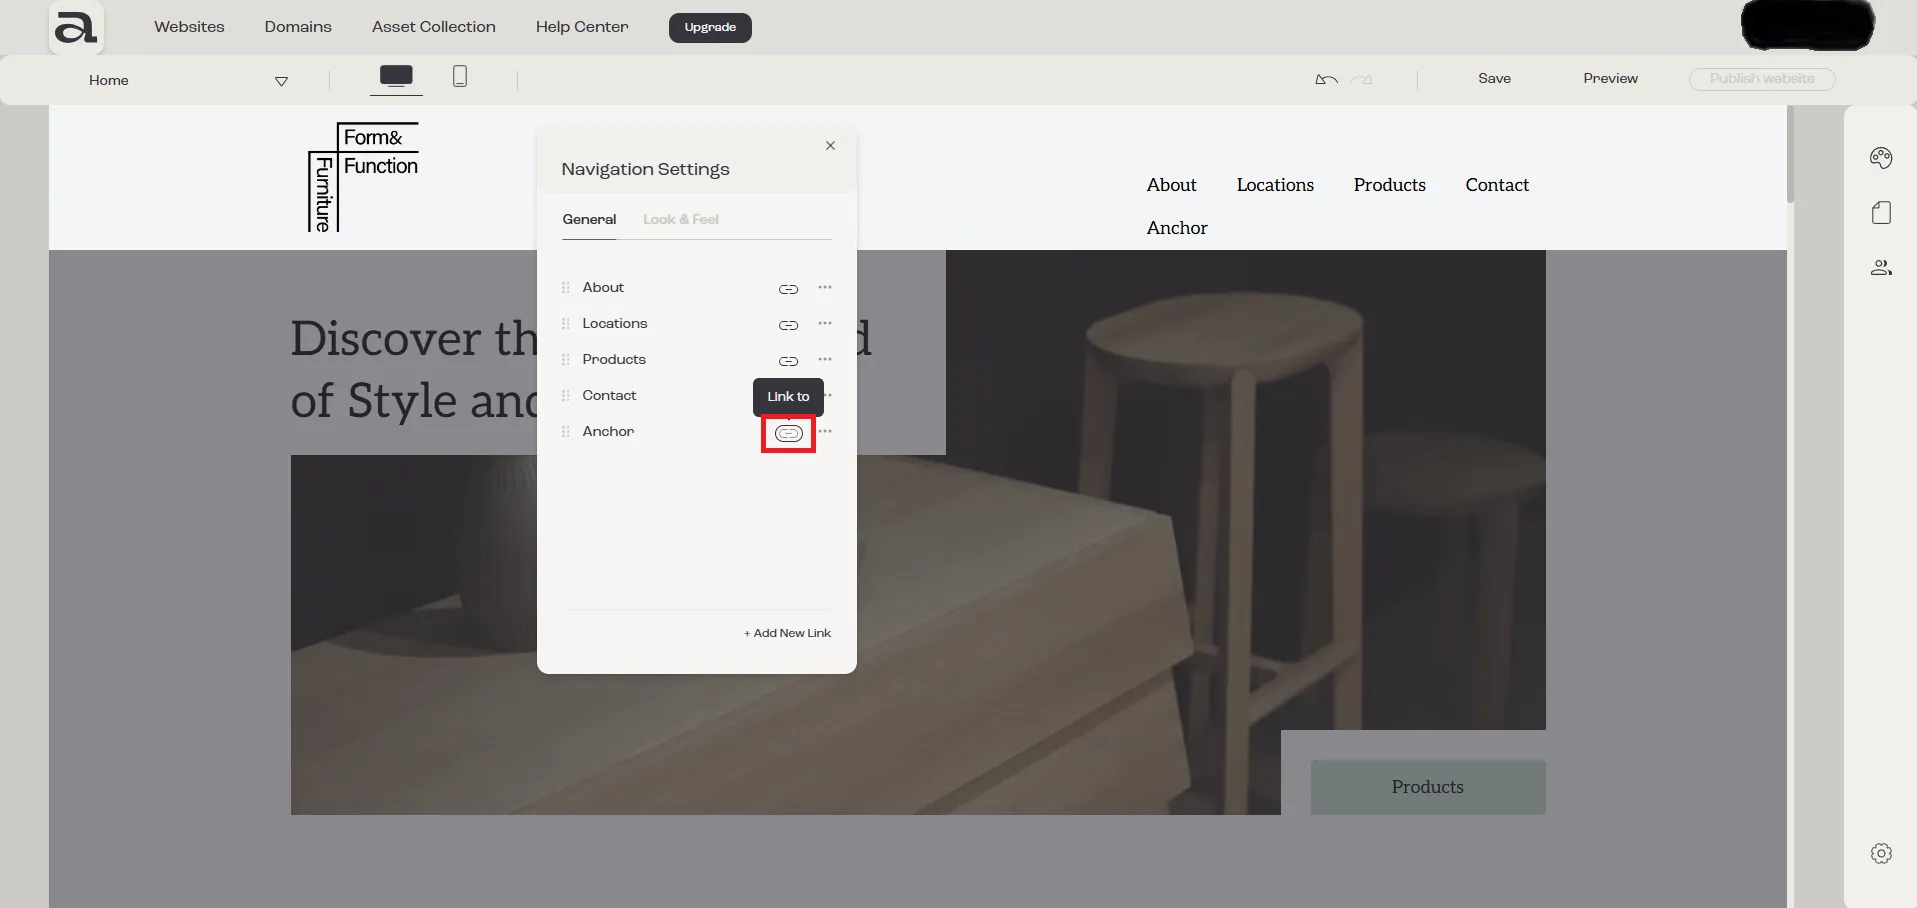
Step 4 - Linking to an Anchor
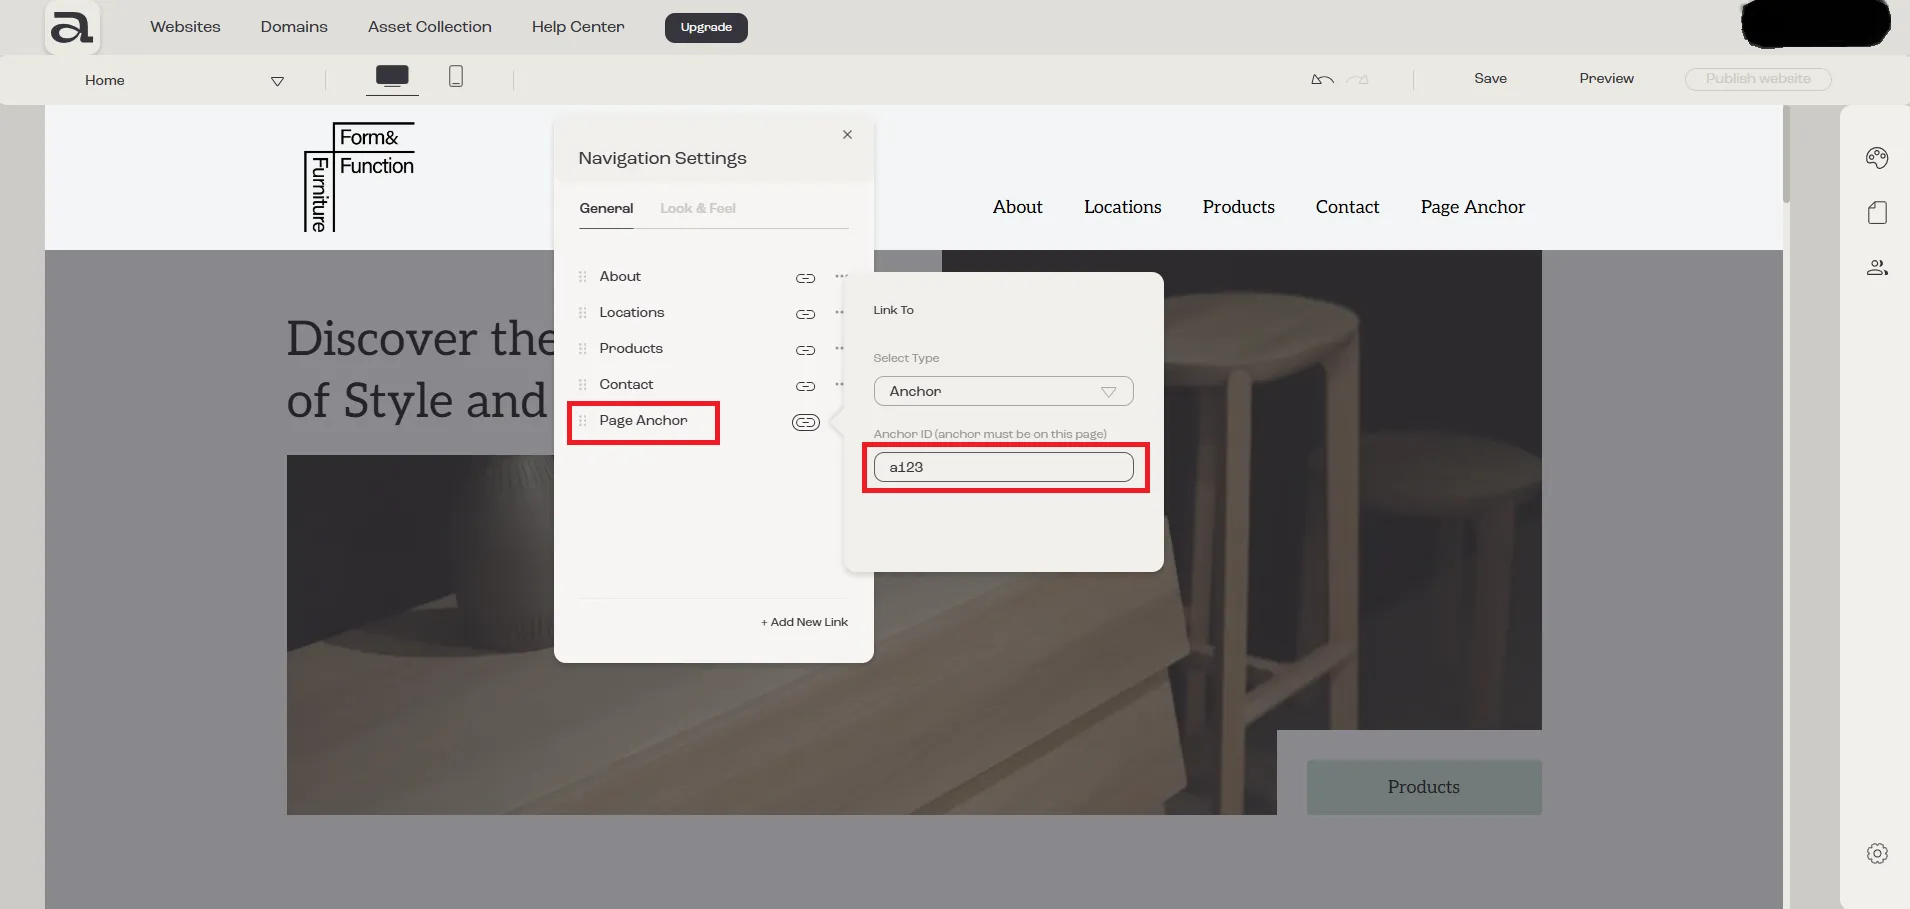
Section titled “Step 4 - Linking to an Anchor”Once you’ve copied the ID, open the settings of the element where you want to add the anchor link.
In the element’s settings, click the “Link to” button.
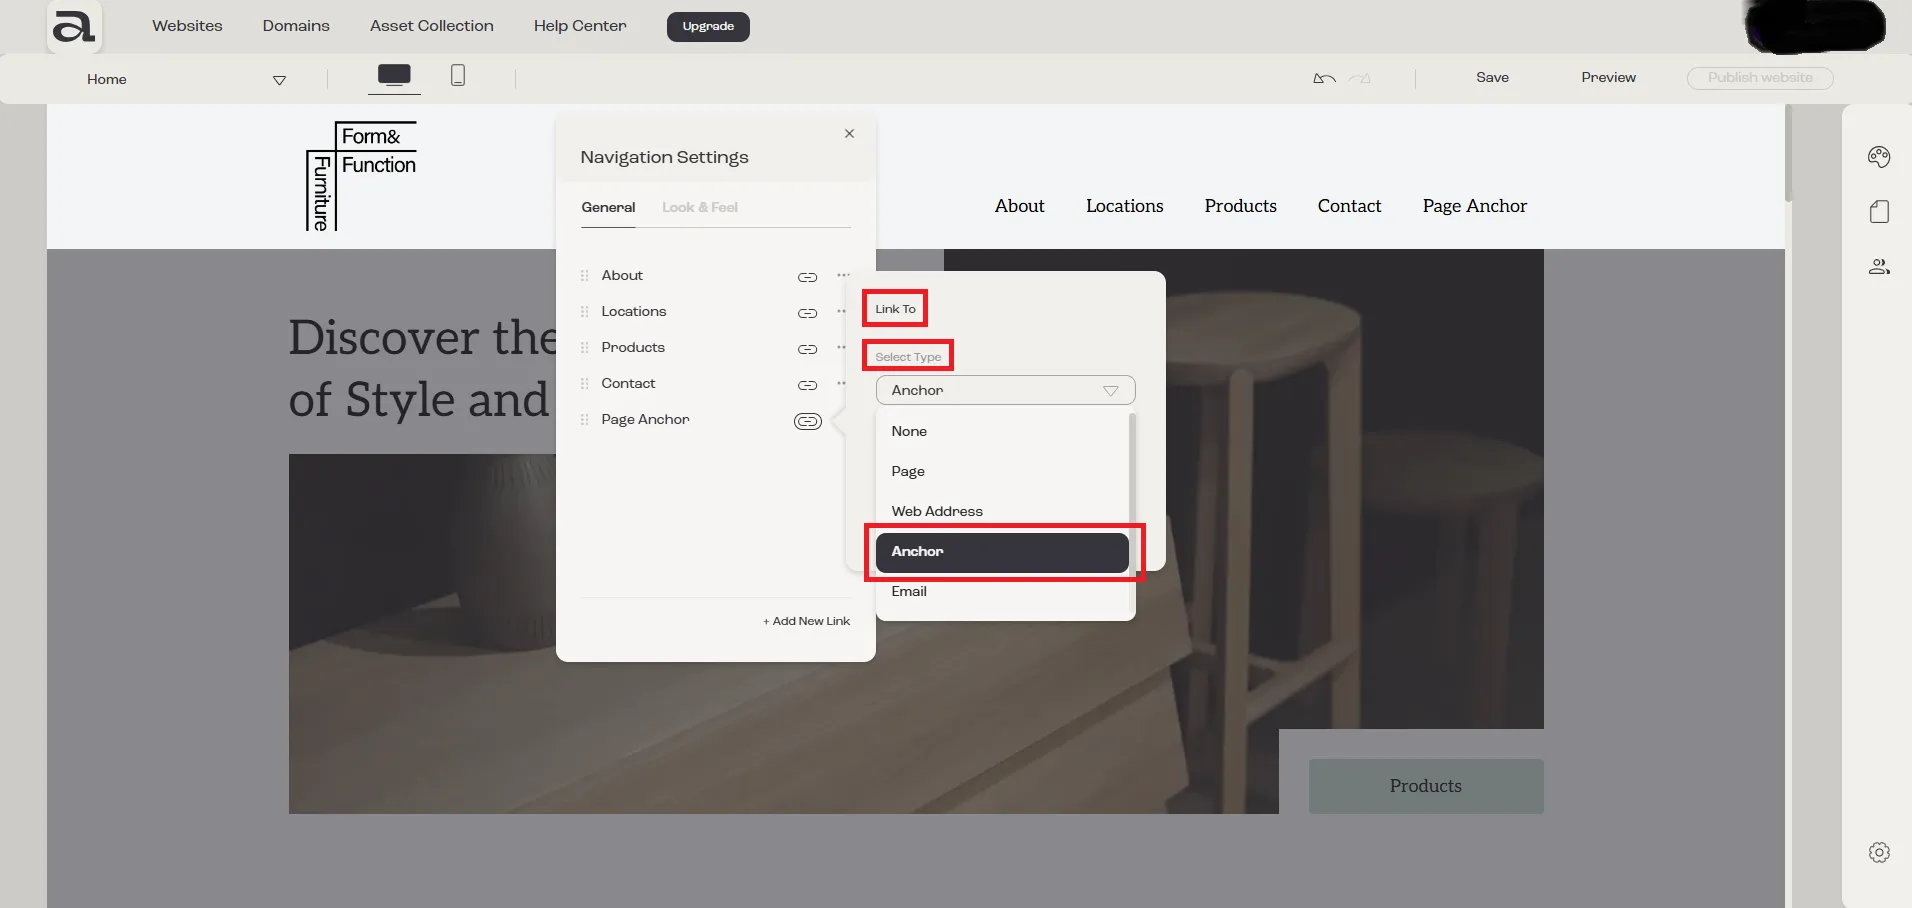
Step 4.1 - Select Type “Anchor”
Section titled “Step 4.1 - Select Type “Anchor””In the “Link To” menu, click the “Select Type” dropdown and choose “Anchor”.
Step 4.2 - Enter Anchor ID
Section titled “Step 4.2 - Enter Anchor ID”After selecting “Anchor”, paste the copied ID (or write it) in the “Anchor ID” input field.
Step 5 - Preview
Section titled “Step 5 - Preview”You’re all set. Preview the website / page to see how it all works.